Cylinder heads – removal and installation
Warning: Wait until the engine is completely cool before beginning this procedure.
Removal
1. Relieve the fuel system pressure (see Fuel and exhaust systems – gasoline engines), then disconnect the cable from the negative terminal of the battery (see Engine electrical systems).
2. Drain the cooling system (see Tune-up and routine maintenance).
3. Remove the drivebelt (see Tune-up and routine maintenance).
4. Remove the PCV system and the EVAP system components (see Emissions and engine control systems). Remove the cowl (see Body).
5. Remove the intake manifold (Intake manifold – removal and installation).
6. Remove the exhaust manifolds from the cylinder heads (Exhaust manifolds – removal and installation).
7. Working through the holes in the pulley, remove the three steering pump mounting bolts. Move the pump out of the way without disconnecting the hoses.
8. Remove the valve covers (Valve covers – removal and installation).
9. Remove the rocker arms and pushrods (Rocker arms and pushrods – removal, inspection and installation). Caution: Keep all the parts in order so they are reinstalled in the same locations.
10. Loosen the head bolts in 1/4-turn increments in the tightening sequence (see illus tration 10.19) until they can be removed by hand. Note: There will be different-length head bolts for different locations, so store the bolts in order as they are removed. This will ensure that the bolts are reinstalled in their original holes.
11. Lift the heads off the engine. If resistance is felt, do not pry between the head and block, as damage to the mating surfaces will result. To dislodge the head, place a block of wood against the end of it and strike the wood block with a hammer, or lift on a casting protrusion. Store the heads on blocks of wood to prevent damage to the gasket sealing surfaces.
Installation
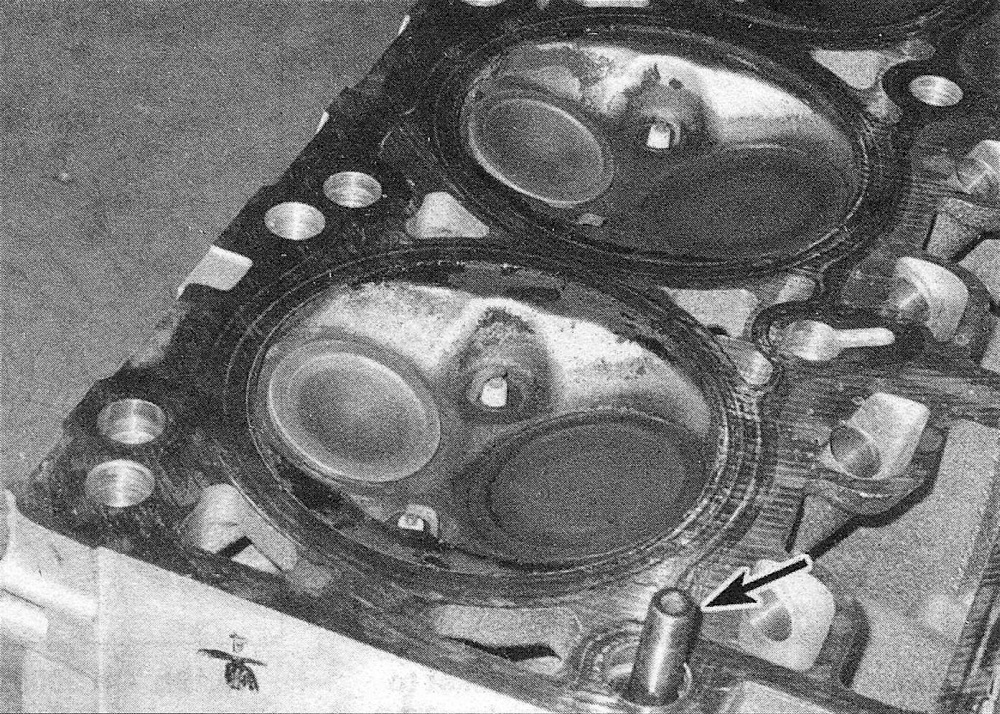
12. The mating surfaces of the cylinder heads and block must be perfectly clean when the heads are installed (see illustration). Gasket removal solvents are available at auto parts stores and may prove helpful.
10.12 Make sure the cylinder head surface is perfectly clean, free from old gasket material, carbon deposits and dirt – note that the dowel is part of the cylinder head stand
13. Use a gasket scraper to remove all traces of carbon and old gasket material, then wipe the mating surfaces with a cloth saturated with brake cleaner. If there is oil on the mating surfaces when the heads are installed, the gaskets may not seal correctly and leaks may develop. When working on the block, cover the lifter valley with shop rags to keep debris out of the engine. Use a vacuum cleaner to remove any debris that falls into the cylinders.
14. Check the block and head mating surfaces for nicks, deep scratches and other damage. If damage is slight, it can be removed with emery cloth. If it is excessive, machining may be the only alternative.
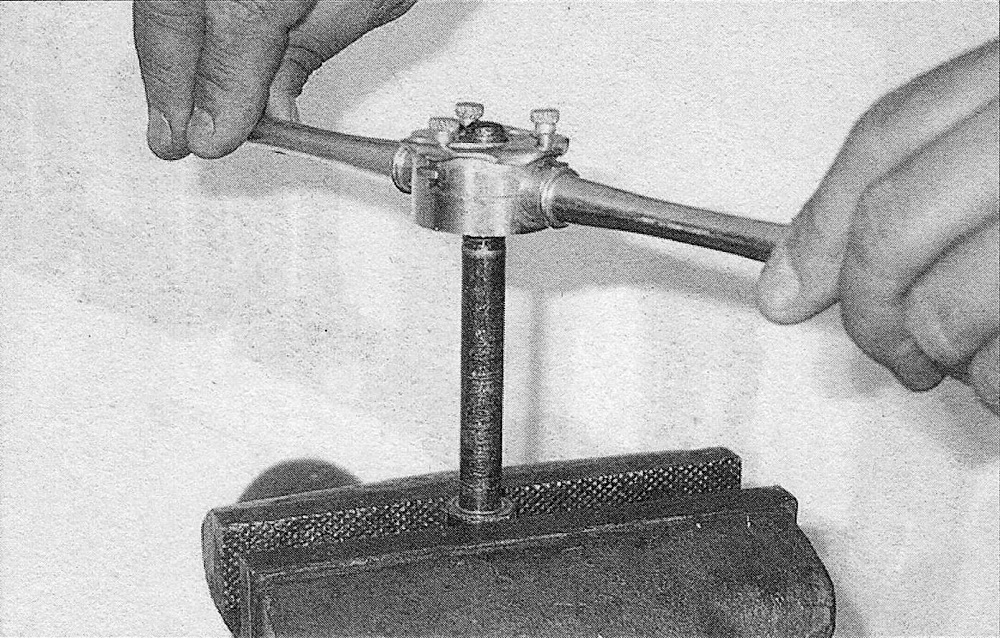
15. Use a tap of the correct size to chase the threads in the head bolt holes in the block. Mount each bolt in a vise and run a die down the threads to remove corrosion and restore the threads (see illustration). Dirt, corrosion, sealant and damaged threads will affect torque readings.
10.15 A die should be used to remove sealant and corrosion from the bolt threads prior to installation
16. Position the new gaskets over the dowels in the block. Be sure the letter designations for the left (L) and right (R) cylinder heads and the top gasket surface (TOP) are correct (see illustration).
10.16 Be sure the letter designations for the left (L) and right (R) cylinder heads and the top gasket surface (TOP) are correct

17. Carefully position the heads on the block without disturbing the gaskets.
18. Before installing the head bolts, coat the threads with a small amount of engine oil.
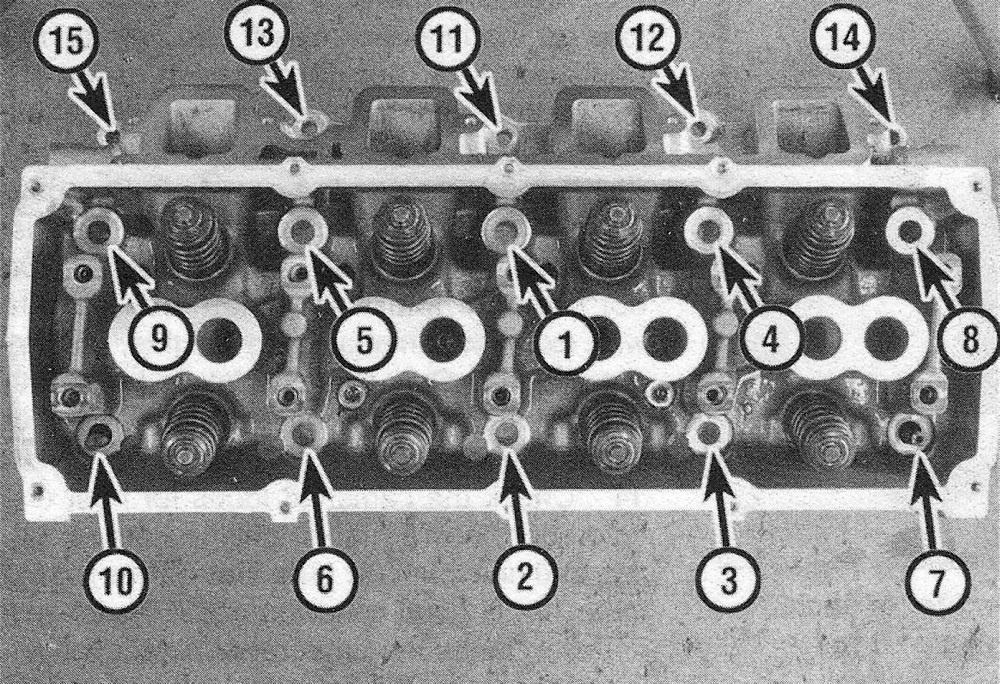
19. Install the bolts in their original locations and tighten them finger tight. Following the recommended sequence (see illustration), tighten the bolts in several steps to the torque listed in this Chapter’s Specifications.
10.19 Cylinder head bolt tightening sequence
20. The remainder of installation is the reverse of removal.
21. Add coolant and change the engine oil and filter (see Tune-up and routine maintenance). Start the engine and check for proper operation and coolant or oil leaks.