Drivebelt check and replacement
(every 15,000 miles or 12 months)
1. The drivebelt is located at the front of the engine and plays an important role in the overall operation of the vehicle and its components. Due to its function and material make-up, the drivebelt is prone to failure after a period of time and should be inspected and adjusted periodically to prevent major engine damage.
2. The vehicles covered by this manual are equipped with a single self-adjusting serpentine drivebelt, which is used to drive all of the accessory components such as the alternator, power steering pump, water pump and air conditioning compressor.
Inspection
3. With the engine off, open the hood and locate the drivebelt at the front of the engine. Using your fingers (and a flashlight, if necessary), move along the belts checking for cracks and separation of the belt plies. Also check for fraying and glazing, which gives the belt a shiny appearance. Both sides of each belt should be inspected, which means you will have to twist the belt to check the underside.
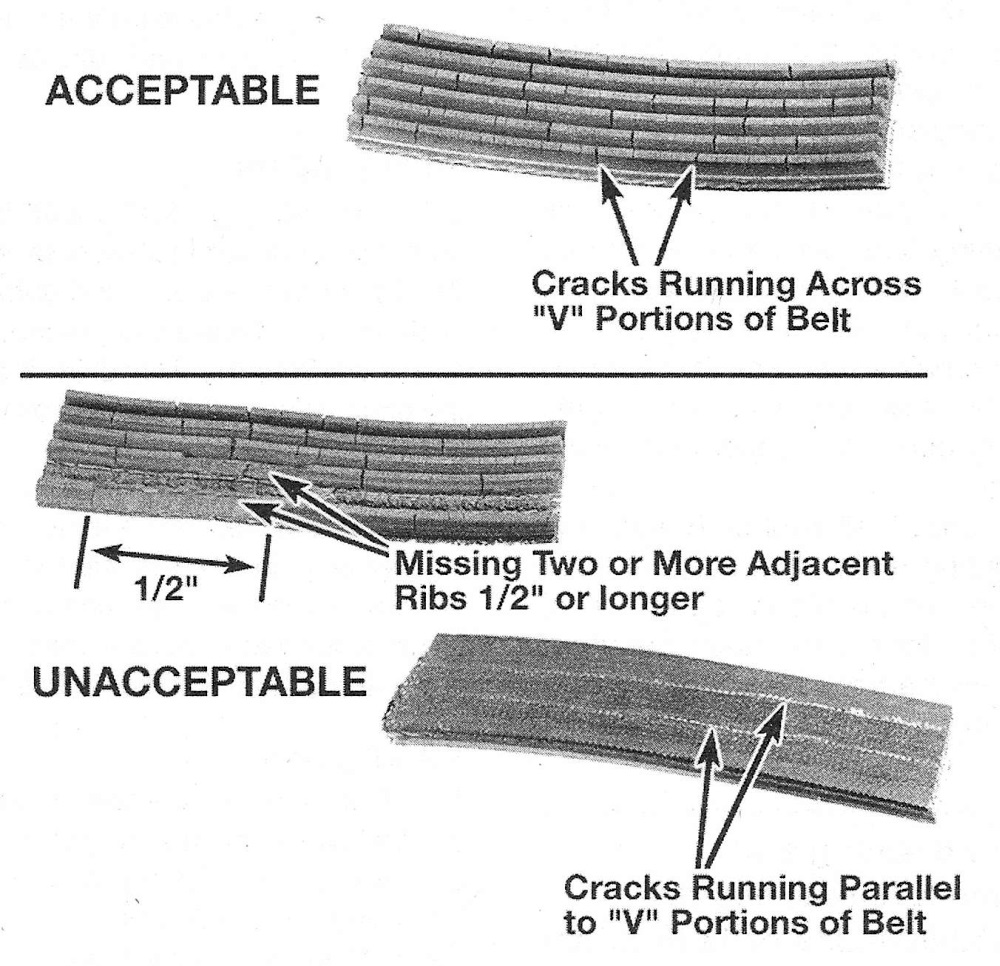
4. Check the ribs on the underside of the belt. They should all be the same depth, with none of the surface uneven (see illustration).
19.4 Here are some of the more common problems associated with drivebelts (check the belts very carefully to prevent an untimely breakdown)
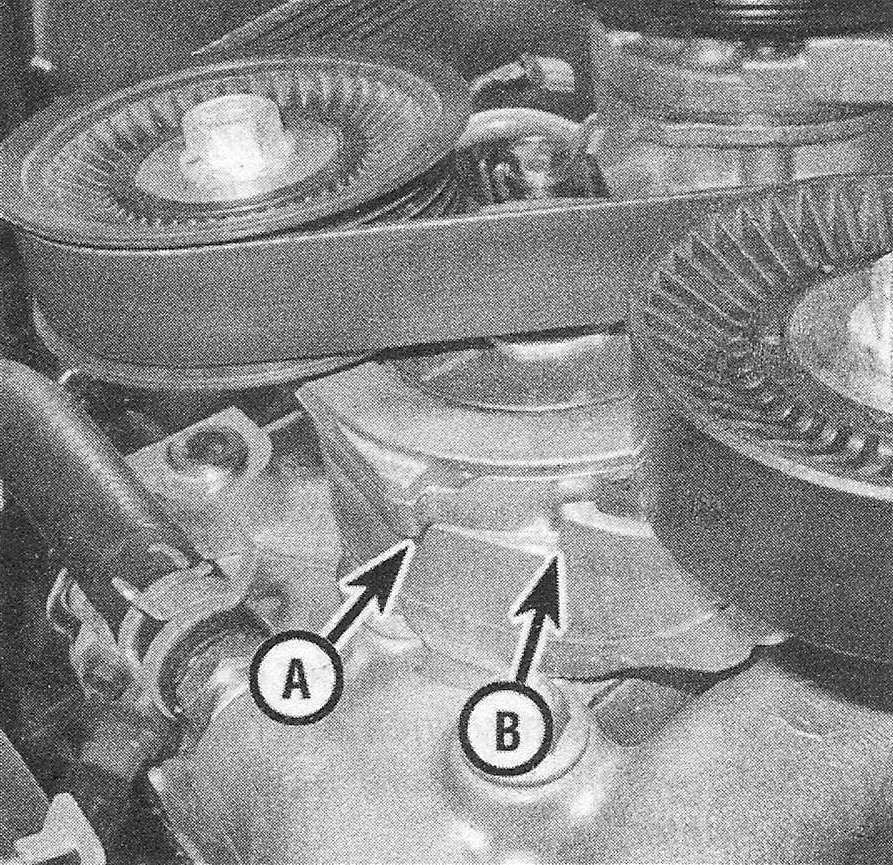
5. The tension of the belt is automatically adjusted by the belt tensioner and does not require any adjustments. Drivebelt wear can be checked visually by inspecting the wear indicator marks located on the side of the tensioner body. Locate the belt tensioner at the front of the engine, then find the tensioner operating marks (see illustration). If the indicator mark is outside the operating range, the belt should be replaced.
19.5 When the raised stop (A) nears the tensioner body (B), the belt can be considered worn-out
Replacement
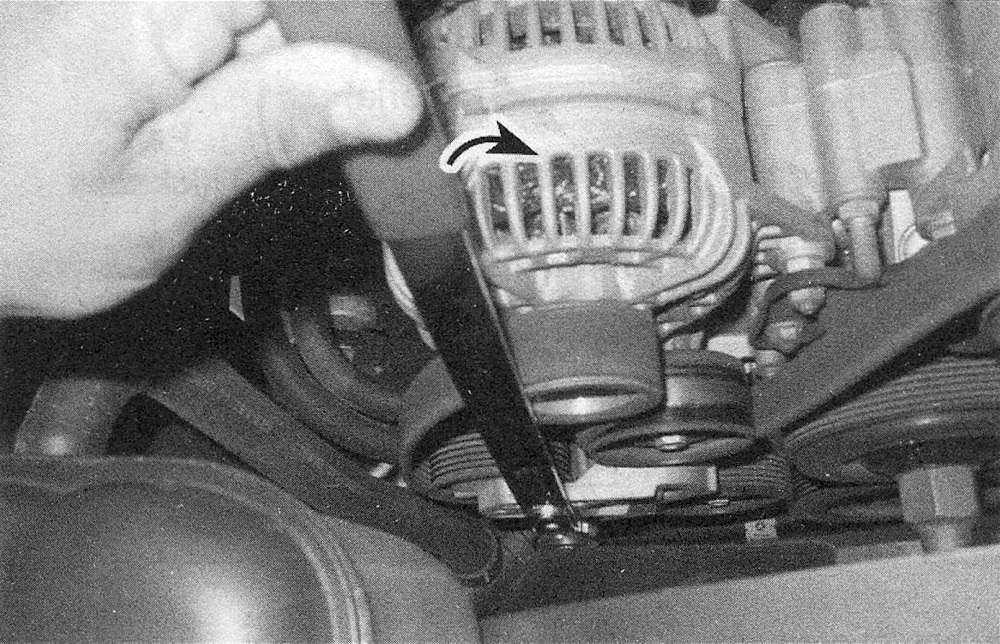
6. To replace the belt, rotate the tensioner to relieve the tension on the belt (see illustration). Some models have a square hole in the tensioner arm that will accept a breaker bar or ratchet. On other models, place a wrench on the tensioner pulley bolt.
19.6 Rotate the tensioner arm to relieve belt tension
7. Remove the belt from the auxiliary components and carefully release the tensioner.
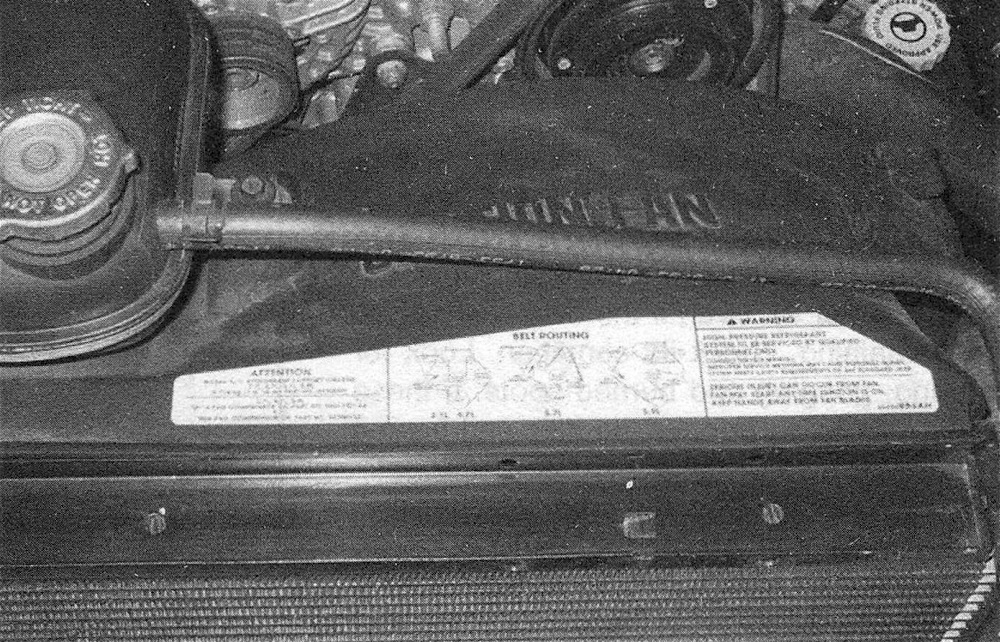
8. Route the new belt over the various pulleys, again rotating the tensioner to allow the belt to be installed, then release the belt tensioner. Make sure the belt fits properly into the pulley grooves – it must be completely engaged. Note: Most models have a drivebelt routing decal on the upper radiator panel to help during drivebelt installation (see illustration).
19.8 The routing schematic for the serpentine belt is usually found on the fan shroud


