Automatic transmission fluid and filter change
(every 90,000 miles or 72 months)
All models except (8HP45/845RE and 8HP70) 8-speed transmissions
Note: This procedure should be done every 60,000 miles if the vehicle is used under severe conditions such as frequent towing or off-road use.
1. At the specified intervals, the transmission fluid should be drained and replaced.
Since the fluid will remain hot long after driving, perform this procedure only after the engine has cooled down completely.
2. Before beginning work, purchase the specified transmission fluid (see Recommended lubricants and fluids in this Chapter’s Specifications) and a new filter(s).
3. Other tools necessary for this job include a floor jack, jackstands to support the vehicle in a raised position, a drain pan capable of holding at least four quarts, newspapers and clean rags.
4. Raise the vehicle and support it securely on jackstands.
5. Place the drain pan underneath the transmission pan. Remove the rear and side pan mounting bolts, but only loosen the rear pan bolts approximately four turns.
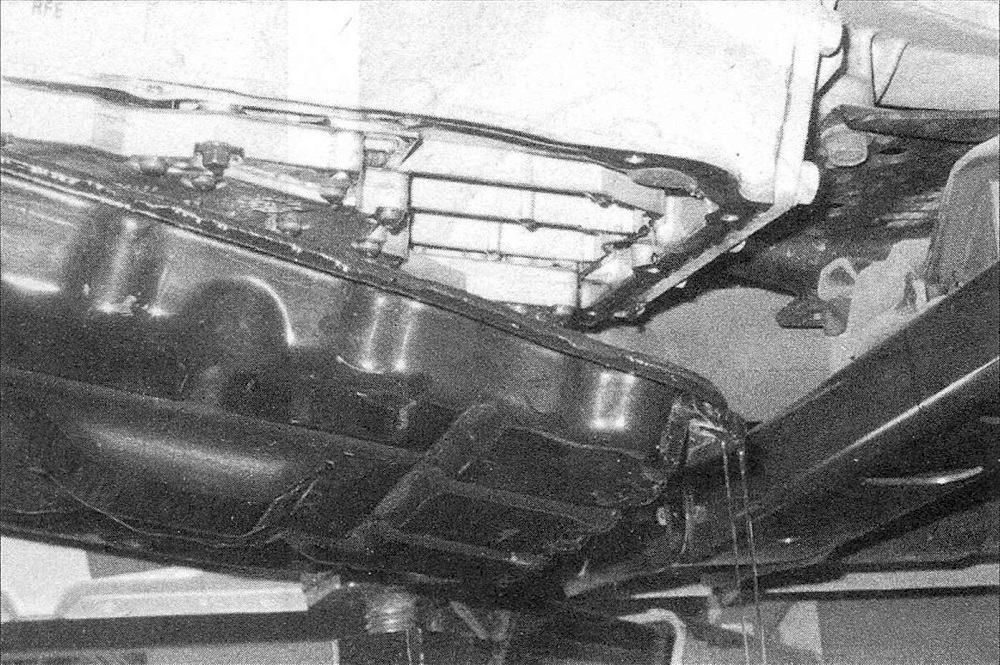
6. Carefully pry the transmission pan loose with a screwdriver, allowing the fluid to drain (see illustration).
31.6 With the front bolts in place, but loose, pull the rear of the pan down to drain the fluid
7. Remove the remaining bolts, pan and gasket. Carefully clean the gasket surface of the transmission pan to remove all traces of the old gasket and sealant.
8. Drain the fluid from the transmission pan, clean the pan with solvent and dry it with compressed air, if available. Note: Some models are equipped with magnets in the transmission pan to catch metal debris. Clean the magnet thoroughly. A small amount of metal material is normal at the magnet. If there is considerable debris, consult a dealer or transmission specialist.
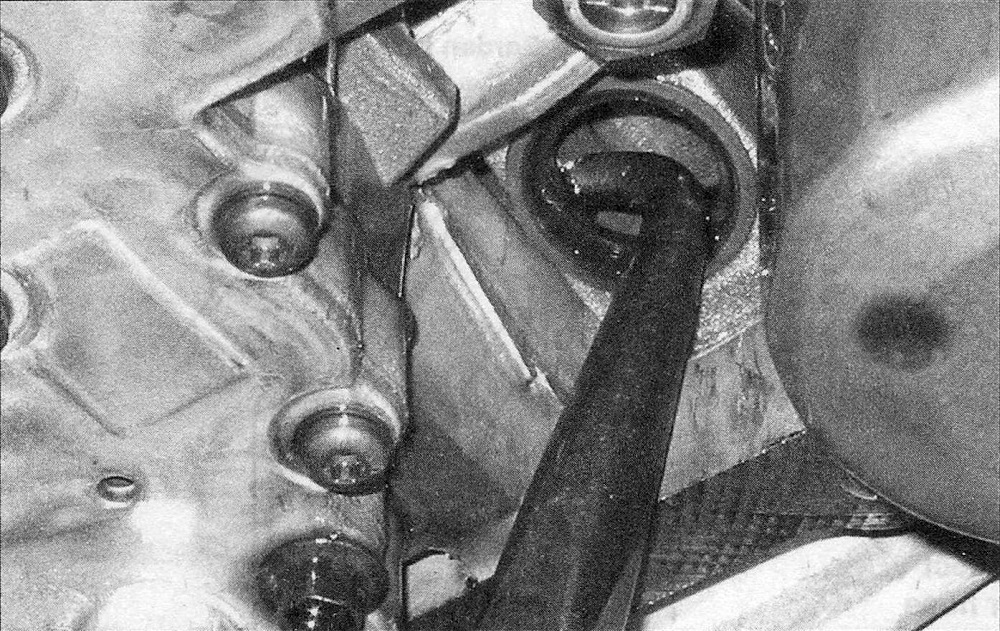
9. Remove the filter and seal from the valve body inside the transmission (see illustration).
31.9 Use a seal removal tool to remove the transmission filter seal from the valve body
10. Use a gasket scraper to remove any traces of old gasket material that remain on the valve body. Note: Be very careful not to gouge the delicate aluminum gasket surface on the valve body.
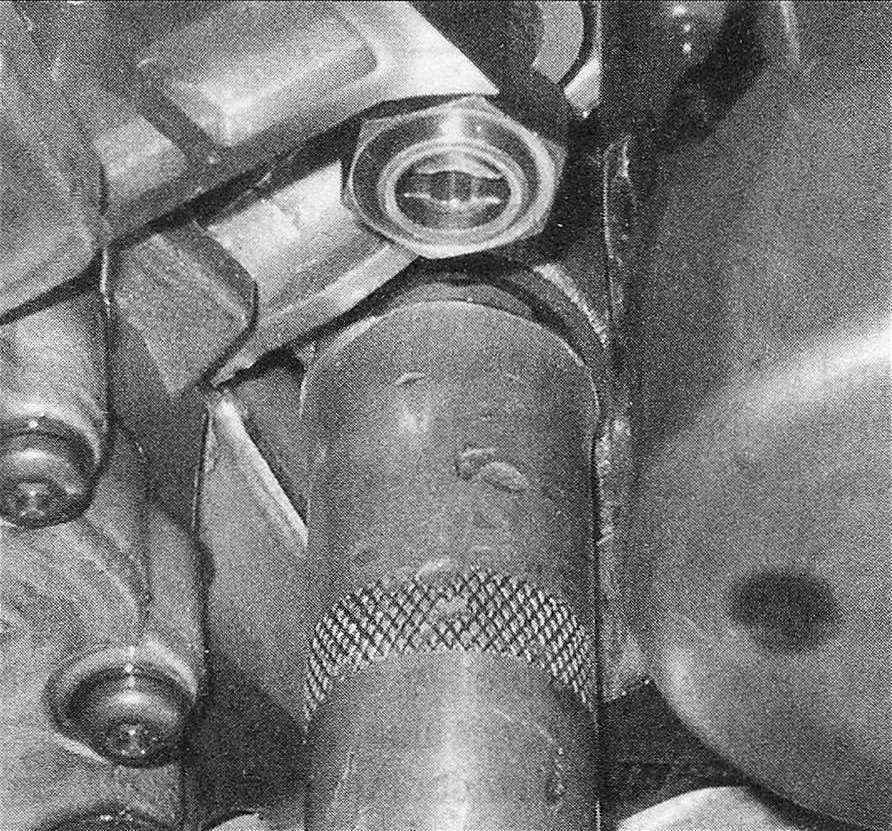
11. On 454RFE and 545RFE transmissions, remove the cooler return filter (see illustration). Compare the old filter with the new one to make sure they’re the same type. Install the new cooler filter and tighten it to 125 inch-lbs.
31.11 Use an oil filter wrench to remove the transmission cooler return filter

12. Install a new gasket and filter. On many replacement filters, the gasket is attached to the filter to simplify installation. Caution: On most models, the seal can be installed on the filter first, then the seal/filter can be pushed in place and secured. On 454RE and 545RFE transmissions, install the filter seal into the valve body first, then install the filter (see illustration).
31.12 On 454RFE and 545RFE transmissions, install the filter seal into the valve body first
13. Make sure the gasket surface on the transmission pan is clean, then install a new gasket on the pan. Put the pan in place against the transmission and, working around the pan, tighten each bolt a little at a time to the torque listed in this Chapter’s Specifications. Note: On 454RFE or 545RFE transmissions, RTV sealant is used instead of a gasket. Clean the pan and transmission surfaces thoroughly with lacquer thinner and apply a continuous bead of ATF-resistant RTV sealant to the pan, then bolt it in place and tighten to Specifications within five minutes.
14. Lower the vehicle and add the specified type and amount (minus one quart) of automatic transmission fluid through the filler tube (Fluid level checks).
15. With the transmission in Park and the parking brake set, run the engine at a fast idle, but don’t race it.
16. Move the gear selector through each range and back to Park. Check the fluid level. It will probably be low. Add enough fluid to bring the level between the two holes on the dipstick.
17. Check under the vehicle for leaks during the first few trips. Check the fluid level again when the transmission is hot (Fluid level checks).
(8HP45/845RE and 8HP70) 8-speed transmissions
Note: The transmission oil pan and filter are an integrated assembly and cannot be serviced separately.
18. Raise the vehicle and support it securely on jackstands.
19. Place a drain pan under the drain plug and allow the transmission fluid to drain out, then reinstall the plug.
20. Remove the transmission pan mounting bolts and slowly lower the pan, then remove the gasket. The gasket may be reused if it is not torn or damaged.
21. If replacing the filter, install a new transmission oil pan.
22. Install the pan and gasket to the transmission and tighten the bolts hand tight.
23. Starting from opposite corners and working in a circular pattern, tighten the pan bolts to the torque listed in this Chapters Specifications.
24. Refer to (Section Fluid level checks) and follow the procedure on adding fluid and checking the fluid level.
25. The remaining installation is the reverse of removal, making sure to check for leaks.