Transfer case – removal and installation
Note: Before starting this procedure, shift the transfer case into 2WD or AWD.
Removal
1. Disconnect the cable (s) from the negative battery terminal(s) (see Engine electrical systems).
2. Raise the vehicle and support it securely on jackstands.
3. Remove the skid plate, if equipped. Drain the transfer case lubricant.
4. Detach all vacuum/vent lines, if equipped, and electrical connectors from the transfer case.
5. On manual shift models, disconnect the shift lever rod from the grommet in the transfer case shift lever or from the shift lever arm on the floor, whichever provides easier access. Press the rod out of the grommet with adjustable pliers.
6. On electric shift models, disconnect the transfer case shift motor and transfer case sensor.
7. Remove the front and rear driveshafts (see Clutch and driveline).
8. Support the transmission with a transmission jack.
9. Support the transfer case with a trans-
mission jack. Secure the transfer case to the transmission jack with chains or tie-down straps.
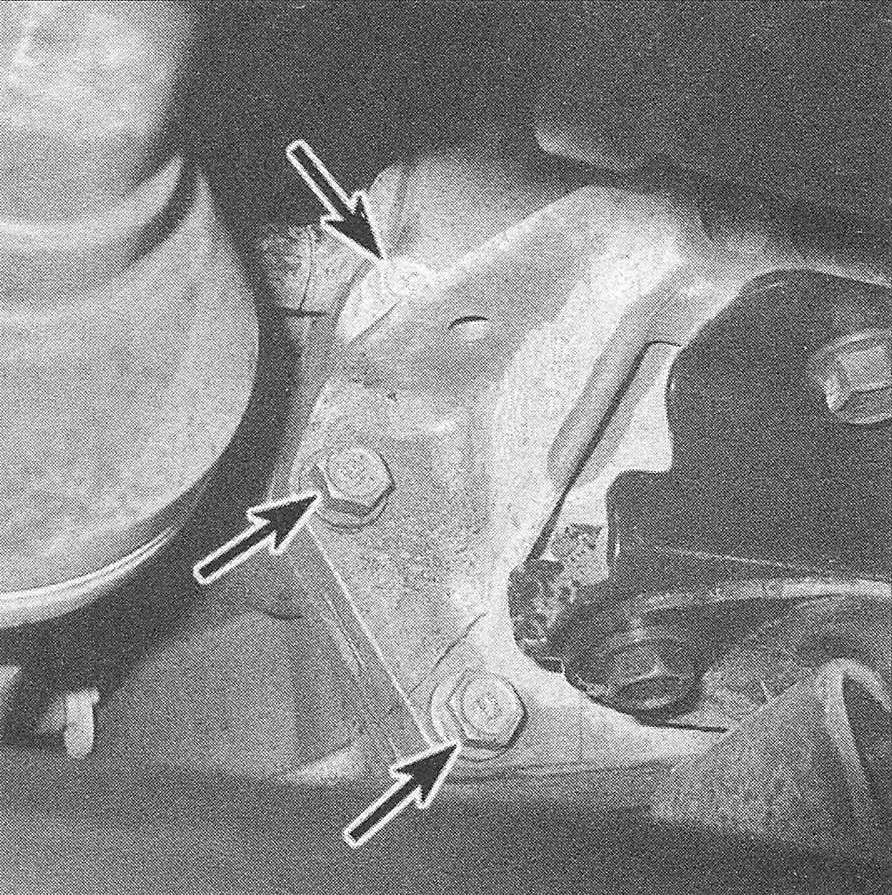
10. Remove the transfer case-to-transmission bolts/nuts (see illustration).
6.10 Remove the transfer case bolts/nuts from the transmission – remaining bolts/nuts hidden from view
11. Make a final check that all wires and hoses have been disconnected from the transfer case, then move the transfer case and jack toward the rear of the vehicle until the transfer case is clear of the transmission. Keep the transfer case level as this is done.
12. Once the input shaft is clear, lower the transfer case and remove it from under the vehicle.
Installation
13. Remove all gasket material from the rear of the transmission. Apply RTV sealant to both sides of the transfer case-to-transmission gasket and position the gasket on the mating surface of the transmission.
14. With the transfer case secured to the jack as on removal, raise it into position behind the transmission and carefully slide it forward, engaging the input shaft with the transmission output shaft. Do not use excessive force to install the transfer case – if the input shaft does not slide into place, readjust the angle so it is level and/or turn the input shaft so the splines engage properly with the transmission.
15. Install the transfer case-to-transmission bolts/nuts, tightening them to the torque listed in this Chapter’s Specifications.
16. Remove the safety chains and remove the jack supporting the transfer case.
17. Install the rear crossmember, if removed.
18. Remove the transmission jack from under the transmission.
19. Install the driveshafts (see Clutch and driveline).
20. Reattach all vacuum and/or vent lines. Plug in all electrical connectors.
21. On manual shift models, connect the shift rod to the transfer case shift lever or to the floor-mounted shift lever arm, and adjust the shift linkage (Shift linkage adjustment (manual shift models)).
22. On electric shift models, connect the transfer case shift motor and transfer case sensor electrical connectors.
23. Refill the transfer case with lubricant (see Tune-up and routine maintenance). If the vehicle has a manual transmission, this is also a good time to check the lubricant level for the transmission (see Tune-up and routine maintenance).
24. Install the skid plate, if equipped.
25. Remove the jackstands and lower the vehicle.
26. Connect the negative battery cable (s).
27. Road test the vehicle for proper operation and check for leakage.
