Oil seals – replacement
1. Disconnect the cable (s) from the negative battery terminal(s) (see Engine electrical systems).
2. Raise the vehicle and support it securely on jackstands.
3. Remove the skid plate, if equipped.
4. Drain the transfer case lubricant (see Tune-up and routine maintenance).
Front (output shaft) seal
5. Remove the front driveshaft (see Clutch and driveline).
6. On models equipped with a companion flange, remove the companion flange nut. On New Venture transfer cases, discard the nut; it’s not reusable.
7. If equipped, tap the companion flange off the front output shaft with a brass or plastic hammer.
8. On models without a companion flange, remove the driveshaft seal boot from the seal slinger around the output shaft, then remove the seal slinger by bending its ears outward.
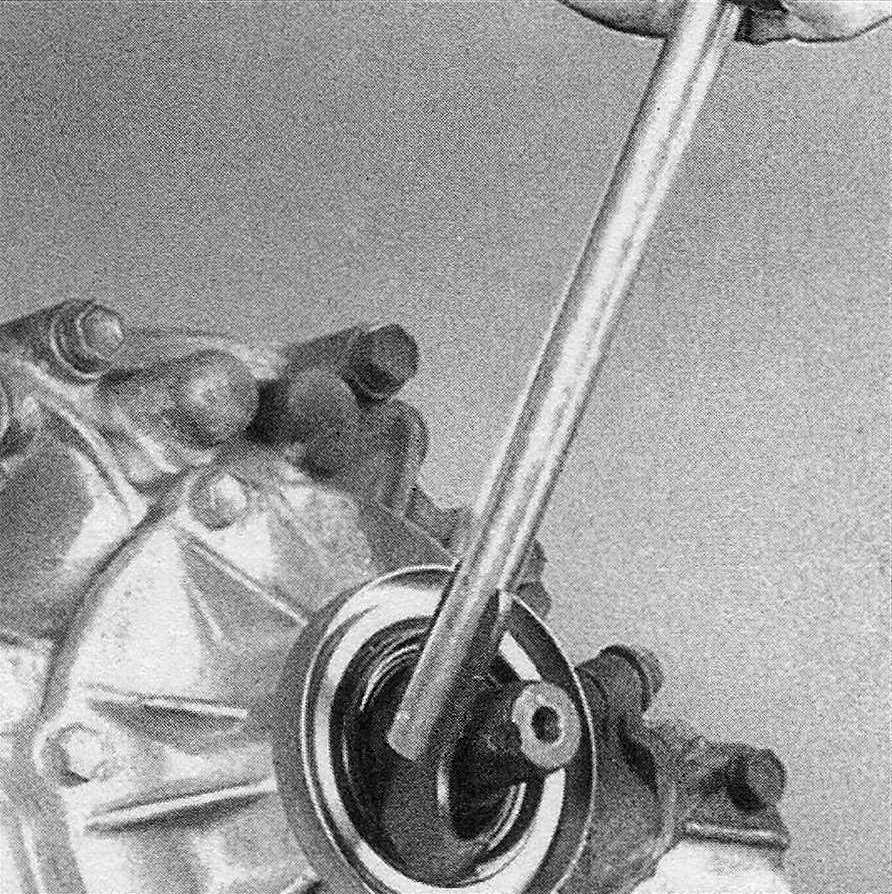
9. Carefully pry out the old seal with a screwdriver or a seal removal tool (see illus tration). Make sure you don’t scratch or gouge the seal bore.
5.9 Use a seal removal tool to pry the transfer case seal out of the housing
10. Lubricate the lips and the outer diameter of the new seal with multi-purpose grease. Place the seal in position, square to the bore, making sure the garter spring faces toward the inside of the transfer case.
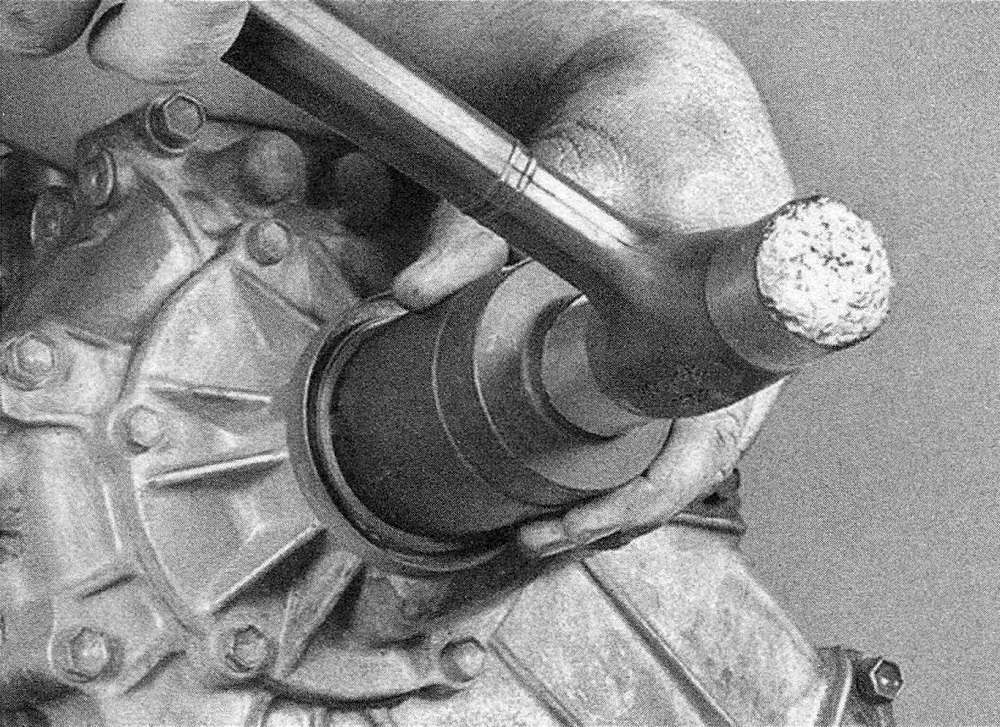
11. Use a seal driver or a suitable equivalent to drive the seal into place. A large deep socket (see illustration) with an outside circumference slightly smaller than the circumference of the new seal will work fine. Start the seal in the bore with light hammer taps. Continue tapping the seal into place until it is recessed the correct amount.
5.11 The new seal can be driven into place using a seal installer tool or a large socket
12. Install the seal slinger and driveshaft seal boot. Secure the boot with a new clamp.
13. Install the companion flange, if equipped, on the front output shaft, then install a NEW flange nut and tighten it to the torque listed in this Chapter’s Specifications.
14. Install the front driveshaft (see Clutch and driveline).
15. Remove the jackstands and lower the vehicle.