Suspension arms (rear) – removal and installation
Note: These procedures apply only to models with coil spring rear suspension.
Control arms
1. Raise the vehicle and support it securely on jackstands.
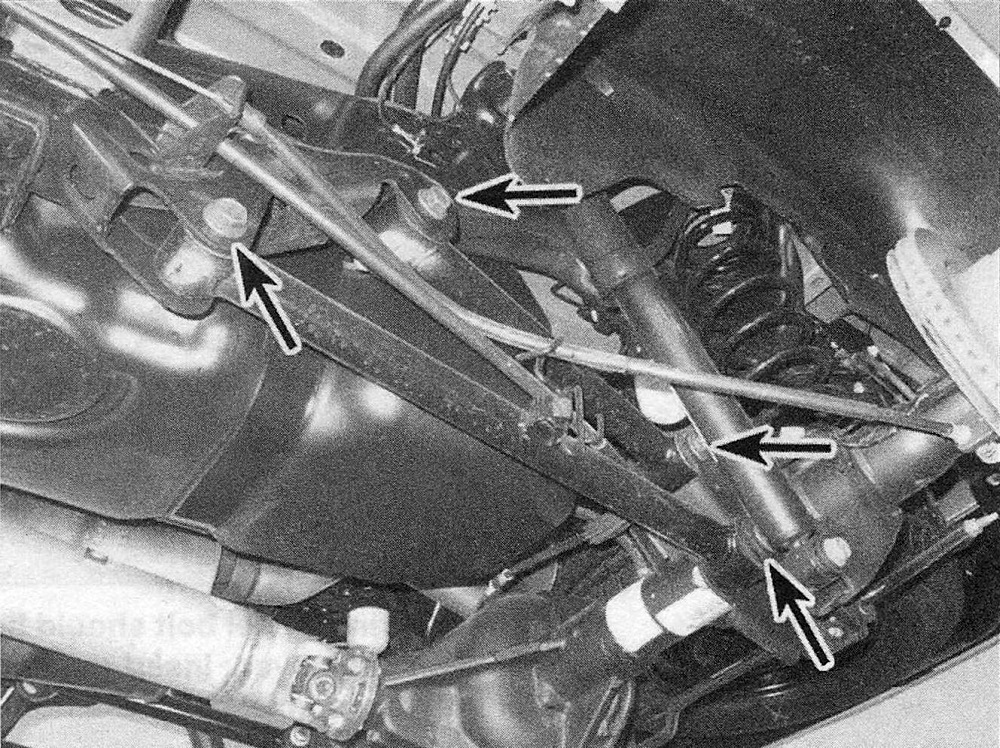
2. Place a jack under the rear axle to support its weight.
3. If you’re working on the left lower control arm, remove the cable guide bolt.
4. Remove the control arm bolts and nuts and remove the control arm (see illustration). Note: The manufacturer states that the nut from the axle end of the control arm must be replaced with a new one whenever it’s removed.
15.4 There are two control arms on each side; mounting bolt locations shown
5. Installation is the reverse of removal.
Don’t tighten the nuts and bolts at this time.
6. Lower the vehicle and allow its full weight to load the rear suspension, then tighten the control arm bolts to the torque listed in this Chapter’s Specifications.
Track bar
Note: The track bar is the one that is parallel with the rear axle (see illustration 1.2).
7. Raise the vehicle and support it securely on jackstands.
8. Place a jack under the rear axle to stabilize it.
9. Remove the track bar bolts and nuts and remove the track bar.
10. Installation is the reverse of removal. Don’t tighten the nuts and bolts at this time.
11. Lower the vehicle and allow its full weight to load the rear suspension, then tighten the track bar bolts to the torque listed in this Chapter’s Specifications.
