Suspension arms (front) (link/coil suspension) – removal and installation
1. Loosen the front wheel lug nuts. Raise the front of the vehicle and support it securely on jackstands. Remove the wheel.
2. If you’re removing a lower suspension arm, paint or scribe alignment marks on the adjuster cams to ensure that the arm is installed correctly.
3. If you’re removing an upper right side suspension arm, disconnect the exhaust system from the manifolds (see Fuel and exhaust systems – gasoline engines; see Fuel and exhaust systems – diesel engine).
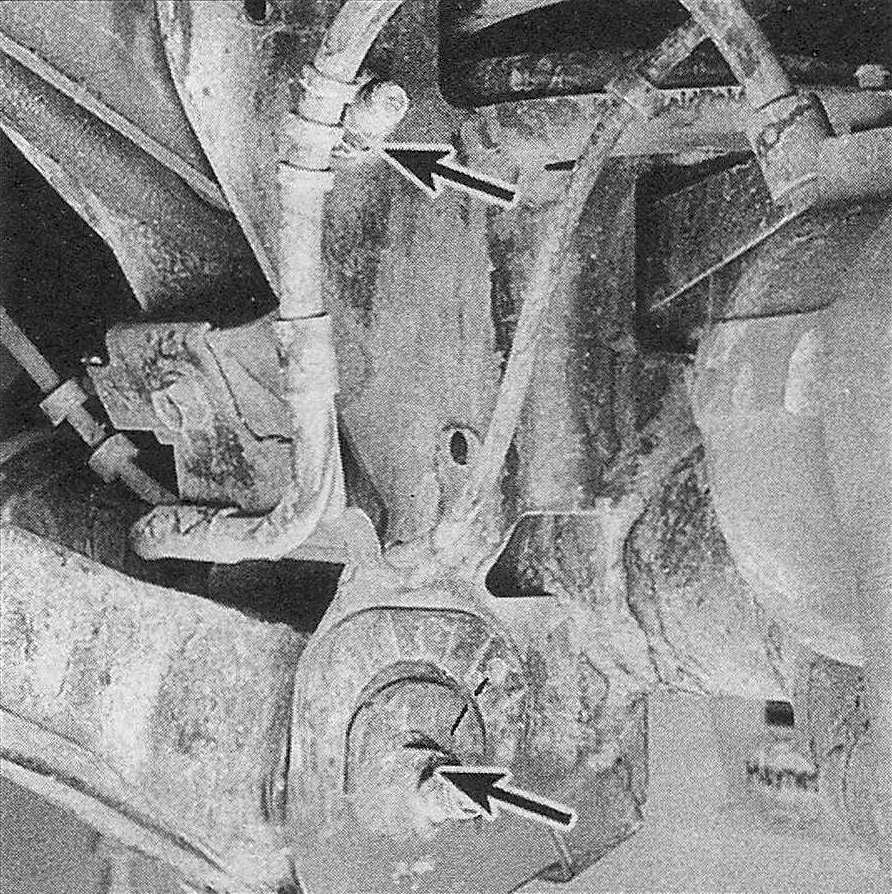
4. Remove the suspension arm nut, cams and cam bolt from the axle (see illustration). Note: The manufacturer recommends that you replace all control arm fasteners with new ones whenever they are removed.
4.4 To detach a front suspension arm from the front axle, remove the nut (s) and knock out the bolt(s) with a punch
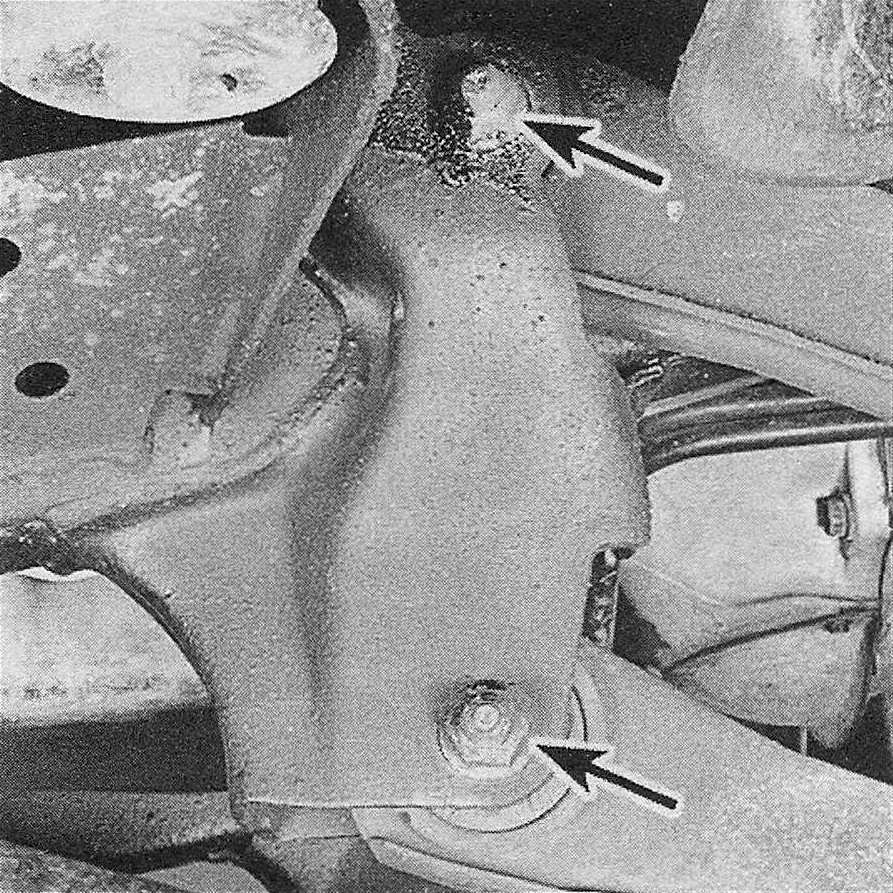
5. Remove the suspension arm nut and pivot bolt from the frame bracket (see illus tration).
4.5 To detach a front suspension arm from the frame bracket, remove the nut and knock out the pivot bolt
6. Installation is the reverse of removal. If you’re installing a lower arm, align the marks made in Step 2. Tighten all suspension fasteners to the torque listed in this Chapter’s Specifications after the vehicle is on the ground.
7. Have the front end alignment checked and, if necessary, adjusted.
Track bar
8. Loosen the wheel lug nuts, raise the front of the vehicle and support it securely on jackstands placed under the frame rails. Remove the wheels and support the axle with a floor jack placed under the axle tube. Raise the axle enough to support its weight.
9. Remove the fasteners securing the track bar to the frame and axle. Remove the track bar.
10. Installation is the reverse of removal. Tighten the track bar mounting fasteners to the torque values listed in this Chapter’s Specifications after the vehicle has been lowered.