Steering linkage – removal and installation
Independent front suspension
Tie-rod end
Removal
1. Loosen the wheel lug nuts, raise the vehicle and support it securely on jackstands. Apply the parking brake. Remove the wheel.
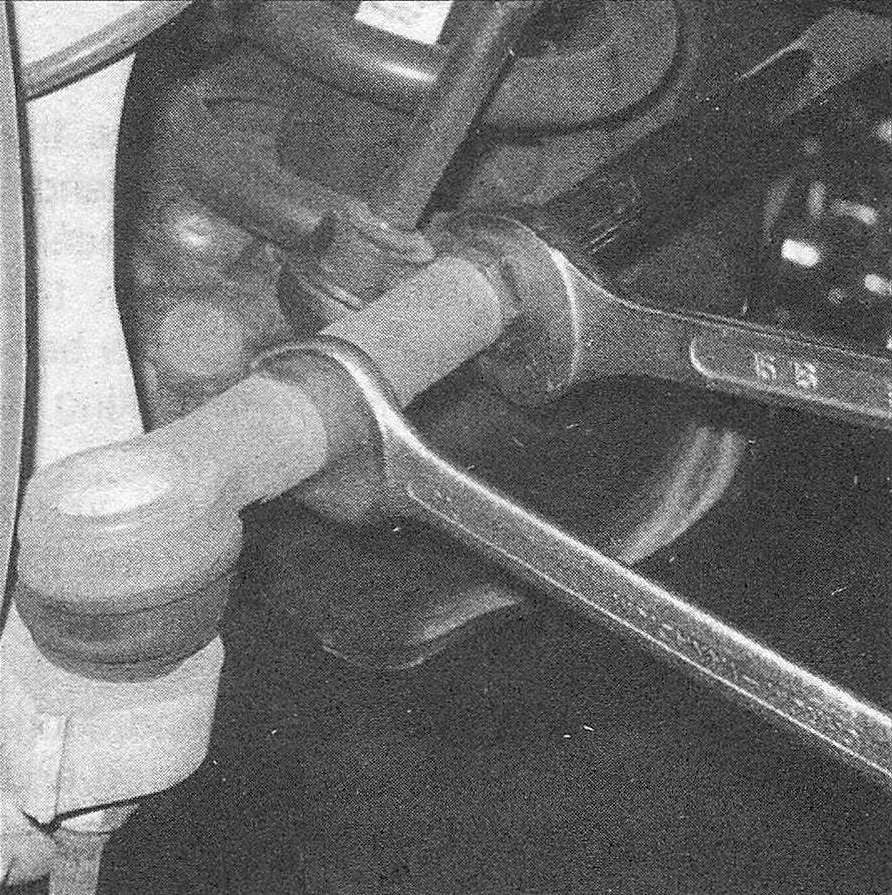
2. Loosen the tie-rod end jam nut (see illustration).
18.2 Hold the tie-rod end with a wrench while loosening the jam nut
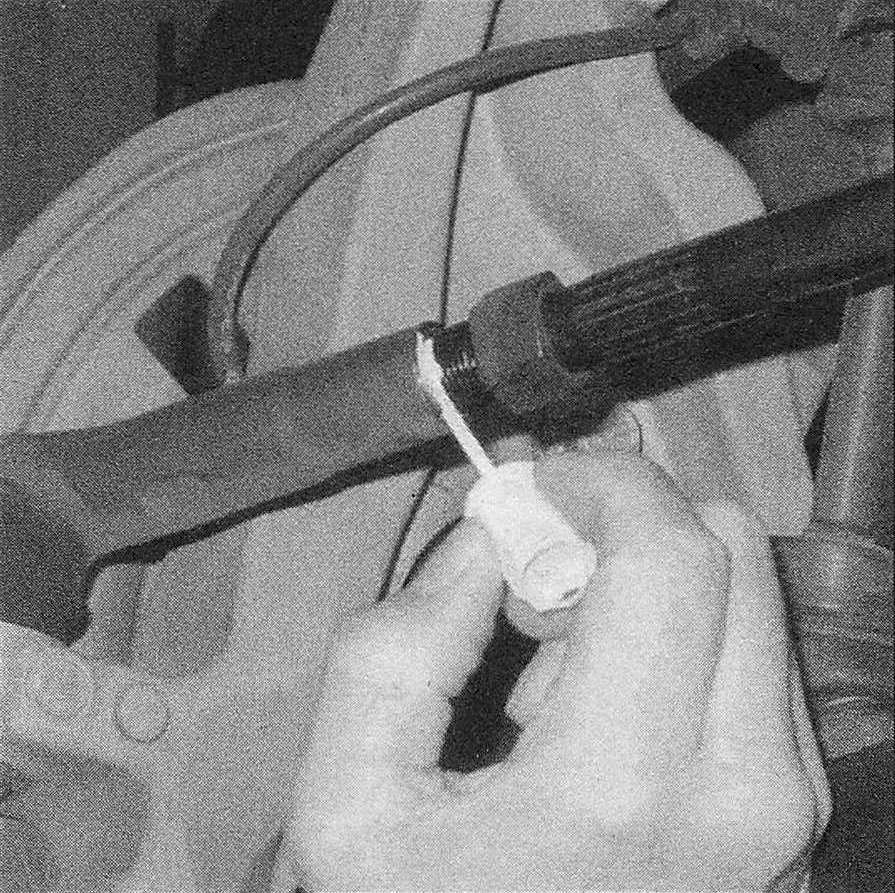
3. Mark the relationship of the tie-rod end to the threaded portion of the tie-rod. This will ensure the toe-in setting is restored when reassembled (see illustration).
18.3 Mark the position of the tie-rod end in relation to the threads
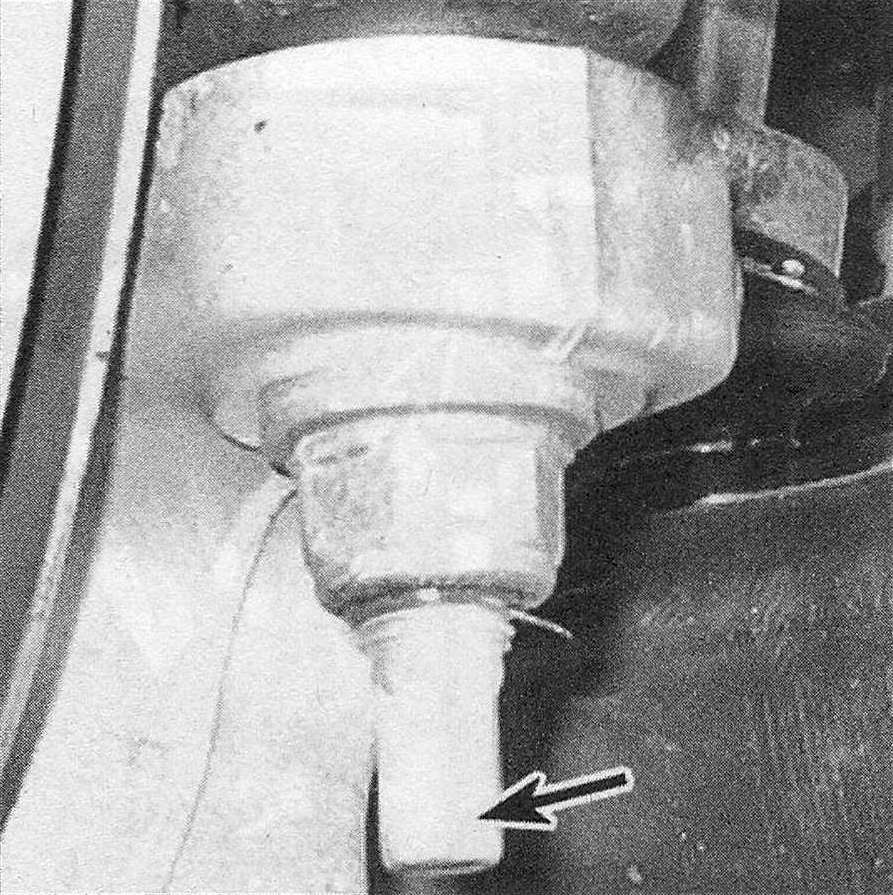
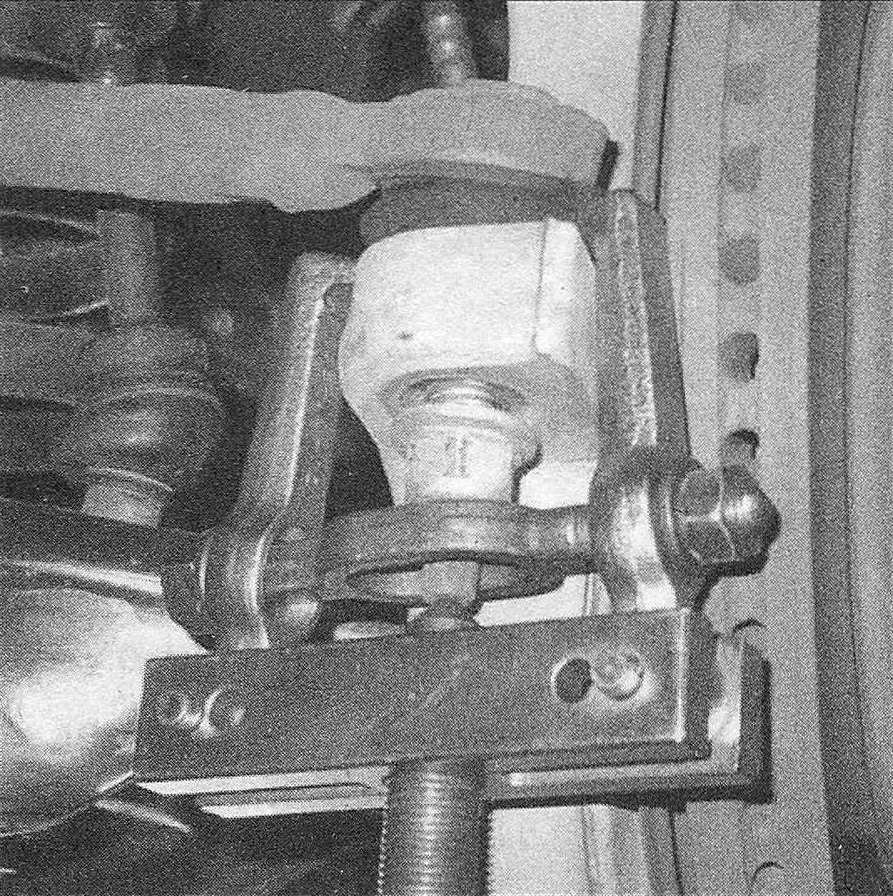
4. Loosen (but don’t remove) the nut on the tie-rod end ballstud and disconnect the tie-rod end from the steering knuckle arm with a puller (see illustrations).
18.4a If the ballstud turns while attempting to loosen the nut, hold it stationary with a wrench
18.4b Back-off the ballstud nut a few turns, then separate the tie-rod end from the steering knuckle with a puller (leaving the nut on the ballstud will prevent the tie- rod end from separating violently)
5. If you’re replacing the tie-rod end, unscrew the tie-rod end from the tie-rod, then thread the new tie-rod end onto the tie-rod to the marked position.
Installation
6. Connect the tie-rod end to the steering knuckle arm. Install the nut on the ballstud and tighten it to the torque listed in this Chapter’s Specifications. Install the wheel. Lower the vehicle and tighten the lug nuts to the torque listed in the Tune-up and routine maintenance Specifications.
7. Have the front end alignment checked and, if necessary, adjusted.
Link/coil suspension
Tie-rod end
Removal
8. Loosen the wheel lug nuts, raise the vehicle and support it securely on jackstands. Apply the parking brake. Remove the wheel.
9. Measure the distance between the adjuster tube and the center line of the ball-stud. This will ensure the toe-in setting is restored when reassembled.
10. Loosen (but don’t remove) the nut on the tie-rod end ballstud and disconnect the tie-rod end from the steering knuckle arm with a puller.
11. If you’re replacing the tie-rod end, lubricate the threaded portion of the tie-rod end with chassis grease. Screw the new tie-rod end into the adjuster tube and adjust the distance from the tube to the ballstud by threading the tie-rod end into the adjuster tube until the same number of threads are showing as before. Or use the measurement you made before removing the tie-rod end. Don’t tighten the adjuster tube clamps yet.
Installation
12. Insert the tie-rod ballstud into the steering knuckle. Make sure the ballstud is fully seated. Install the nut and tighten it to the torque listed in this Chapter’s Specifications. If the ballstud spins when attempting to tighten the nut, hold it stationary with a small wrench.
13. Tighten the tie-rod adjuster clamp bolts to the torque listed in this Chapter’s Specifications. Have the front end alignment checked and, if necessary, adjusted.
Drag link
Removal
14. Loosen the wheel lug nuts, raise the vehicle and support it securely on jackstands. Apply the parking brake. Remove the wheels.
15. Remove the nut from the drag link ball-stud.
16. Using a puller, separate the drag link from the Pitman arm.
17. Loosen (but don’t remove) the nuts on the tie-rod end ballstuds and disconnect the tie-rod ends from the steering knuckle and drag link with a puller.
Installation
18. Installation is the reverse of removal. Tighten all of the fasteners to the torque listed in this Chapter’s Specifications.
19. Have the front end alignment checked and, if necessary, adjusted.
Pitman arm
Removal
20. Loosen the wheel lug nuts, raise the vehicle and support it securely on jackstands. Apply the parking brake. Remove the right wheel.
21. Remove the drag link nut from the Pitman arm ballstud.
22. Working at the right side steering knuckle, loosen (but don’t remove) the nut on the end of the drag link ballstud, then disconnect the end of the drag link from the steering knuckle arm with a puller.
23. Remove the Pitman arm nut and washer. Mark the Pitman arm and the steering gear shaft to ensure proper alignment at reassembly (only if the same Pitman arm is going to be used).
Installation
24. Installation is the reverse of removal. Tighten all of the fasteners to the torque listed in this Chapter’s Specifications. Have the front end alignment checked and, if necessary, adjusted.
Steering damper
25. Inspect the steering damper for fluid leakage. A slight film of fluid near the shaft seal is normal, but if there’s excessive fluid present and it’s obviously coming from the steering damper, replace the damper.
26. Inspect the steering damper bushing for excessive wear. If it’s in bad shape, replace the damper.
27. To test the damper itself, disconnect it from the tie-rod. Using as much travel as possible, extend and compress the damper. The resistance should be smooth and constant for each stroke. If any binding, dead spots or unusual noises are present, replace the damper.
28. Remove the damper-to-tie-rod mounting bolt and nut. Separate the damper from the tie-rod.
29. Remove the damper-to-axle mounting bolt and nut. Separate the damper from the axle.
30. Installation is the reverse of removal. Tighten the fasteners to the torque values listed in this Chapter’s Specifications.