Fuel rail and injectors – removal and installation
Warning: Gasoline is extremely flammable, so take extra precautions when you work on any part of the fuel system.
Warning: The engine must be completely cool before beginning this procedure.
1. Relieve the fuel system pressure (Fuel pressure relief procedure).
2. Disconnect the cable from the negative battery terminal (see Engine electrical systems).
3.6L V6 engines
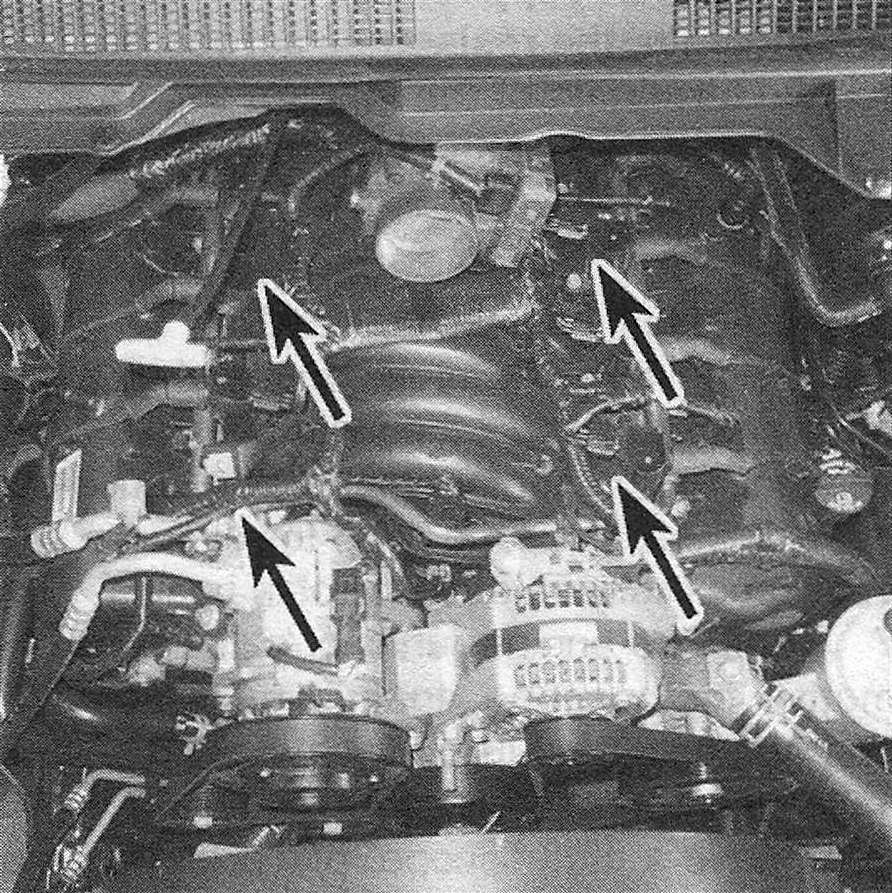
3. Remove the upper intake manifold (see 3.6L V6 engine).
4. Disconnect the fuel delivery line quickconnect fitting from the fuel rail (if you’re unfamiliar with quick-connect fittings, Fuel lines and fittings – repair and replacement).
5. Disconnect the fuel injector electrical connectors, then detach the injector wiring harness mounting clips from the fuel rail and set the harness aside.
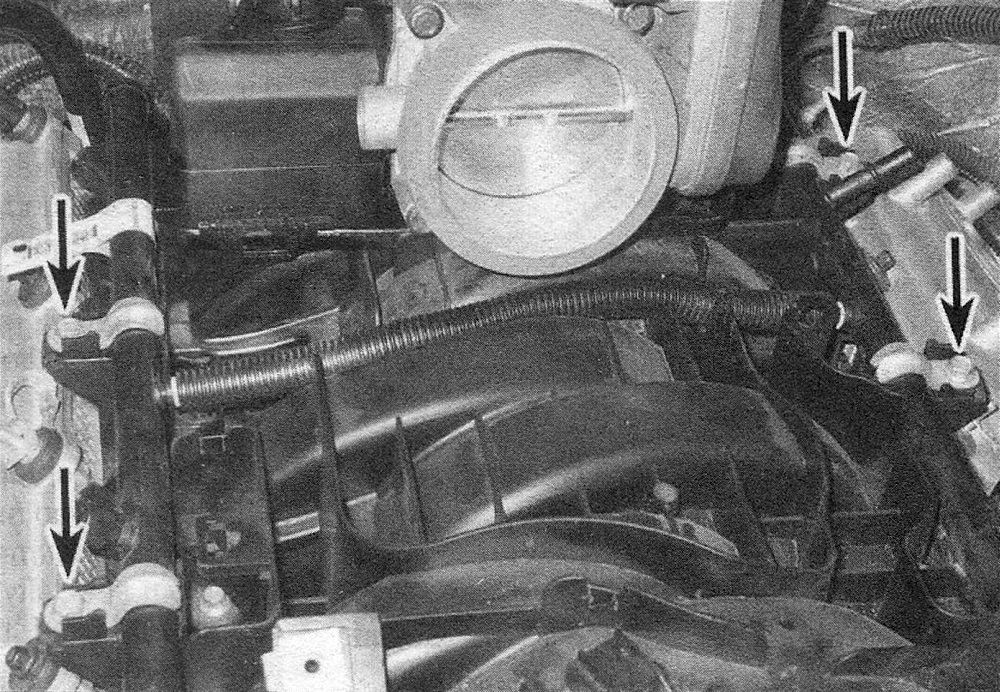
6. Remove the fuel rail mounting bolts,
pull up on the fuel rail to disengage the injectors from their bores in the intake manifold, then remove the fuel rail and injectors as an assembly. The injectors might initially stick in their bores, but they’ll pull free when sufficient force is applied. Proceed to Step 14.
3.7L V6 and 4.7L V8 engines
7. Remove the air intake duct (Air filter housing and air intake duct – removal and installation).
8. Remove the bracket at the front of the throttle body. Disconnect the fuel supply line from the fuel rail (Fuel lines and fittings – repair and replacement).
9. Clearly label any vacuum hoses that will interfere with fuel rail removal, then disconnect them from the throttle body and the intake manifold.
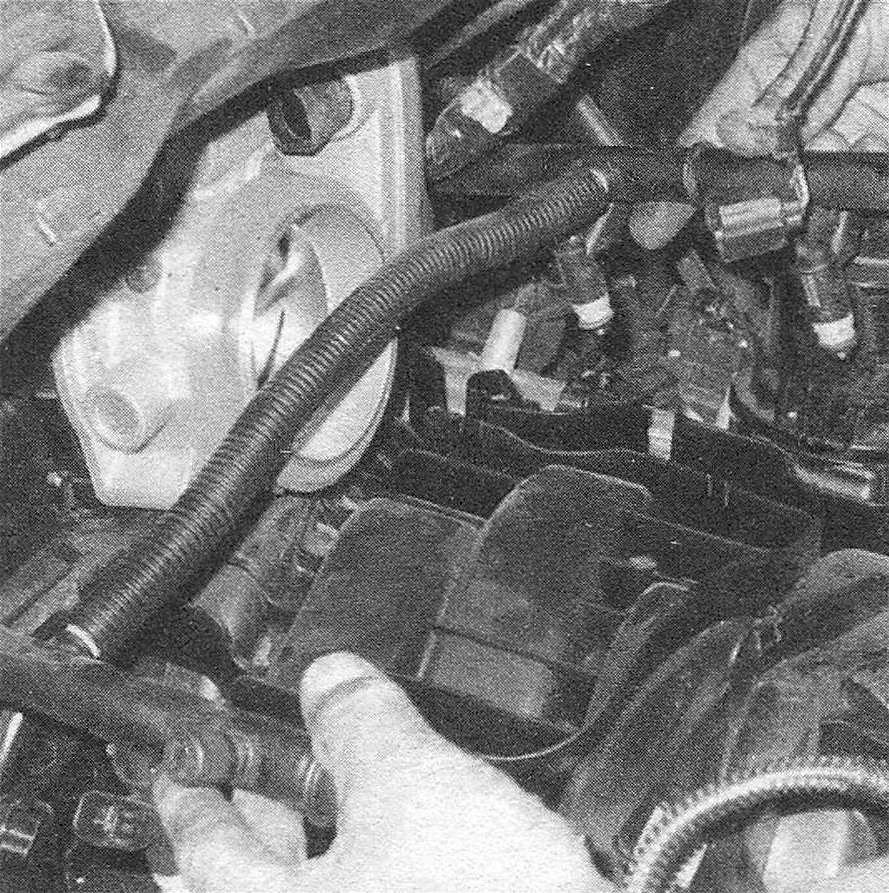
10. Disconnect the electrical connectors for any wiring harnesses that will interfere with fuel rail removal and set the wiring harnesses aside.
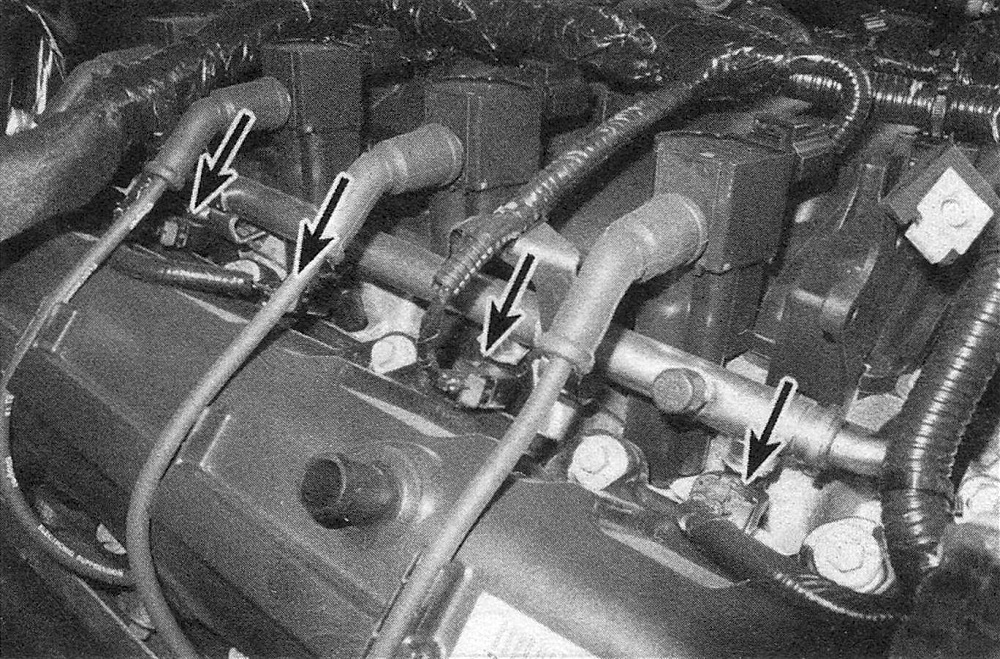
11. Disconnect the fuel injector electrical connectors (see illustrations) and set the injector wiring harness aside. Note: Each connector should be numbered with the corresponding cylinder number. If the number tag is obscured or missing, renumber the connectors.
12.11a Fuel injector wiring connectors (4.7L V8 engine)
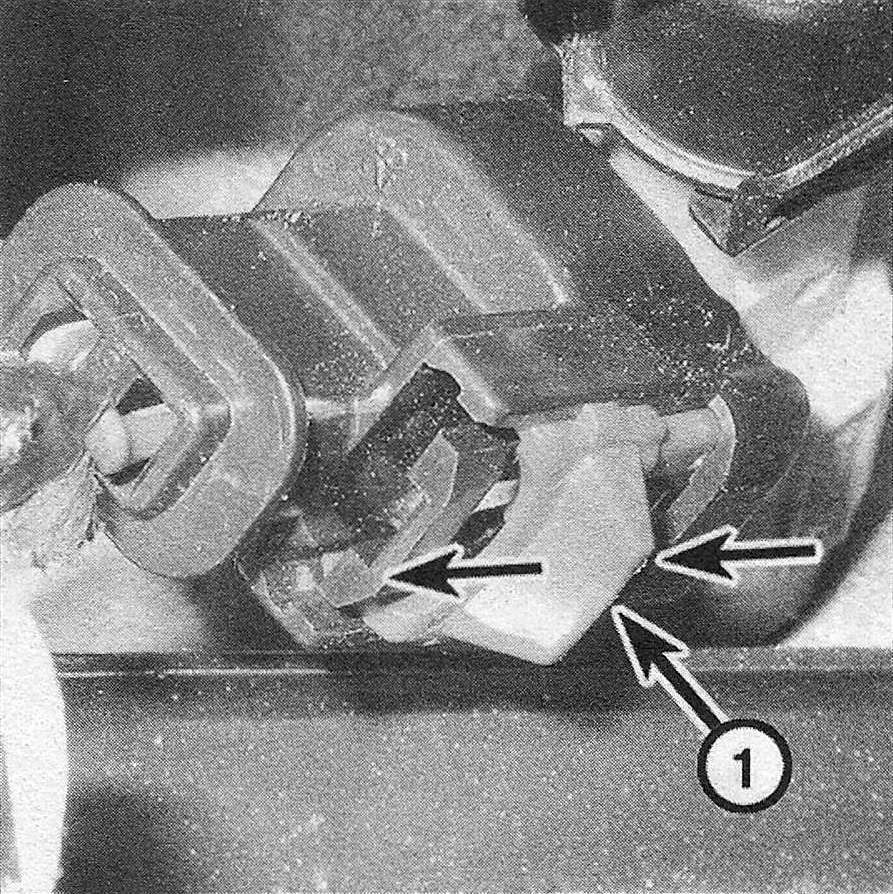
12.11b To disconnect the electrical connector from the injector on a 3.7L V6 or 4.7L V8, move the slider (1) up (away from the injector) …
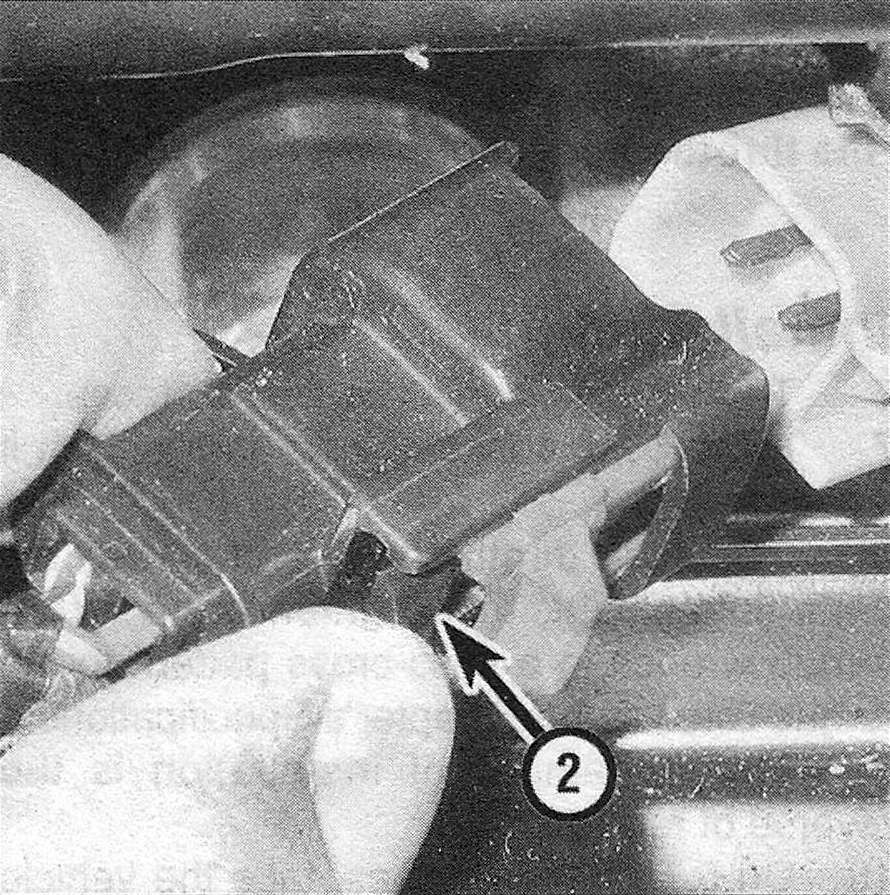
12.11c … then depress the tab (2) and pull the connector off of the injector
12. Remove all of the ignition coils (see Engine electrical systems).
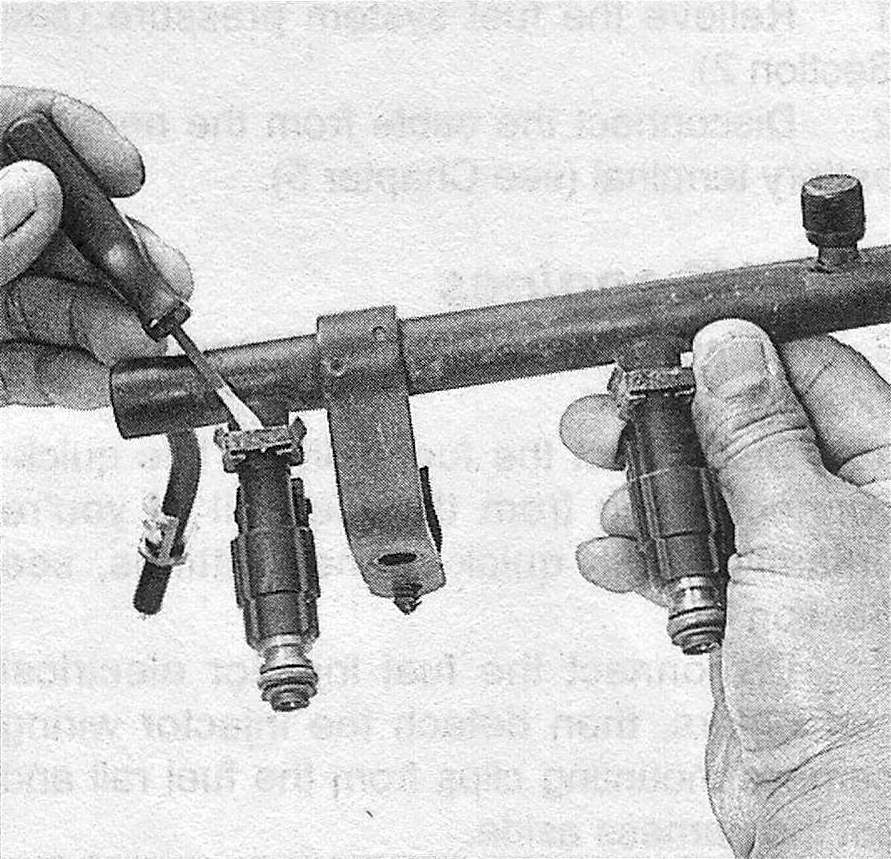
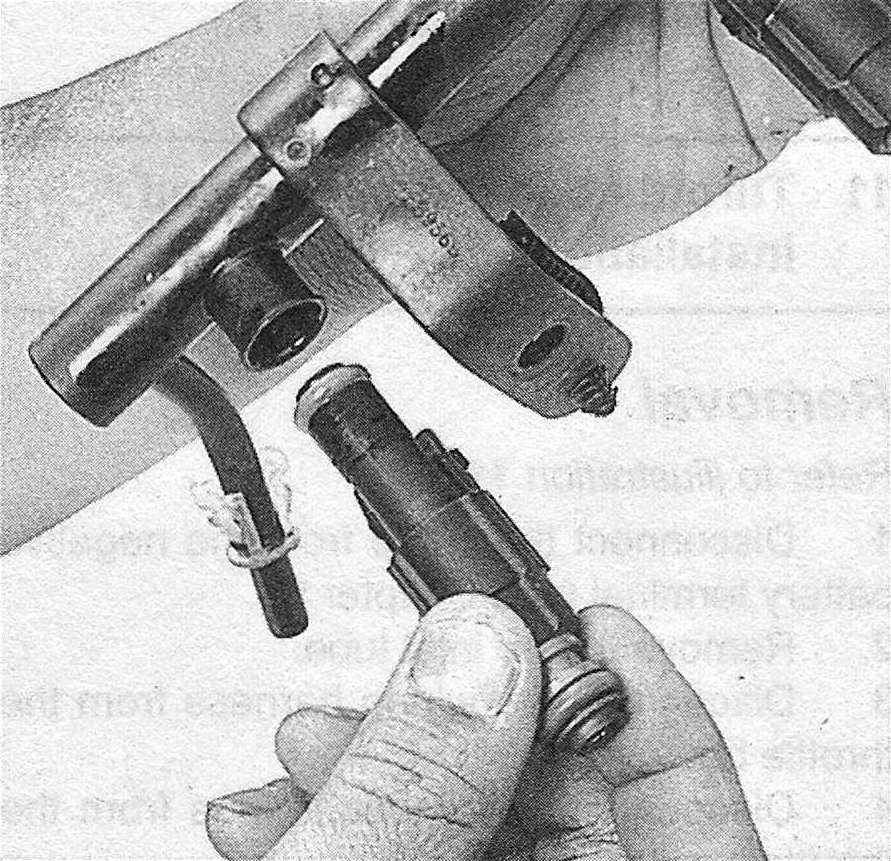
13. Clean any debris from around the injectors. Remove the fuel rail mounting nuts/bolts (see illustration). Gently rock the fuel rail and injectors to loosen the injectors, then remove the fuel rail and fuel injectors as an assembly. Caution: Do not attempt to separate the left and right fuel rails. Both sides are serviced together as an assembly.
12.13 Fuel rail mounting bolts (4.7L V8 engine)
3.6L V6, 3.7L V6 and 4.8L engines
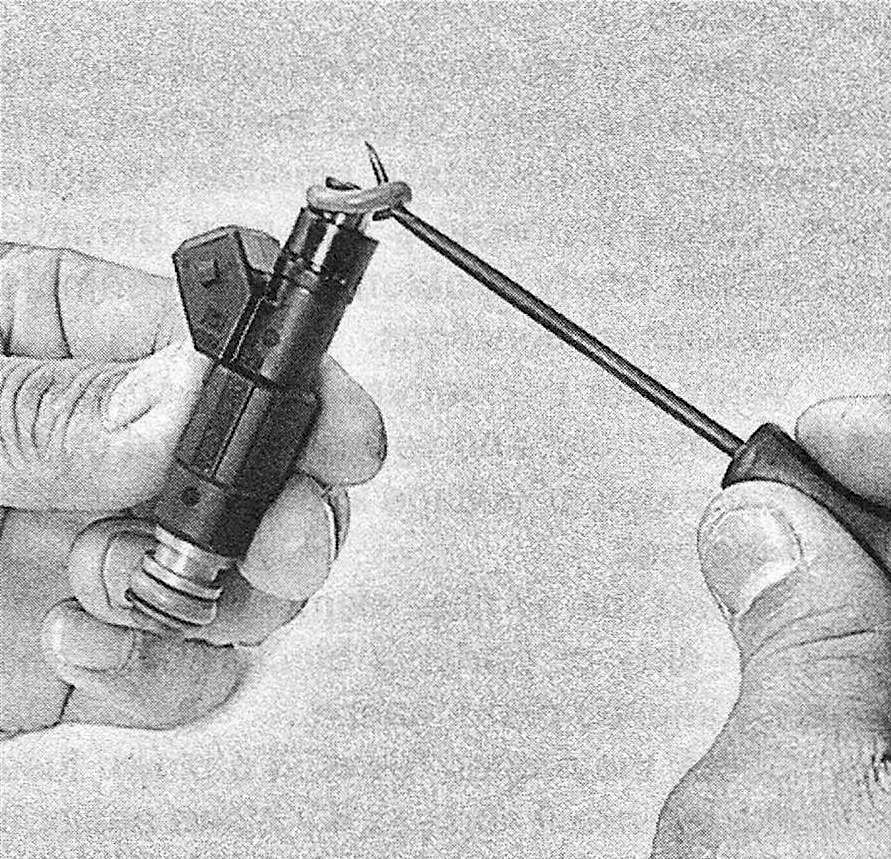
14. Remove the injectors from the fuel rail, then remove and discard the 0-rings (see illustrations). Note: Whether you’re replacing an injector or a leaking 0-ring, it’s a good idea to remove all the injectors from the fuel rail and replace all the 0-rings.
12.14a Using a screwdriver or pliers, remove the injector retaining clip …
12.14b … and withdraw the injector from the fuel rail
12.14c Carefully remove the 0-rings from the injectors
15. Coat the new 0-rings with clean engine oil and install them on the injector (s), then insert each injector into its corresponding bore in the fuel rail. Install the injector retaining clip.
16. Clean the injector bores on the intake manifold.
17. Guide the injectors/fuel rail assembly into the injector bores on the intake manifold. Make sure the injectors are fully seated, then tighten the fuel rail mounting nuts/bolts to the torque listed in this Chapter’s Specifications.
18. The remainder of installation is the reverse of removal.
19. After the injector/fuel rail assembly installation is complete, turn the ignition switch to ON, but don’t operate the starter. This activates the fuel pump for about two seconds, which builds up fuel pressure in the fuel lines and the fuel rail. Repeat this step two or three times, then check the fuel lines, fuel rail and injectors for fuel leakage.
5.7L and 6.4L Hemi engine
20. Remove the engine cover by pulling up at the front, then sliding it off.
21. Remove the air inlet tube from the air filter housing and the throttle body.
22. Disconnect the fuel supply line from the fuel rail (Fuel lines and fittings – repair and replacement).
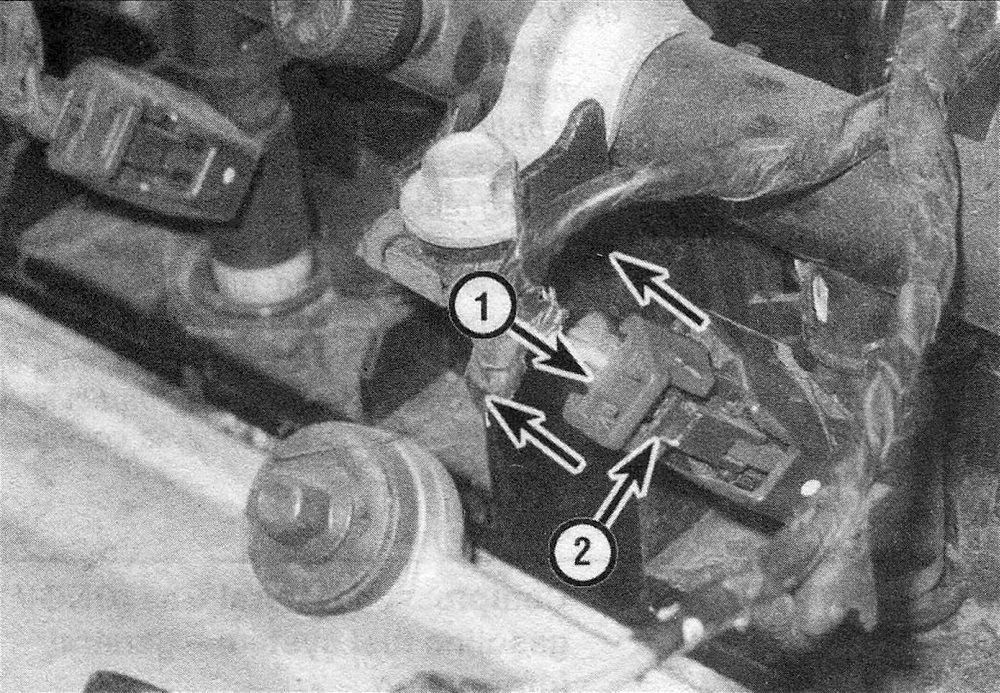
23. Look at the wiring harness for the ignition coils and for the fuel injectors. Note how each branch of the main harness branches into two leads – one for the coil and one for the injector – for each cylinder. To make sure that you don’t accidentally plug the wrong connector into the wrong injector, each injector lead is identified by a numeric designation – 1, 2, 3, 4, etc. – imprinted on the electrical tape protecting the lead; If the harness does not have these numbers on the eight injector leads, label them now, before disconnecting the electrical connectors from the fuel injectors. Then disconnect the electrical connectors from all eight fuel injectors (see illustration).
12.23 To disconnect an electrical connector from an injector on a Hemi engine, move the red slider (1) away from the injector, then depress the release tab (2) and pull off the connector
24. Detach the PCV hose and the air make-up hose and move them out of the way.
25. Remove the four fuel rail mounting bolts (see illustration).
12.25 To detach the fuel rail from the intake manifold, remove these four bolts and hold-down clamps
26. Starting with the left side of the fuel rail, carefully pull on the injectors while wiggling them from side to side at the same time until all four injectors start to clear their mounting holes. Repeat this step on the right side. Go back and forth between the two sides of the engine, gradually working the injectors out of their mounting holes, until all eight injectors are free. When all of the injectors are free, remove the fuel rail and injectors as a single assembly (see illustration).
12.26 Carefully lift the fuel rail and injectors off the engine as a single assembly
27. To remove an injector from the fuel rail, remove the injector retainer clip (see illustration 12.14a) and pull the injector out of the fuel rail. Note: Whether you’re replacing an injector or a leaking 0-ring, it’s a good idea to remove all the injectors from the fuel rail and replace all the 0-rings.
28. Remove the 0-rings from the injector (see illustration 12.14c), discard them and install new 0-rings. Lubricate the new 0-rings with clean engine oil before installing the injector into the fuel rail.
29. Installation is the reverse of removal. Tighten the fuel rail mounting bolts to the torque listed in this Chapter’s Specifications.