Turbocharger – removal and installation
Caution: The turbocharger is a precision component that has been assembled and balanced to very fine tolerances. Do not disassemble it or try to repair it. Turbochargers should only be overhauled or repaired by authorized turbocharger repair facilities. An incorrectly assembled turbocharger could result in damage to the turbocharger and/or the engine.
Note: This procedure requires a special wrench (see Step 15). Don’t start work until you have this tool.
Removal
1. Disconnect the negative battery cables from both batteries (see Engine electrical systems).
2. Drain sufficient coolant from the radiator (see Tune-up and routine maintenance).
3. Remove the air filter housing (Air filter housing – removal and installation).
4. Disconnect the hoses and tubes from the turbocharger (see illustrations).
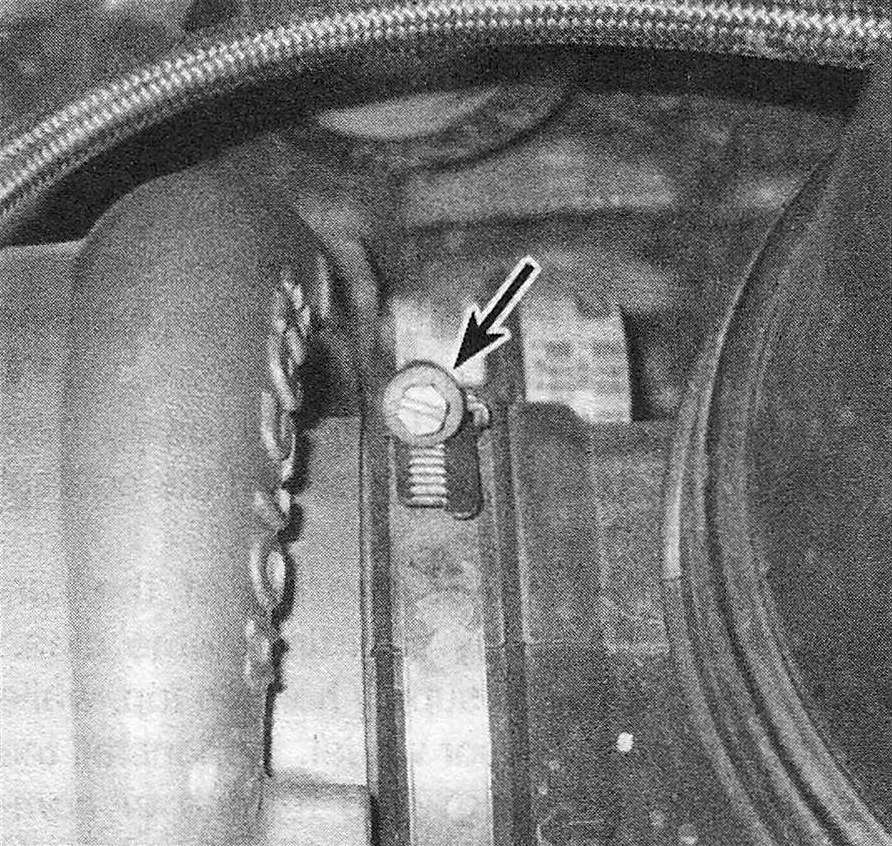
13.4a To disconnect the air intake duct from the turbocharger, loosen this hose clamp screw
13.4b To disconnect the turbocharger outlet duct from the turbocharger, loosen this hose clamp screw and pull off the duct
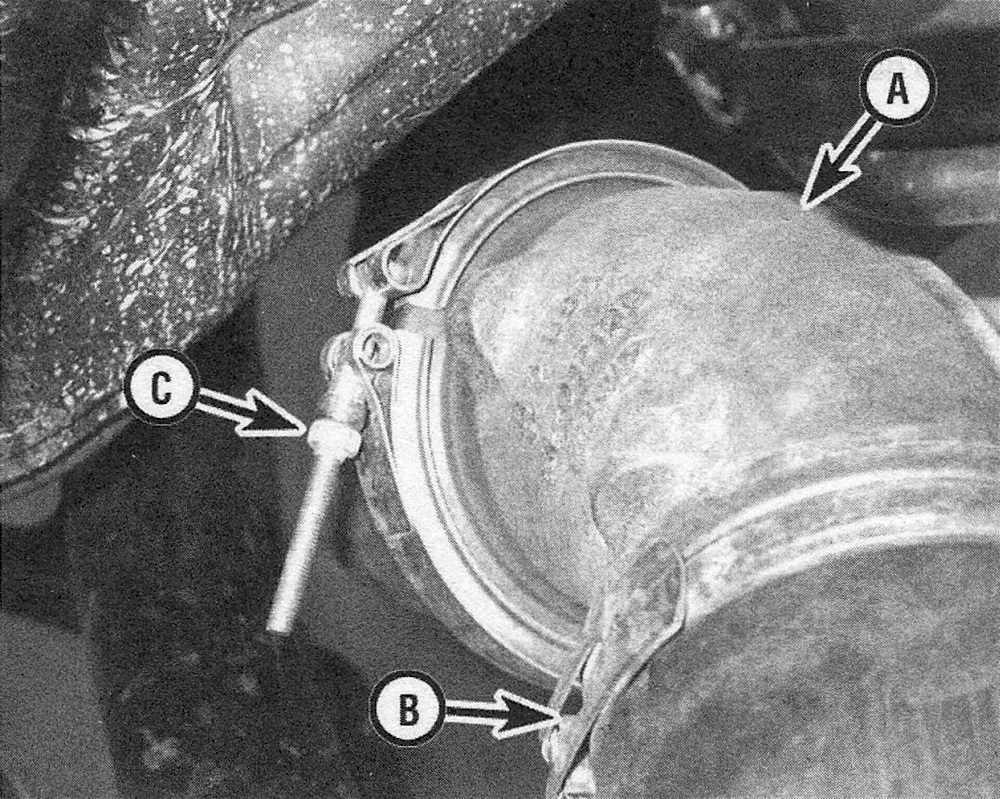
13.4c To disconnect the exhaust discharge elbow (A) from the turbocharger, loosen this clamp (B) and separate the elbow from the turbocharger. If you need more room, loosen the hose clamp (C) at the lower end of the elbow and remove the elbow entirely
5. Disconnect the wiring from the turbocharger.
6. Disconnect the oil supply line from the turbocharger (see illustration). Remove the coolant lines completely.
13.6 Disconnect the oil supply line from the top of the turbocharger. Use a back-up wrench to protect the elbow in the line from kinks

7. On 2012 and later models, remove the engine-driven viscous fan and the fan shroud (see Cooling, heating and air conditioning systems).
8. Raise the vehicle and support it securely on jackstands. Remove the right inner fender splash shield.
9. Install an engine support fixture or an engine hoist (see 3.6L V6 engine) and use it to take the weight of the engine.
10. Remove the right engine mount.
11. Remove the interfering exhaust bracket from the transmission.
12. Remove the exhaust pipe V-band clamp from the turbocharger.
13. Remove the oil drain tube from the turbocharger and the engine (see illustration), then lower the vehicle.
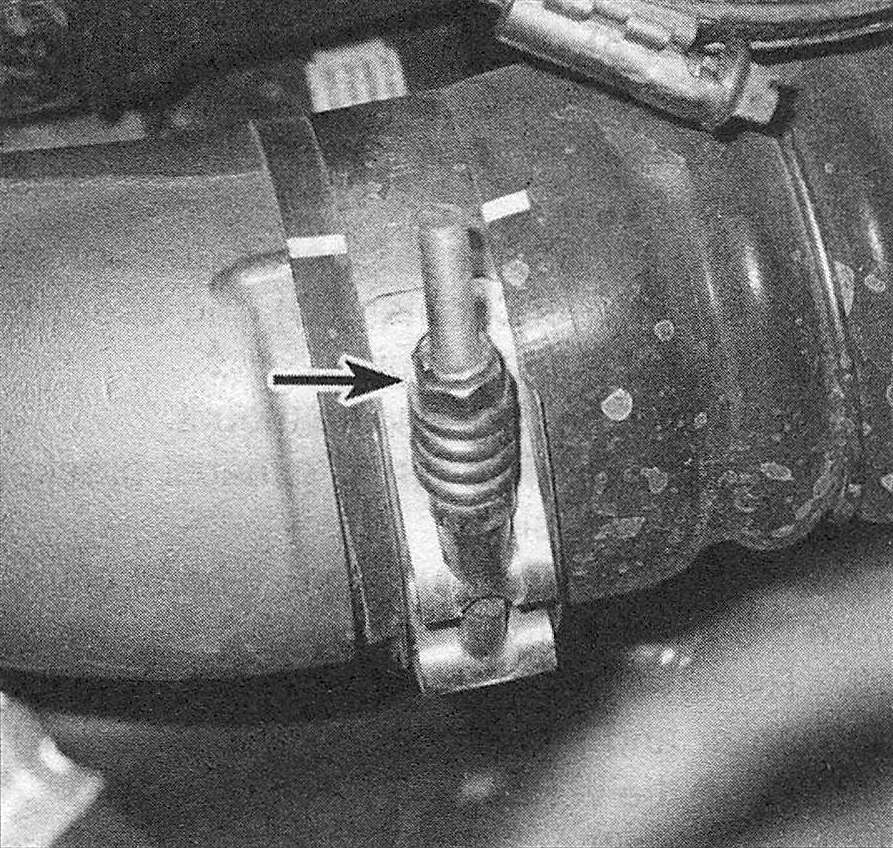
13.13 To disconnect the oil return line from the bottom of the turbocharger, remove these two bolts

14. Remove the Grid Heater relay from the battery tray and set it aside.
15. Remove the turbocharger mounting nuts. Note: This requires a special wrench (Miller #9866) which is available at Dodge dealers and specialty automotive tool dealers.
16. Remove the turbocharger, being careful not to damage the wastegate actuator assembly (see illustration).
Note: The wastegate actuator is precisely adjusted. Be careful when laying the complete turbocharger unit on the bench, so as not to disturb wastegate actuator alignment.
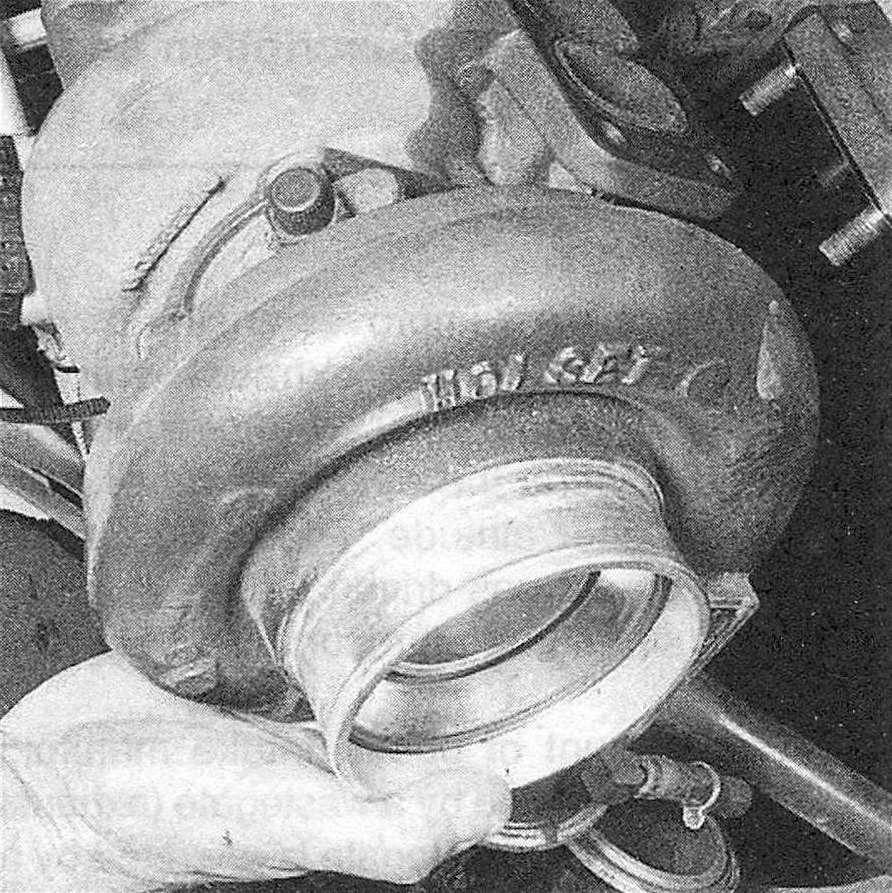
13.16 Carefully lift the turbocharger out of the engine compartment; it’s heavy, so take care to avoid damaging the wastegate system
Installation
17. Clean the turbocharger and exhaust manifold sealing surfaces.
18. Use a die to clean the studs in the turbocharger mounting portion of the exhaust manifold and coat them with anti-seize compound. Bolt the turbocharger onto the exhaust manifold using a new gasket.
19. Reinstall the oil drain line using new 0-rings. Also replace the seals on the coolant lines.
20. Prime the center bearing of the turbocharger with oil by squirting some clean engine oil into the oil supply hole on top, while turning the compressor wheel, then install the supply line. Warning: The turbine or compressor wheels have very sharp blades; do not turn the blades with your fingers. Use a plastic pen.
21. The remainder of installation is the reverse of removal. Tighten the turbochargerto-exhaust manifold nuts to the torque listed in this Chapter’s Specifications.