Intake Air Temperature (IAT) sensor – replacement
1. Disconnect the cable (s) from the negative battery terminal(s) (see Engine electrical systems).
Gasoline engines
Note: On 3.7L V6 and 4.7L V8 engines, the IAT sensor is slightly upstream of the throttle body in the air inlet duct. On Hemi engines, the IAT sensor is in the front of the intake manifold air box plenum.
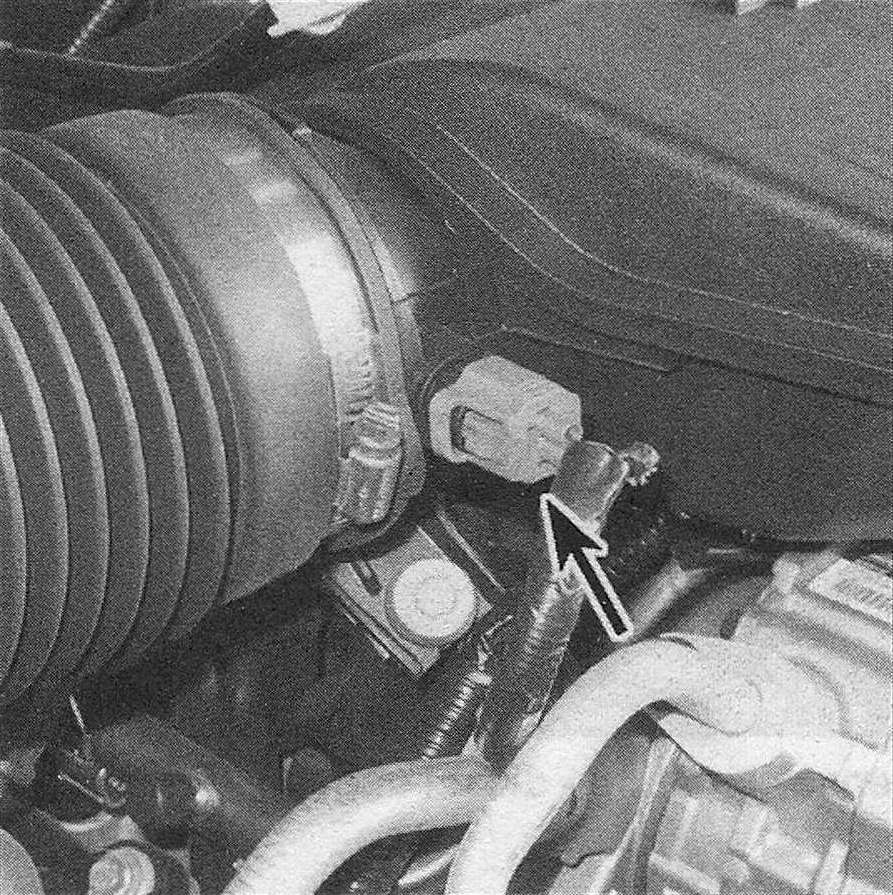
2. Disconnect the electrical connector from the IAT sensor (see illustrations).
8.2a On 3.7L V6 and 4.7L V8 engines, the IAT sensor is mounted in the air inlet duct
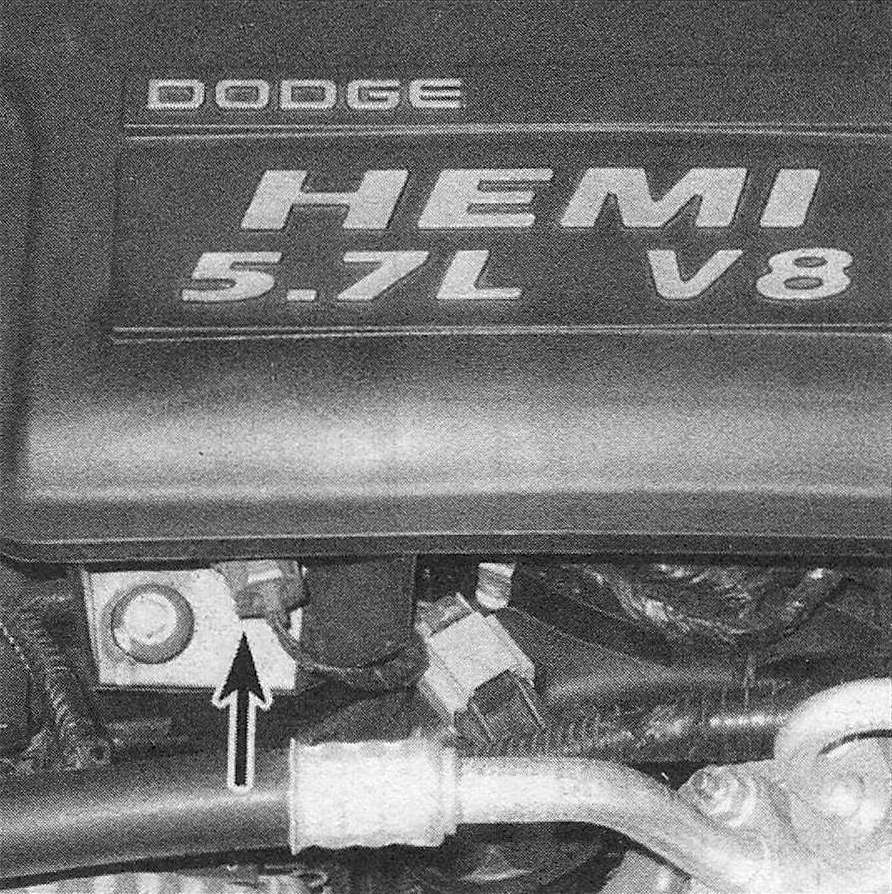
8.2b On Hemi engines, the IAT sensor is located at the right front corner of the air resonator box
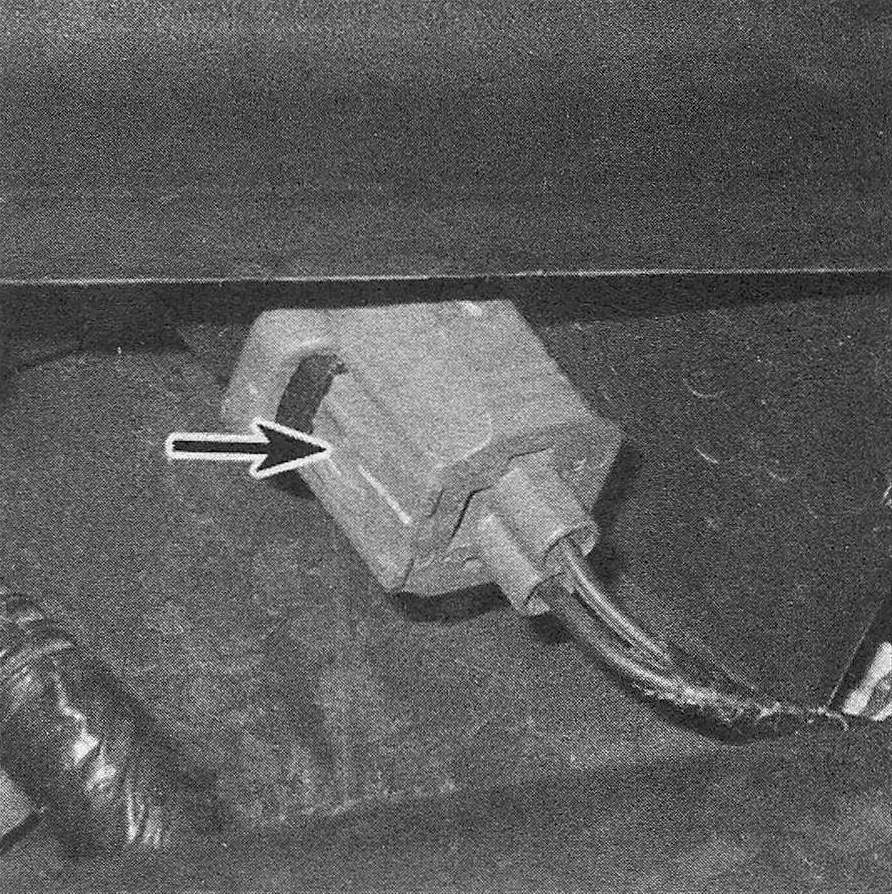
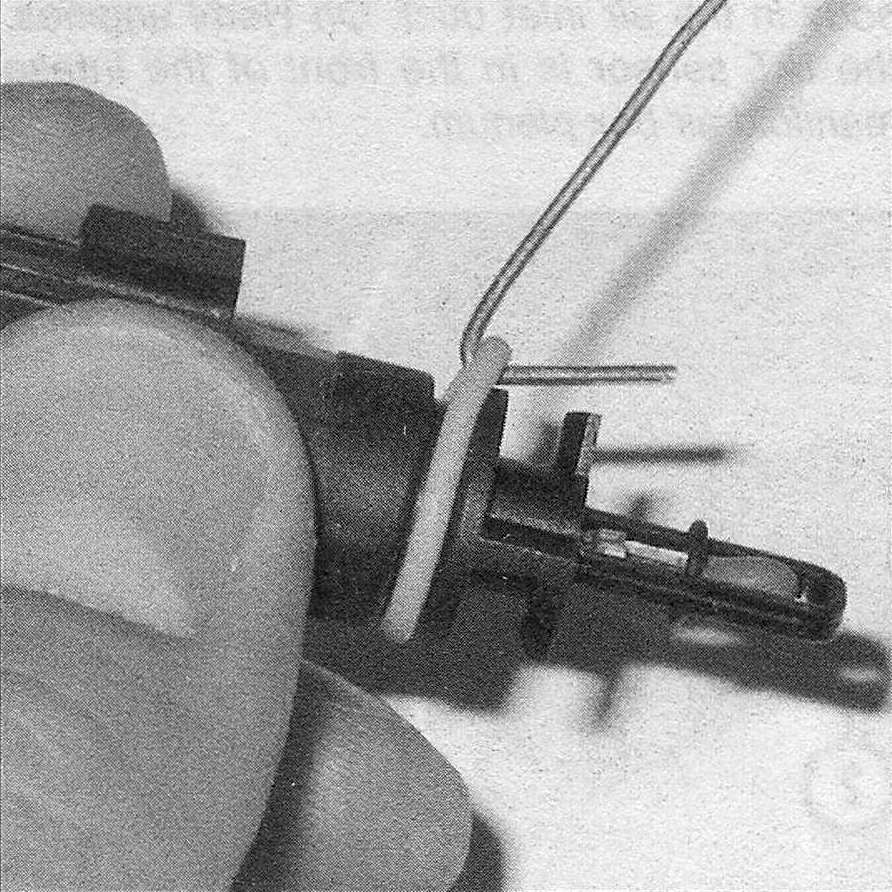
8.2c Depress this tab and pull off the IAT sensor connector (Hemi engine shown, 3.7L V6 and 4.7L V8 similar)
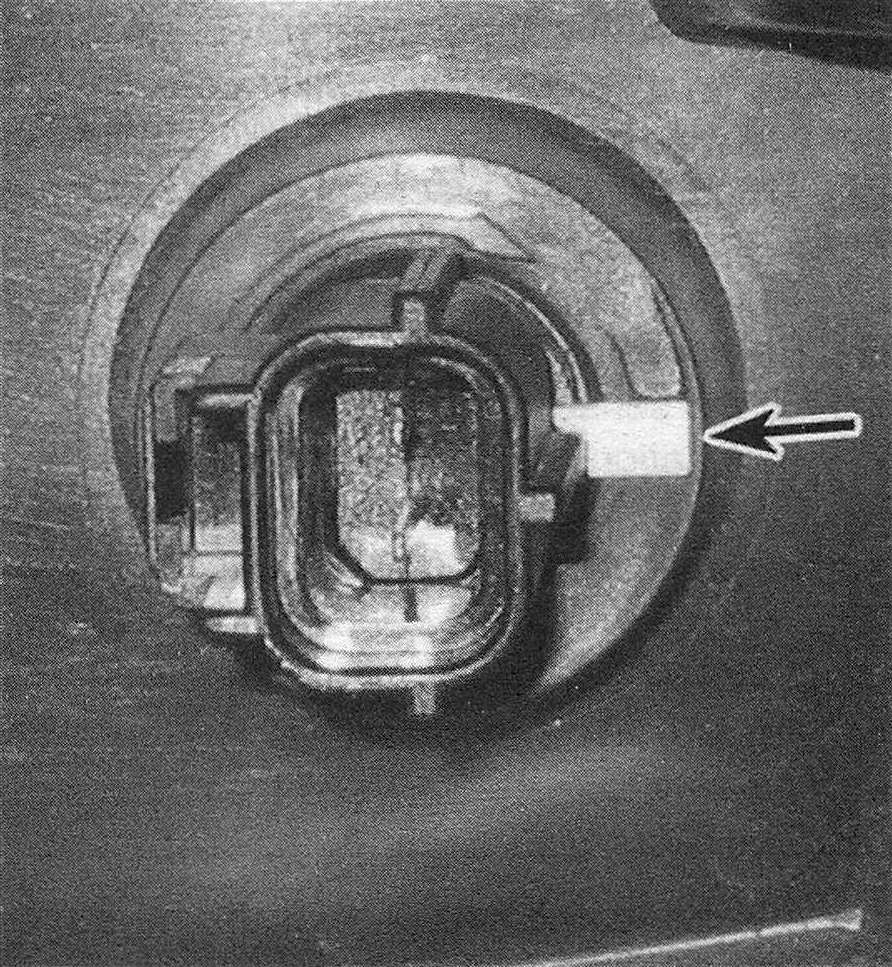
3. Lift up the release tab (see illustration) slightly, then turn the sensor 1/4-turn counterclockwise and pull it out.
8.3 Lift up the release tab slightly and rotate the IAT sensor counterclockwise 1/4-turn and pull it out (Hemi engine shown, 3.7L V6 and 4.7L V8 similar)
4. Remove the old 0-ring from the IAT sensor (see illustration) and inspect it for cracks, tears and deterioration. If the 0-ring is damaged, replace it.
8.4 Remove the 0-ring from the IAT sensor and inspect it for cracks, tears and deterioration. If the 0-ring is damaged, replace it
5. To install the IAT sensor, insert it into its mounting hole and rotate it clockwise 1/4-turn. Make sure that the release tab locks the sensor into place. Installation is otherwise the reverse of removal.
6. Disconnect the electrical connector from the IAT/MAP sensor (see illustration).
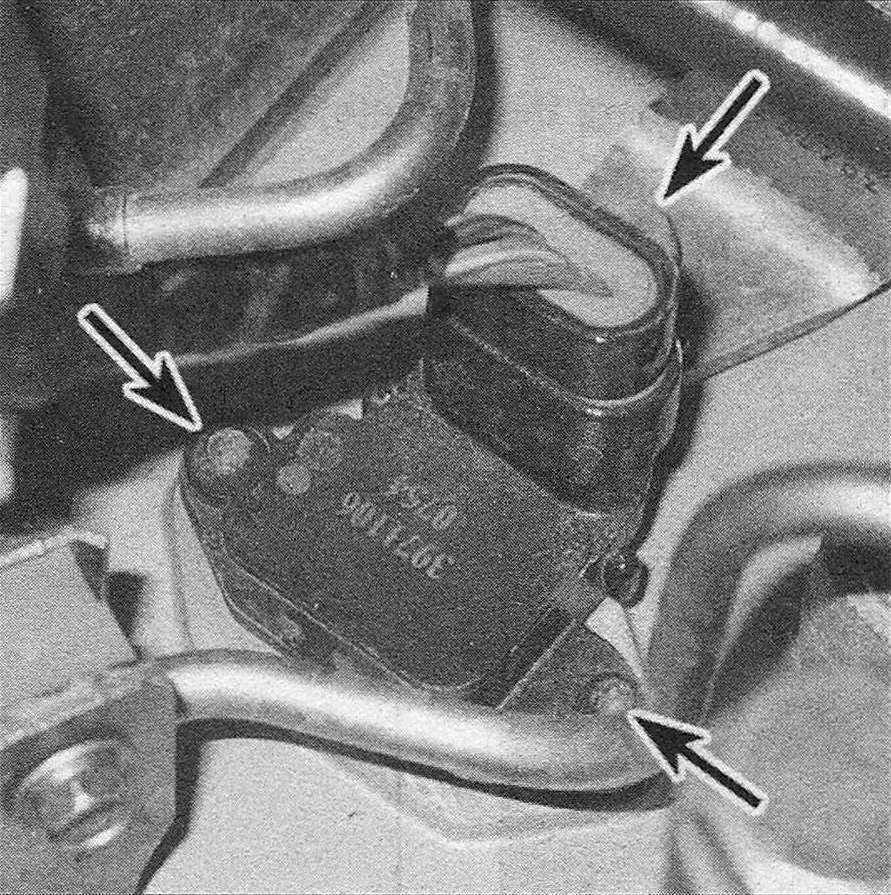
8.6 Disconnect the IAT/MAP sensor electrical connector and remove the two Torx mounting screws (diesel engine)
7. Remove the two sensor mounting screws.
8. Remove the IAT/MAP sensor from the intake manifold.
9. Remove the sensor 0-ring and inspect it for cracks (see illustration 8.4), tears and other deterioration. If it’s damaged, replace it.
10. Installation is the reverse of removal. Tighten the mounting screws securely.