Engine Coolant Temperature (ECT) sensor – replacement
Warning: Wait until the engine is completely cool before beginning this procedure.
1. Partially drain the cooling system (see Tune-up and routine maintenance).
2. Disconnect the cable (s) from the negative battery terminal(s) (see Engine electrical systems).
36L V6, 3.7L V6 and 4.7L V8 engines
Note: On the 3.6L V6 engine, the ECT sensor is located in the water jacket at rear of the cylinder head on the left side of the engine. On 3.7L V6 and 4.7L V8 engines, the sensor is located at the front of the intake manifold.
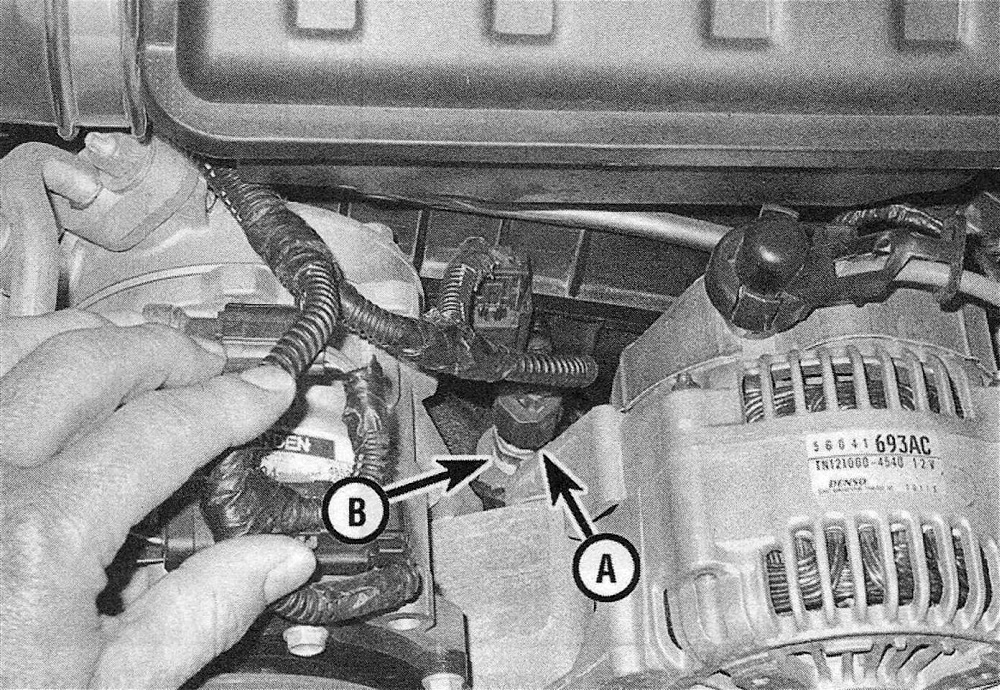
3. Disconnect the electrical connector from the ECT sensor (see illustrations).
6.3a Disconnect the ECT sensor electrical connector (A) and unscrew the sensor (B) from the manifold (3.7L V6 engine)
6.3b Disconnect the ECT sensor electrical connector and unscrew the sensor from the manifold (4.7L V8 engine)
4. Using a deep socket, carefully unscrew the ECT sensor from the cylinder head or the intake manifold.
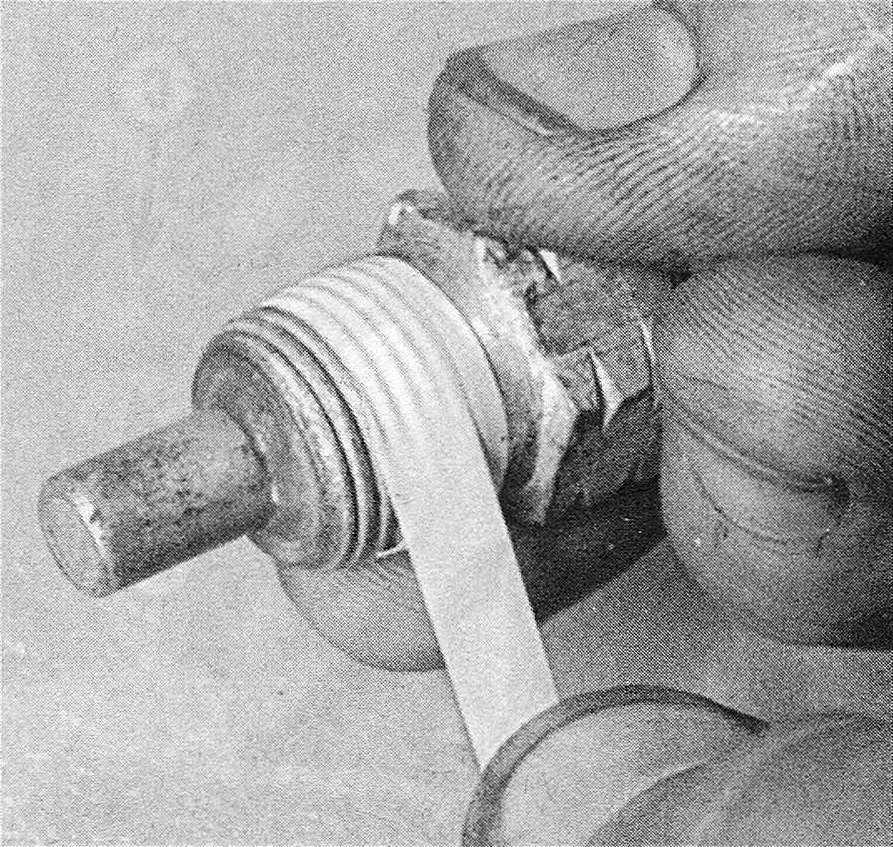
5. To prevent leakage and thread corrosion, wrap the threads of the ECT sensor with Teflon sealing tape (see illustration) before installing the sensor. Note: Seal the sensor threads whether you’re installing the old sensor or a new unit.
6.5 Before installing the ECT sensor, wrap the threads of the sensor with Teflon tape to prevent leaks
6. Installation is otherwise the reverse of removal. Tighten the ECT sensor to the torque listed in this Chapter’s Specifications.
7. Refill the cooling system (see Tune-up and routine maintenance).
Hemi engines
Note: The ECT sensor is located at the front of the engine block in the water pump assembly.
8. Remove the drivebelt (see Tune-up and routine maintenance).
9. To access the ECT sensor, you’ll need to unbolt the air conditioning compressor from the engine (see Cooling, heating and air conditioning systems). It is NOT necessary to disconnect any air conditioning hoses from the compressor. Set the compressor aside and support it with a bungee cord or a piece of wire.
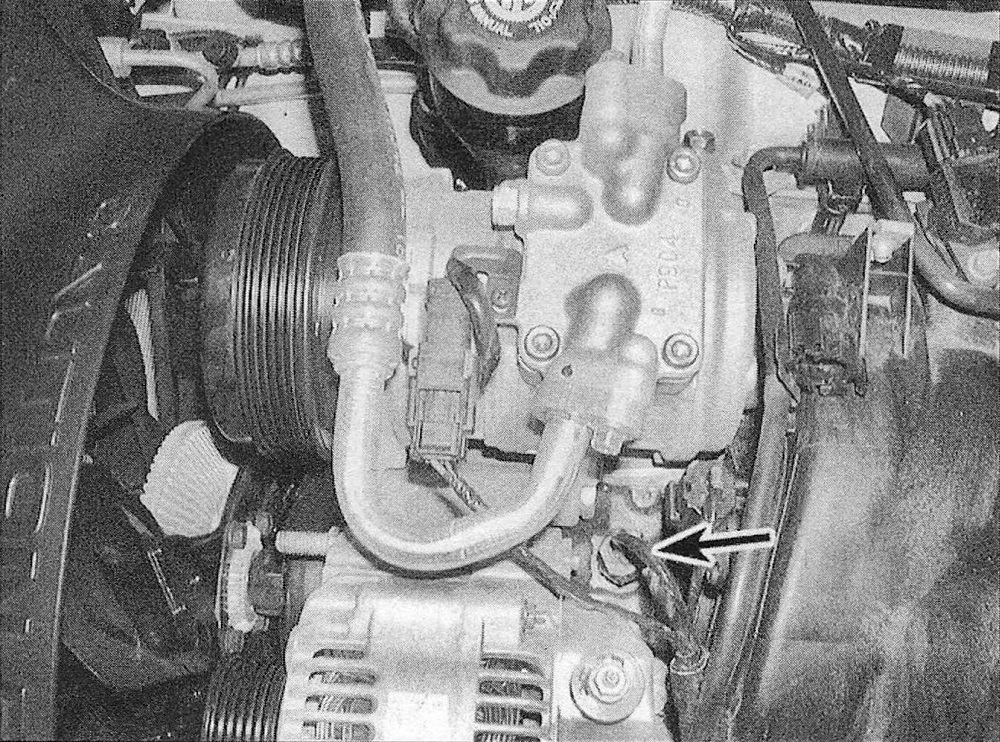
10. Disconnect the electrical connector from the ECT sensor (see illustration).
6.10 Disconnect the ECT sensor electrical connector (A) and unscrew the sensor (B) from the manifold (Hemi engine)
11. Using a deep socket, carefully unscrew the ECT sensor from the intake manifold.
12. To prevent leakage and thread corrosion, wrap the threads of the ECT sensor with Teflon sealing tape (see illustration 6.5) before installing the sensor. Note: Seal the sensor threads whether you’re installing the old sensor or a new unit.
13. Installation is otherwise the reverse of removal. Tighten the ECT sensor to the torque listed in this Chapter’s Specifications.
14. Refill the cooling system (see Tune-up and routine maintenance).
Diesel engine
Note: The ECT sensor is located at the right front corner of the cylinder head, near the thermostat housing.
15. Remove the interfering upper EGR tube.
16. Remove the heat shield.
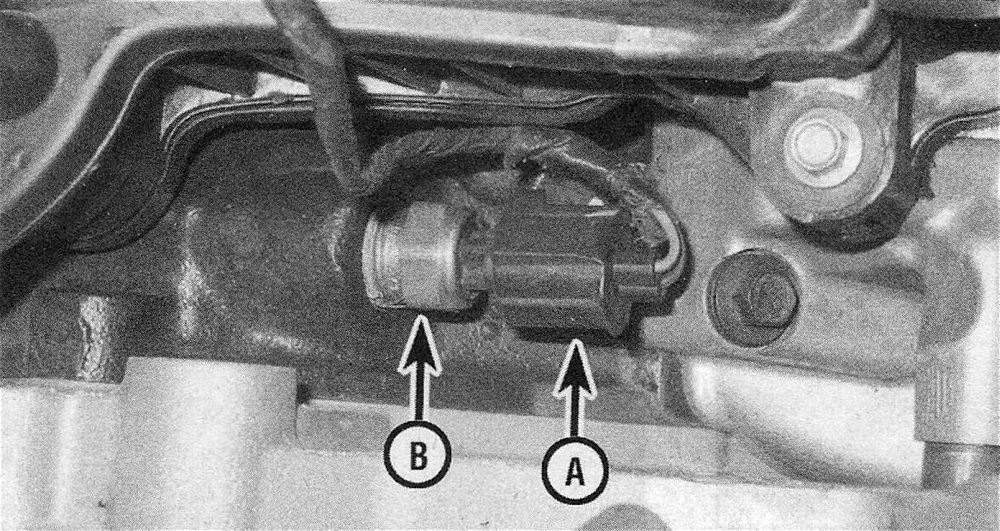
17. Disconnect the electrical connector from the ECT sensor (see illustration).
6.17 ECT sensor location – diesel engine

18. Unscrew the ECT sensor from the cylinder head.
19. To prevent leakage and thread corrosion, wrap the threads of the ECT sensor with Teflon sealing tape (see illustration 6.5) before installing the sensor. Note: Seal the sensor threads whether you’re installing the old sensor or a new one.
20. Installation is otherwise the reverse of removal. Tighten the ECT sensor to the torque listed in this Chapter’s Specifications.
21. Refill the cooling system (see Tune-up and routine maintenance).