Catalytic converter – general description, check and replacement
Note: Because of a Federally-mandated extended warranty which covers emission-related components such as the catalytic converter, check with a dealer service department before replacing the converter at your own expense.
General description
1. A catalytic converter (or catalyst) is an emission control device in the exhaust system that reduces certain pollutants in the exhaust gas stream. There are two types of converters. An oxidation catalyst reduces hydrocarbons (HC) and carbon monoxide (CO). A reduction catalyst reduces oxides of nitrogen (NOx). A catalyst that can reduce all three pollutants is known as a «Three-Way Catalyst» (TWC). All models covered by this manual are equipped with TWCs.
Check
2. The test equipment for a catalytic converter (a loaded-mode dynamometer and a 5-gas analyzer) is expensive. If you suspect that the converter on your vehicle is malfunctioning, take it to a dealer or authorized emission inspection facility for diagnosis and repair.
3. Whenever you raise the vehicle to service underbody components, inspect the converter for leaks, corrosion, dents and other damage. Carefully inspect the welds and/ or flange bolts and nuts that attach the front and rear ends of the converter to the exhaust system. If you note any damage, replace the converter.
4. Although catalytic converters don’t break too often, they can become clogged or even plugged up. The easiest way to check for a restricted converter is to use a vacuum gauge to diagnose the effect of a blocked exhaust on intake vacuum.
a) Connect a vacuum gauge to an intake manifold vacuum source (see 3.7L V6 and 4.7L V8 engines Hemi engine Diesel engine 3.6L V6 engine).
b) Warm the engine to operating temperature, place the transaxle in Park (automatic models) or Neutral (manual models) and apply the parking brake.
c) Note the vacuum reading at idle and jot it down.
d) Quickly open the throttle to near its wide-open position and then quickly get off the throttle and allow it to close. Note the vacuum reading and jot it down.
e) Do this test three more times, recording your measurement after each test.
f) If your fourth reading is more than one in-Hg lower than the reading that you noted at idle, the exhaust system might be restricted (the catalytic converter could be plugged, OR an exhaust pipe or muffler could be restricted).
Replacement
Warning: Make sure that the exhaust system is completely cooled down before proceeding. If the vehicle has just been driven, the catalytic converter can be hot enough to cause serious burns.
5. Raise the vehicle and place it securely on jackstands.
6. Spray a liberal amount of penetrant onto the threads of the exhaust pipe-to-exhaust manifold bolts and the clamp bolt behind the catalytic converter (see illustrations) and wait awhile for the penetrant to loosen things up.
13.6a To disconnect the exhaust pipe ahead of the catalyst from the exhaust manifold, remove these two bolts. If they’re difficult to loosen, spray some penetrant onto the threads, wait awhile and try again. Discard these bolts and use new ones when reconnecting the pipe to the manifold
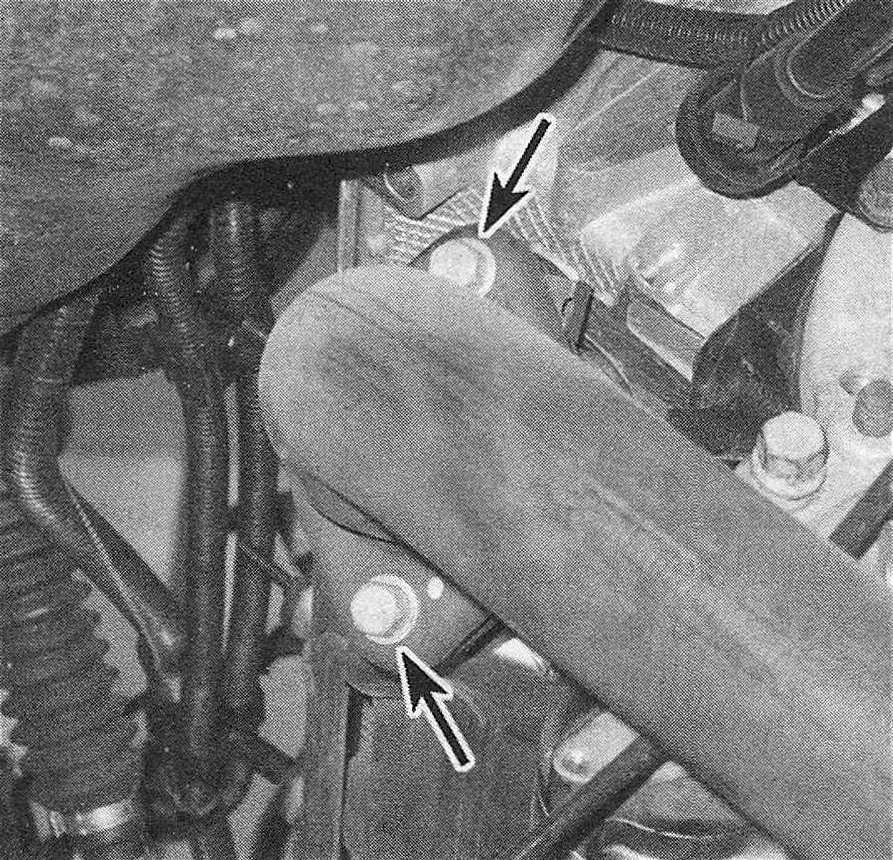
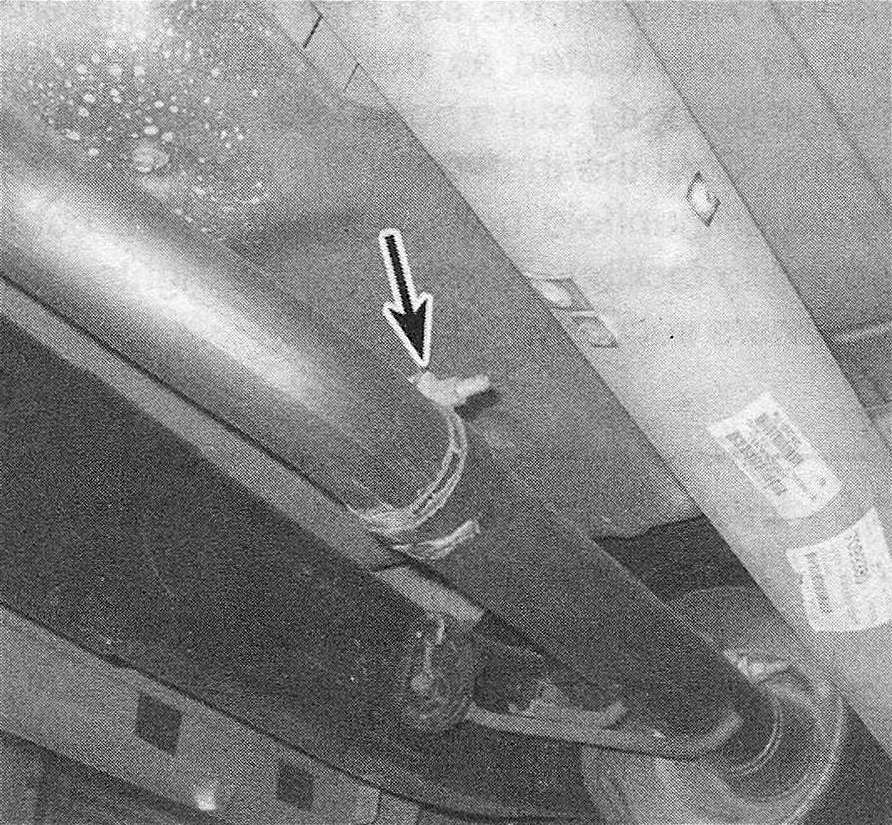
13.6b To disconnect the exhaust pipe behind the catalyst from the exhaust pipe going to the muffler, back off this nut to loosen the clamp. If it’s hard to loosen, spray some penetrant onto the threads and wait awhile. If the clamp is in bad shape, replace it with a new one
7. While you’re waiting for the penetrant to do its work, disconnect the electrical connectors for the upstream and downstream oxygen sensor and remove both oxygen sensors (Oxygen sensors – general description and replacement).
8. Unscrew the upper exhaust pipe-to-exhaust manifold flange bolts. If they’re still difficult to loosen, spray the threads with some more penetrant, wait awhile and try again.
9. To loosen the clamp that secures the slip joint between the exhaust pipe behind the catalytic converter and the pipe ahead of the muffler, back off the nut. If it’s still difficult to loosen, spray the threads with some more penetrant, wait awhile and try again.
10. Remove the catalytic converter assembly. Remove and discard the old flange gasket.
11. Installation is the reverse of removal. Use a new flange gasket at the exhaust manifold mounting flange. Use new bolts at the front flange. Although the slip joint clamp doesn’t get as overheated as the exhaust manifold flange bolts, it’s still a good idea to use a new clamp. Coat the threads of the clamp and the exhaust manifold bolts with anti-seize compound to facilitate future removal. Tighten the fasteners securely.