Water pump – removal and installation
Warning: Wait until the engine is completely cool before beginning this procedure.
Removal
1. Disconnect the cable (s) from the negative battery terminal(s) (see Engine electrical systems).
2. Drain the cooling system (see Tune-up and routine maintenance). If the coolant is relatively new or in good condition, save it and reuse it.
3. Remove the drivebelt (see Tune-up and routine maintenance).
3.6L engine
4. Disconnect the IAT sensor electrical connector and remove the air filter housing (see Fuel and exhaust systems – gasoline engines).
5. Disconnect the heater and radiator hoses at the water pump.
6. Remove the idler pulley mounting bolt and idler pulley.
7. Remove the water pump mounting bolts, making sure to identify the four bolts that bolt directly to the timing chain cover.
8. Remove the pump and discard the gasket.
3.7L V6 and 4.7L V8 engines
9. Detach the engine-mounted viscous fan assembly from the water pump (Engine-mounted and radiator-mounted cooling fans – check and component replacement). Don’t try to remove it from the truck at this point.
10. Remove the radiator-mounted electric fan (Engine-mounted and radiator-mounted cooling fans – check and component replacement).
11. Disconnect the lower radiator hose from the water pump. If a hose sticks, grasp it near the end with a pair of adjustable pliers and twist it to break the seal, then pull it off. If the hose is deteriorated, cut it off and install a new one.
5.7L and 6.4L Hemi engines
12. Remove the air filter housing, the air inlet ducts and the resonator brackets (see Fuel and exhaust systems – gasoline engines).
13. Remove the fan assembly (Engine-mounted and radiator-mounted cooling fans – check and component replacement).
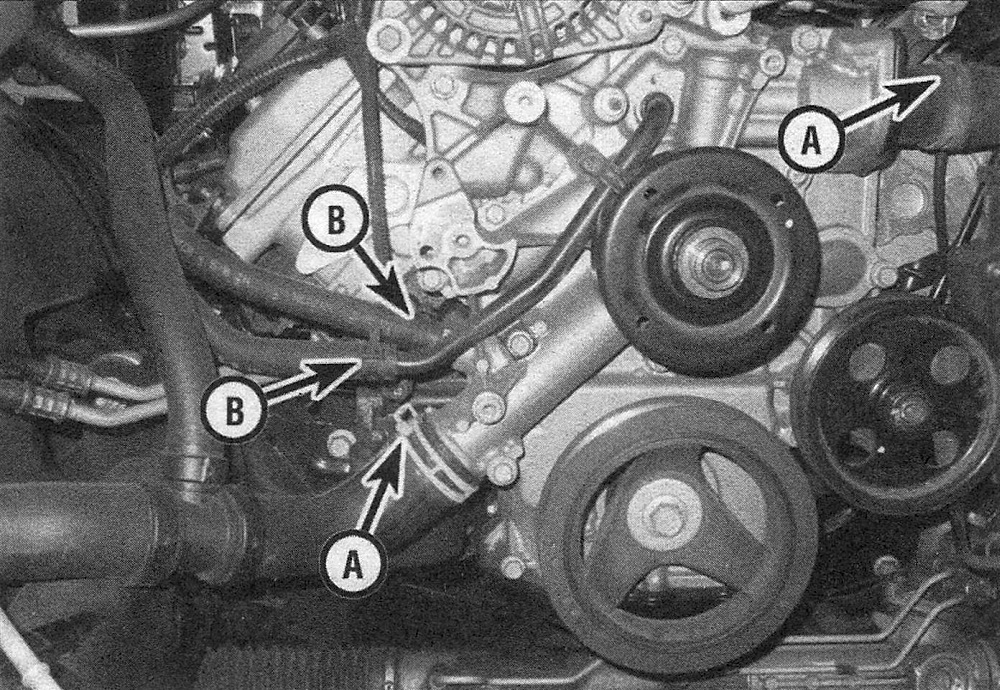
14. Disconnect the radiator hoses from the engine (see illustration), then move them out of the way. If a hose sticks, grasp it near the end with a pair of adjustable pliers and twist it to break the seal, then pull it off. If the hose is deteriorated, cut it off and install a new one.
8.14 Location of the radiator (A) and heater hoses (B) (Hemi engine)
15. Remove the drivebelt idler pulley and the tensioner.
16. Remove the top metal heater tube from the cylinder head.
17. On 6.4L models, disconnect EGR cooler hose then disconnect the temperature sensor electrical connector and move the harness out of the way.
6.7L diesel engine
18. Remove the air filter housing and the air intake pipe (see Fuel and exhaust systems – diesel engine).
19. Remove the alternator (see Engine electrical systems).
All engines
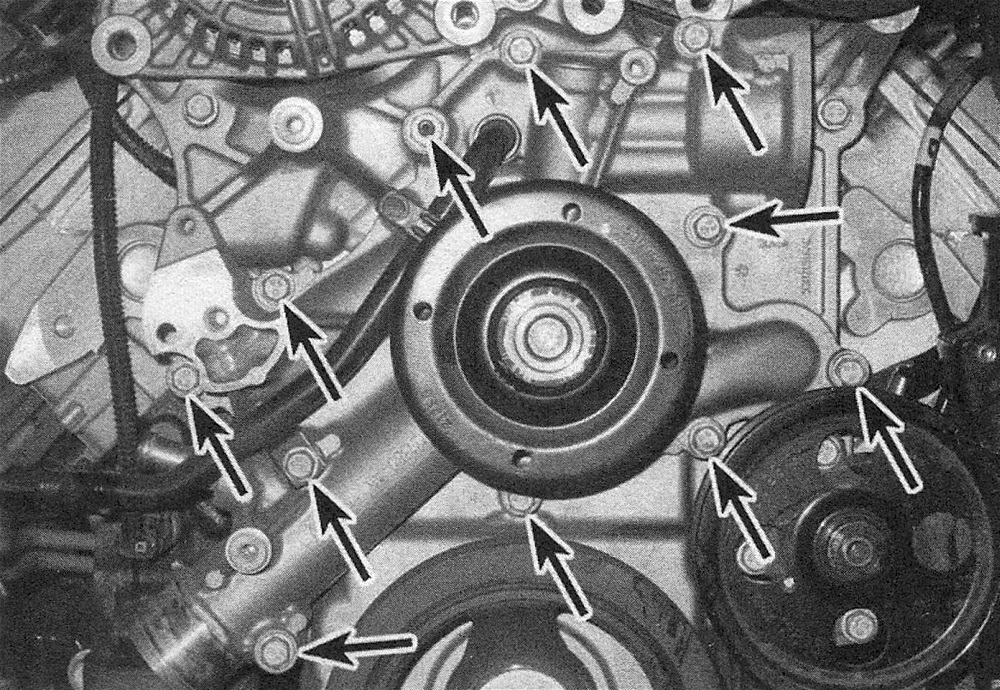
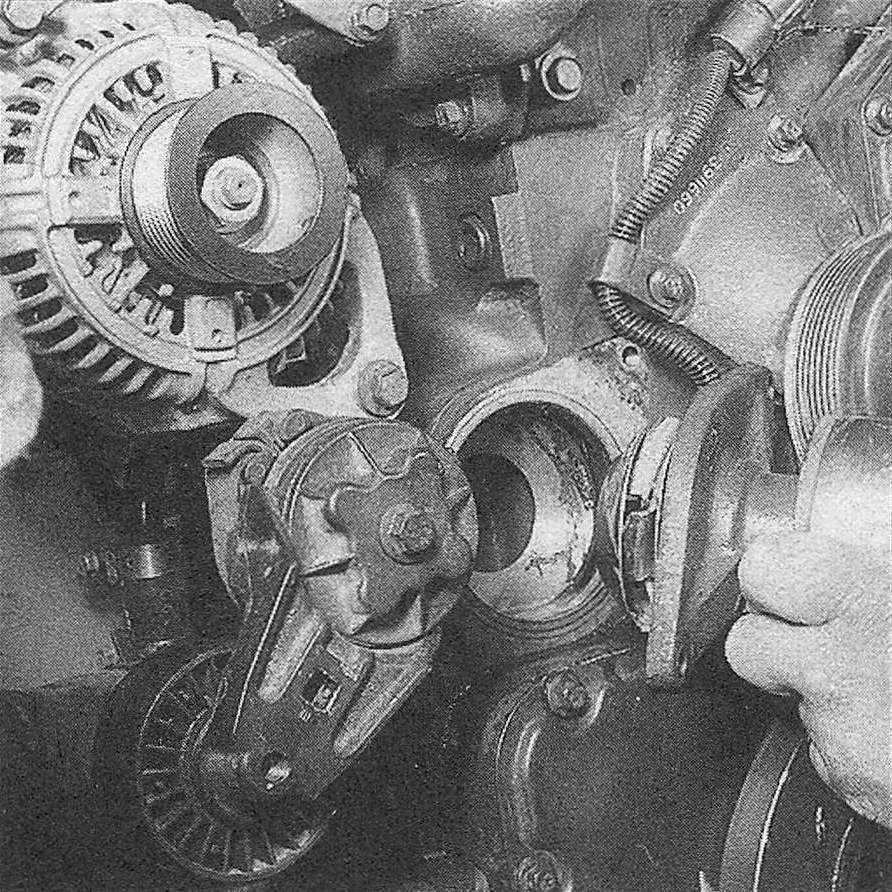
20. Remove the bolts and detach the water pump from the engine. Note the locations of the various lengths and different types of bolts as they’re removed to ensure correct installation (see illustrations).
8.20a Water pump bolt locations (Hemi engine)
8.20b Water pump removal (diesel engine)
Installation
21. Clean the bolt threads and the threaded holes in the engine to remove corrosion and sealant.
22. Compare the new pump to the old one to make sure they’re identical. If the old pump is being reused, check the impeller blades on the rear for corrosion. If any vanes are missing or badly corroded, replace the pump with a new one.
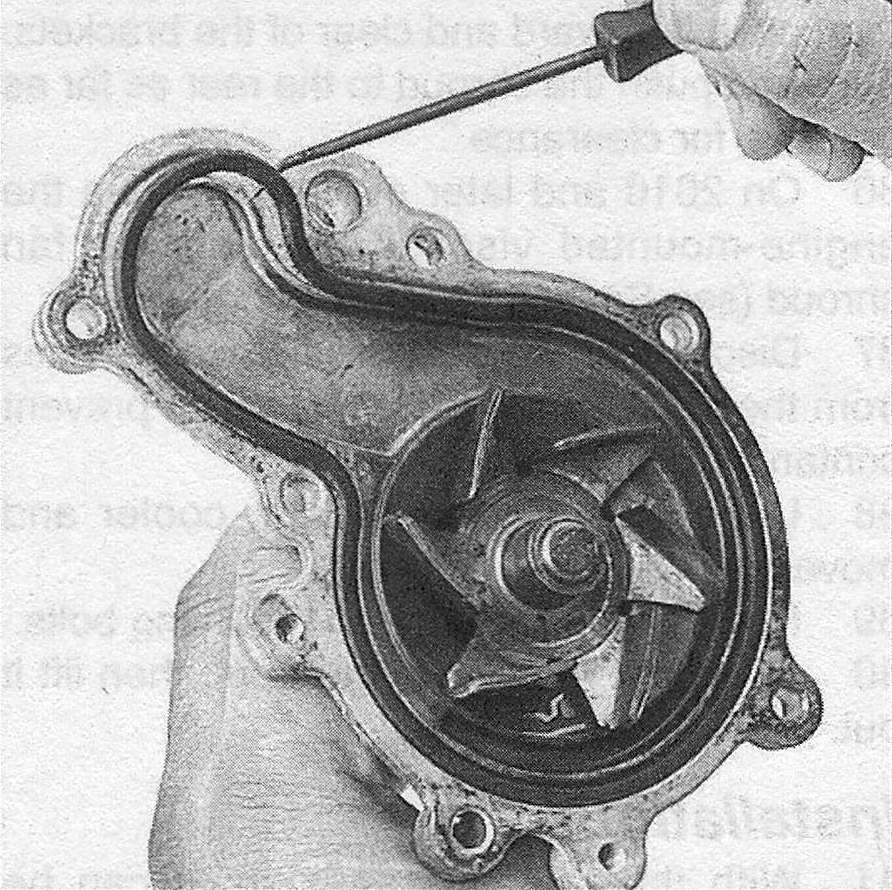
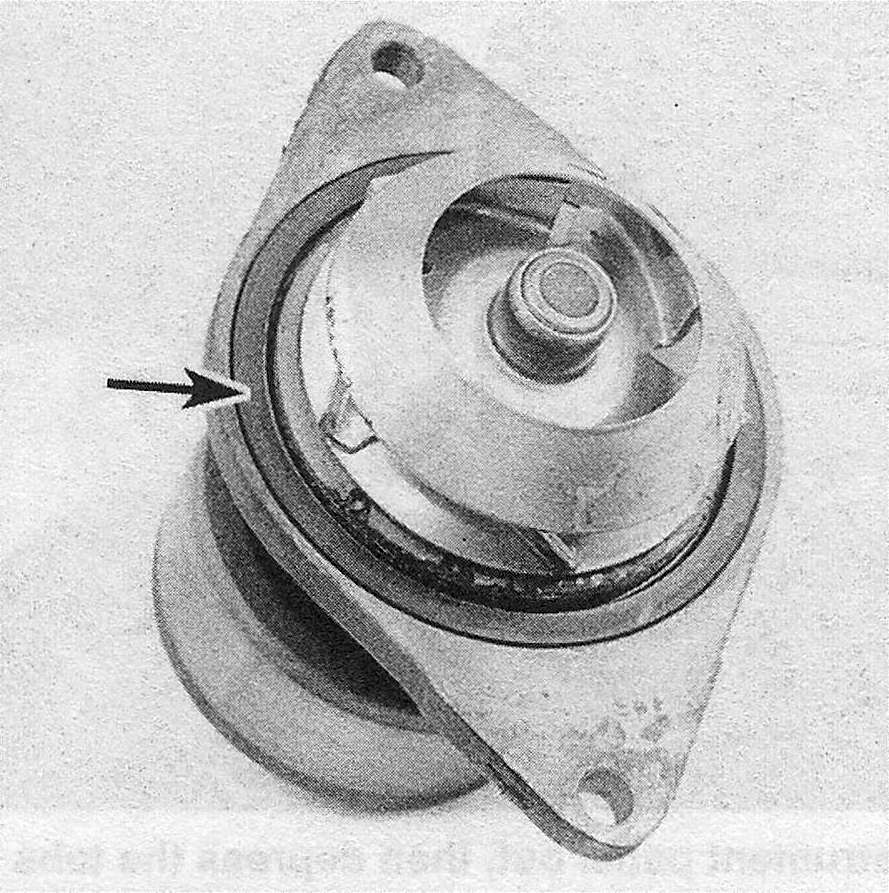
23. Remove all traces of old gasket material from the engine (and water pump, if the same one is to be installed) (see illustration).
8.23 First remove the rubber 0-ring from the water pump flange, then carefully scrape all gasket material and sealer from the face of the pump
24. Clean the engine and water pump mating surfaces with brake system cleaner.
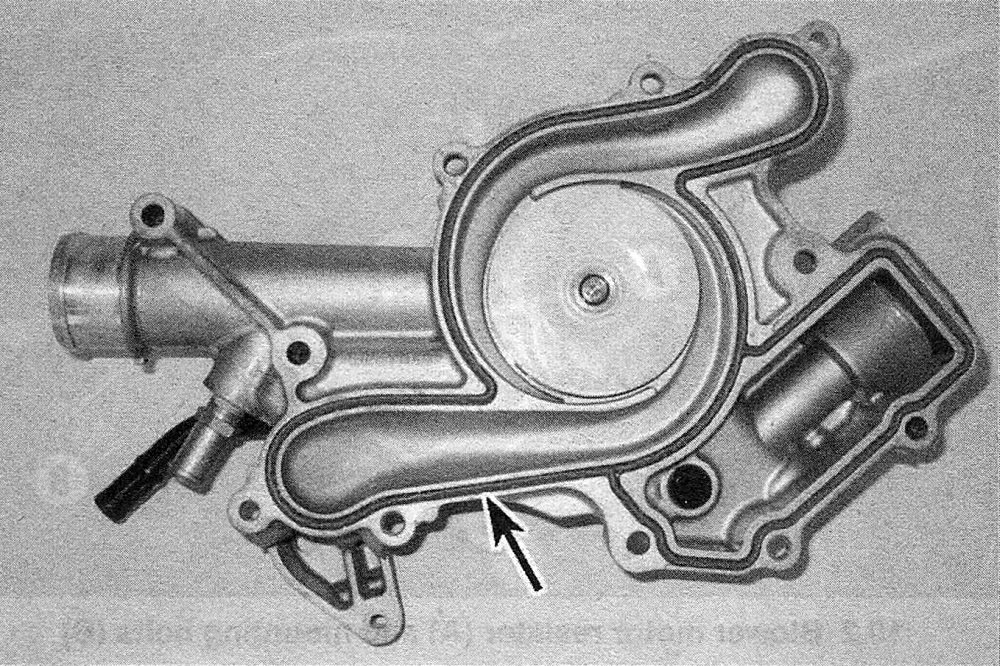
25. On water pumps equipped with an 0-ring seal, position it in the groove on the back of the water pump (see illustrations). Caution: Make sure the 0-ring is correctly seated in the water pump groove to avoid a coolant leak.
8.25a Install a new rubber 0-ring in the groove on the back of the pump (diesel engine shown)
8.25b Water pump 0-ring location – make sure it rests properly in its groove (Hemi engine)
26. On water pumps equipped with a gasket, apply a thin film of RTV sealant to the gasket mating surface of the new pump, and position the gasket on the pump. Apply a thin film of RTV sealant to the engine-side of the gasket and slip a couple of bolts through the pump mounting holes to hold the gasket in place.
27. Carefully attach the pump and 0-ring/ gasket to the engine and thread the bolts into the holes finger tight. On diesel engines, make sure the weep hole is pointing down.
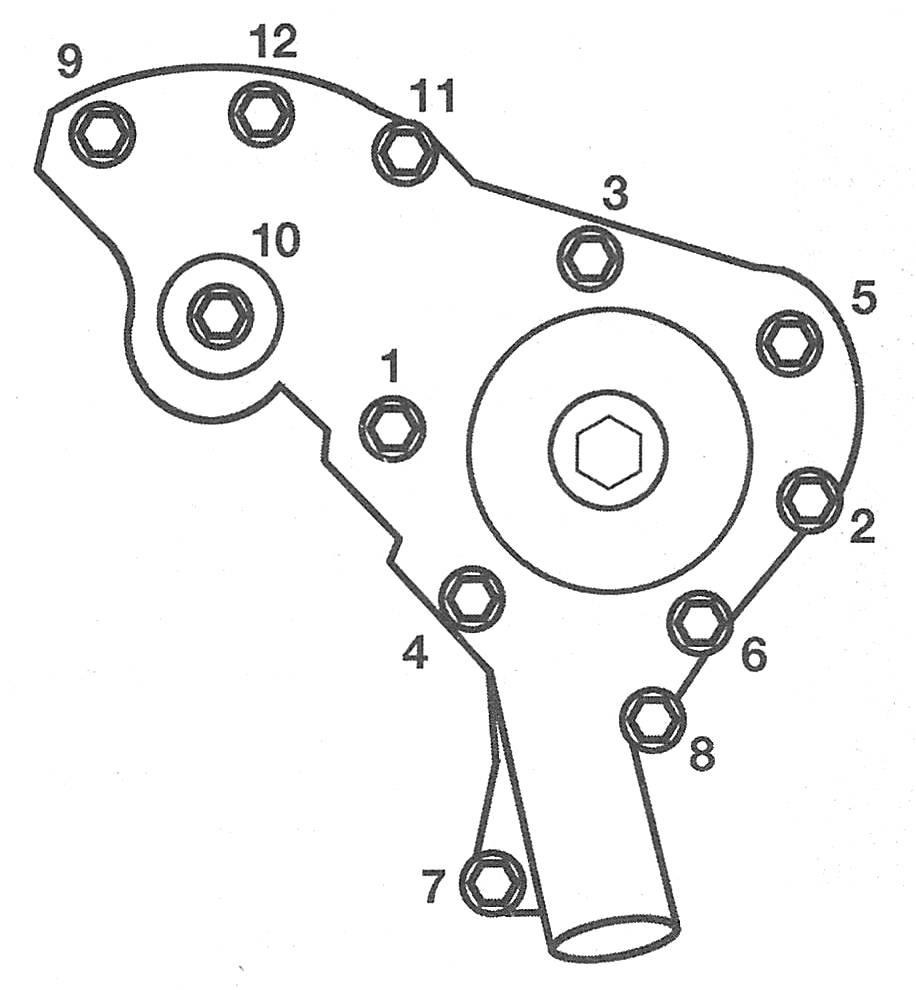
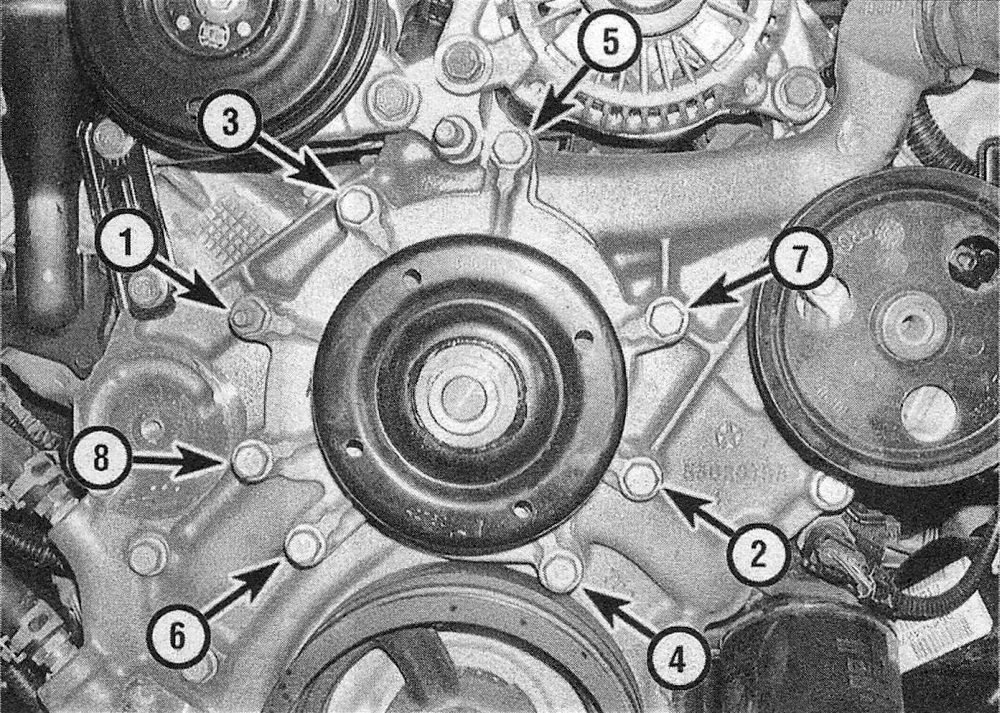
28. Install the remaining bolts and tighten them in a criss-cross pattern to the torque listed in this Chapter’s Specifications in 1/4-turn increments (see illustrations). Turn the water pump by hand to make sure it rotates freely.
8.28a 3.6L engine water pump bolt tightening sequence
8.28b Tighten the water pump bolts in a criss-cross pattern (3.7L V6/4.7L V8 engine shown)
29. Reinstall all parts removed for access to the pump.
30. Refill the cooling system (see Tune-up and routine maintenance). Run the engine and check for leaks.