Thermostat – check and replacement
Warning: Do not remove the radiator cap or expansion tank cap, drain the coolant or replace the thermostat until the engine has cooled completely.
Check
1. Before assuming the thermostat is to blame for a cooling system problem, check the coolant level, drivebelt tension (see Tune-up and routine maintenance) and temperature gauge operation.
2. If the engine seems to be taking a long time to warm up (based on heater output or temperature gauge reading), the thermostat is probably stuck open. Replace the thermostat with a new one.
3. If the engine runs hot, use your hand to check the temperature of the radiator hose that leads from the thermostat to the radiator. The thermostat is in different locations for each engine. If the hose isn’t hot, but the engine is, the thermostat is probably stuck closed, preventing the coolant inside the engine from escaping to the radiator. Replace the thermostat. Caution: Don’t drive the vehicle without a thermostat. On some models, the computer may stay in open-loop, potentially causing oil-sludge, excessive exhaust emissions/fuel consumption. On other models, the engine will operate in radiator bypass mode, which will cause it to overheat.
4. If the inlet radiator hose is hot, it means that the coolant is flowing and the thermostat is open. Consult the Troubleshooting section at the front of this manual for cooling system diagnosis.
Replacement
5. Disconnect the cable (s) from the negative battery terminal(s) (see Engine electrical systems).
6. Drain the cooling system to a level below the thermostat (see Tune-up and routine maintenance). If the coolant is relatively new or in good condition (Antifreeze/coolant – general information), save it and reuse it.
3.6L engine
7. Remove the air filter housing and resonator (see Fuel and exhaust systems – gasoline engines).
8. Follow the upper radiator hose to the engine to locate the thermostat housing.
3.7L V6 and 4.7L V8 engines
9. Raise the vehicle and support it securely on jackstands, then remove the splash shield.
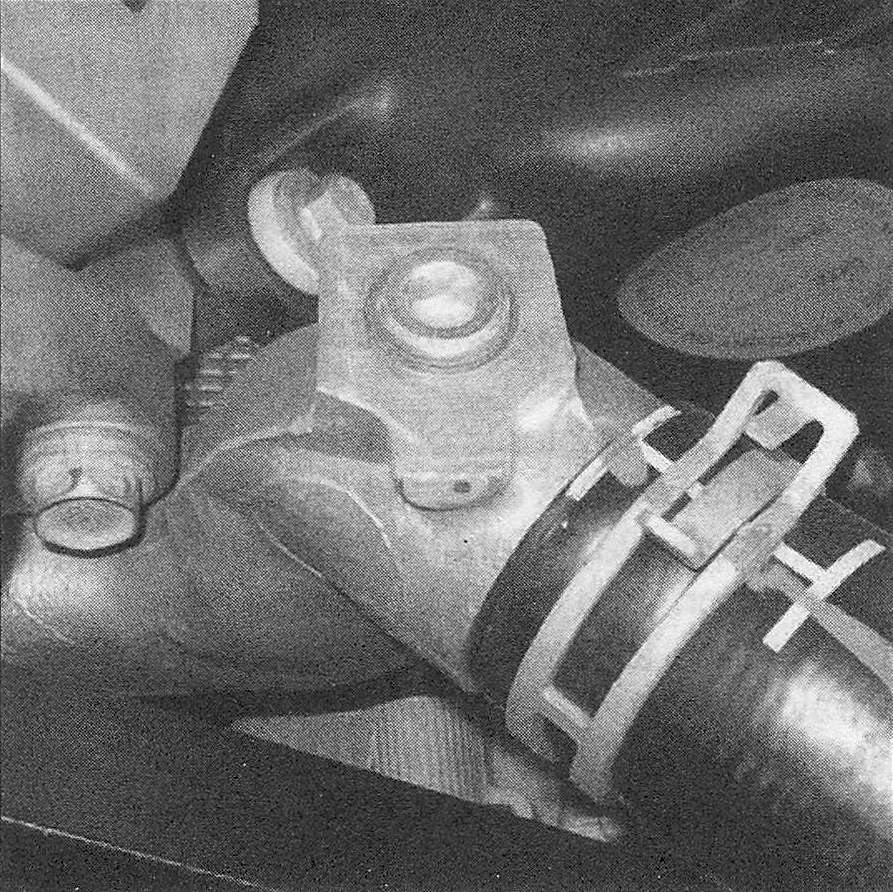
10. Follow the lower radiator hose to the engine to locate the thermostat housing (see illustration).
3.10 Thermostat housing location (4.7L V8 engine shown, 3.7L V6 similar)
5.7L and 6.4L Hemi engine
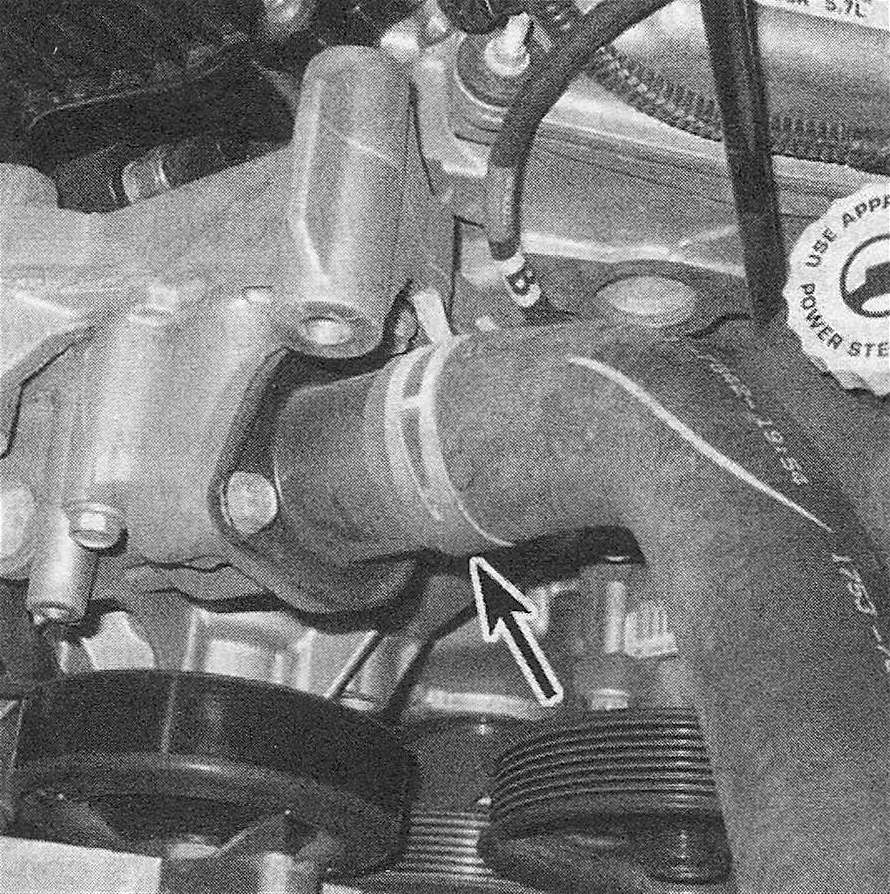
11. Follow the upper radiator hose to the engine to locate the thermostat housing (see illustration).
3.11 Thermostat housing location (Hemi engine) – the air conditioning compressor is removed for clarity
Diesel engine
12. Follow the upper radiator hose to the engine to locate the thermostat housing.
13. Remove the cooling system vent plug; it’s located next to the EGR cooler.
14. Disconnect the wiring from the exhaust gas pressure sensor, then remove the exhaust pressure tube from the thermostat housing.
15. Remove the interfering EGR crossover tube and the heat shield.
All models
16. Squeeze the tabs on the hose clamp to loosen it from the hose (s), then reposition the clamp several inches back up the hose. Detach the hose(s) from the thermostat housing. If the hose is stuck, grasp it near the end with a pair of adjustable pliers and twist it to break the seal, then pull it off. If the hose is old or deteriorated, cut it off and install a new one.
17. If the outer surface of the thermostat housing that mates with the hose is deteriorated (corroded, pitted, etc.) it may be damaged further by hose removal. If it is, the thermostat housing will have to be replaced.
18. Remove the thermostat housing from the engine. If the housing is stuck, tap it with a soft-face hammer to jar it loose. Be prepared for some coolant to spill as the gasket seal is broken.
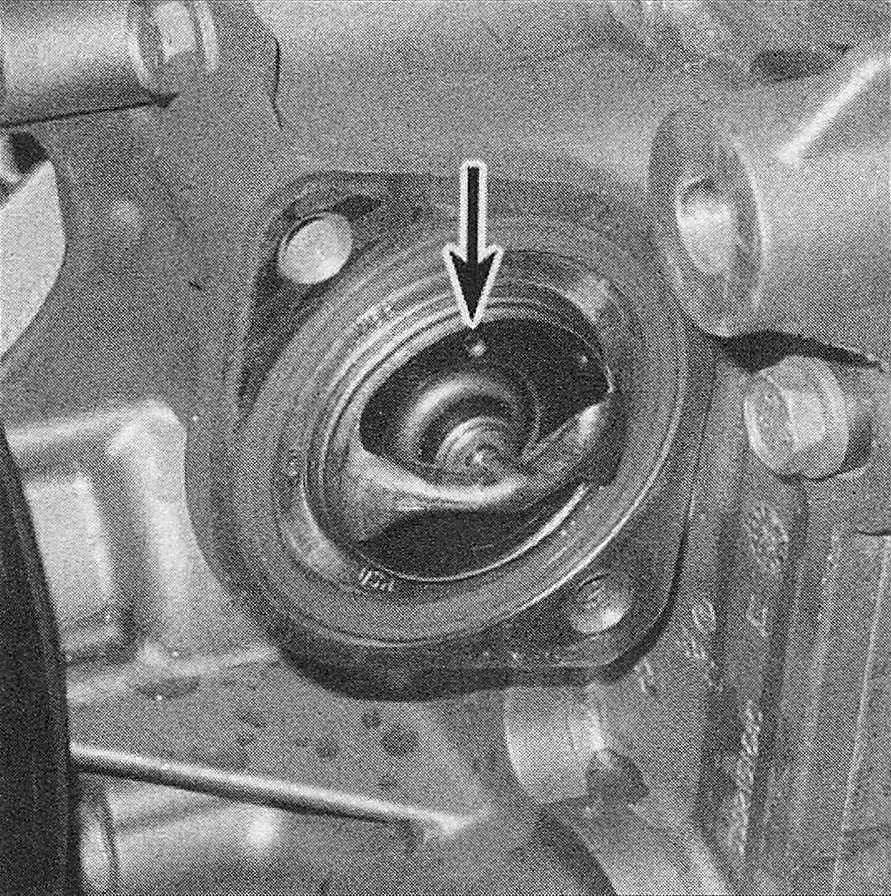
19. Note how the thermostat is installed (which end is facing up, or out, and the position of the air bleed jiggle valve, if equipped) and remove it from the engine (see illustration).
3.19 Location of the jiggle valve on the thermostat (Hemi engine)
Note: On 3.6L engines, the thermostat is an integral part of the housing and must be replaced as an assembly.
20. Remove the rubber gasket from around the thermostat.
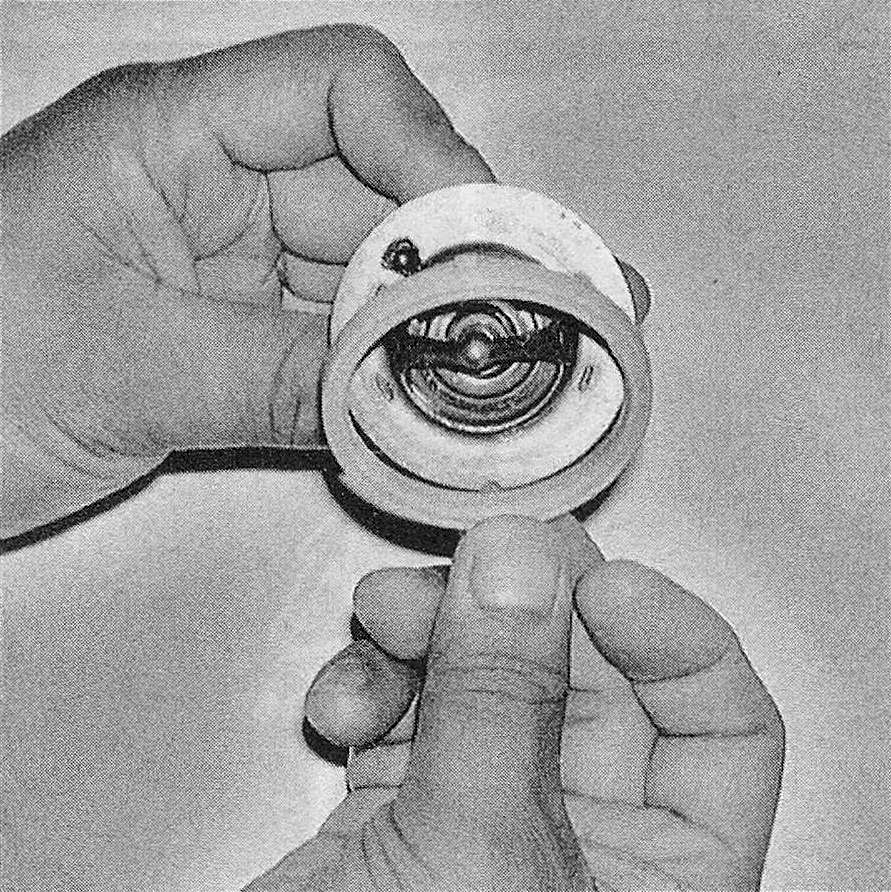
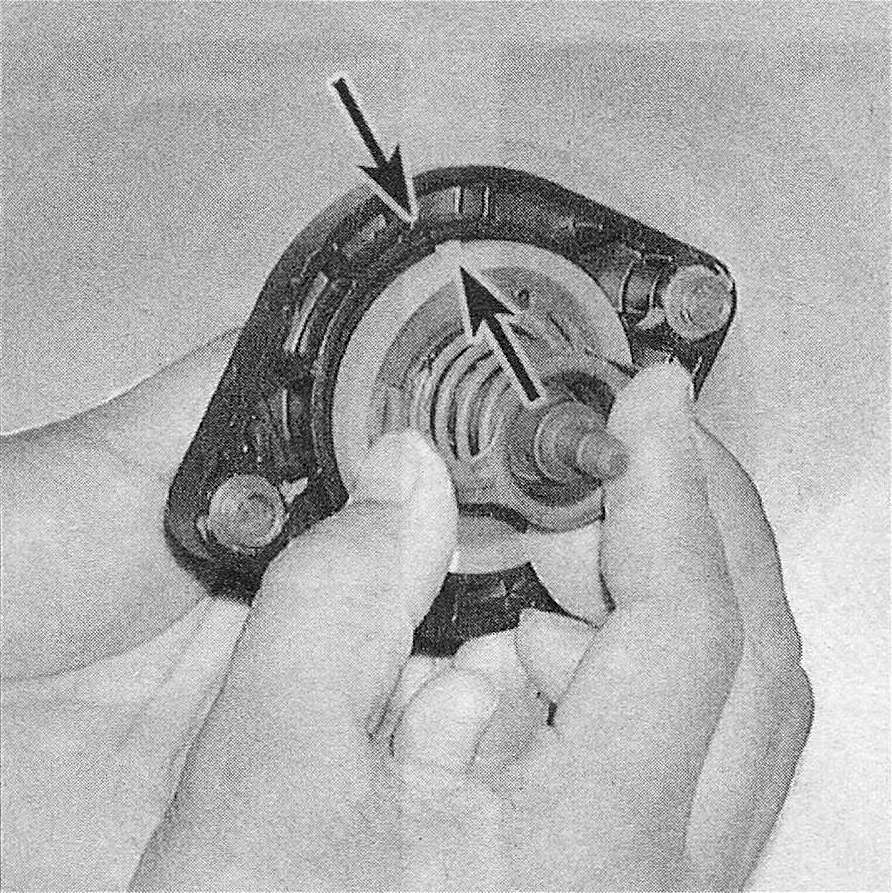
21. Install a new rubber gasket around the thermostat. Make sure to align the rubber tab on the inside of the 0-ring groove with the notch on the thermostat (see illustration). Then align the rubber tab on the outside of the gasket with the notch on the thermostat housing and insert the thermostat and gasket into the thermostat housing (see illustration). Note: Some models are not equipped with alignment notches on the thermostat. Simply install the rubber gasket around the thermostat (see illustration).
3.21a On 3.7L V6 engines, align the notch on the thermostat with the rubber tab on the gasket’s inner groove …
3.21b … then align the tab (lower arrow) on the outer edge of the gasket with the notch in the thermostat housing (upper arrow) and insert the thermostat into the housing
3.21c On models without alignment notches, install a new rubber gasket around the perimeter of the thermostat

22. Install the thermostat housing and bolts onto the engine. Tighten the bolts to the torque listed in this Chapter’s Specifications.
23. Reattach the hose (s) to the fitting(s) and tighten the hose clamp(s) securely.
24. Refill the cooling system (see Tune-up and routine maintenance).
25. Start the engine and allow it to reach normal operating temperature, then check for leaks and proper thermostat operation.