Radiator – removal and installation
Warning: Wait until the engine is completely cool before beginning this procedure.
Removal Gasoline engines
1. Disconnect the cable from the negative battery terminal (see Engine electrical systems).
2. Raise the vehicle and support it securely on jackstands.
3. Drain the cooling system (see Tune-up and routine maintenance).
4. Remove the cover from beneath the radiator, if so equipped.
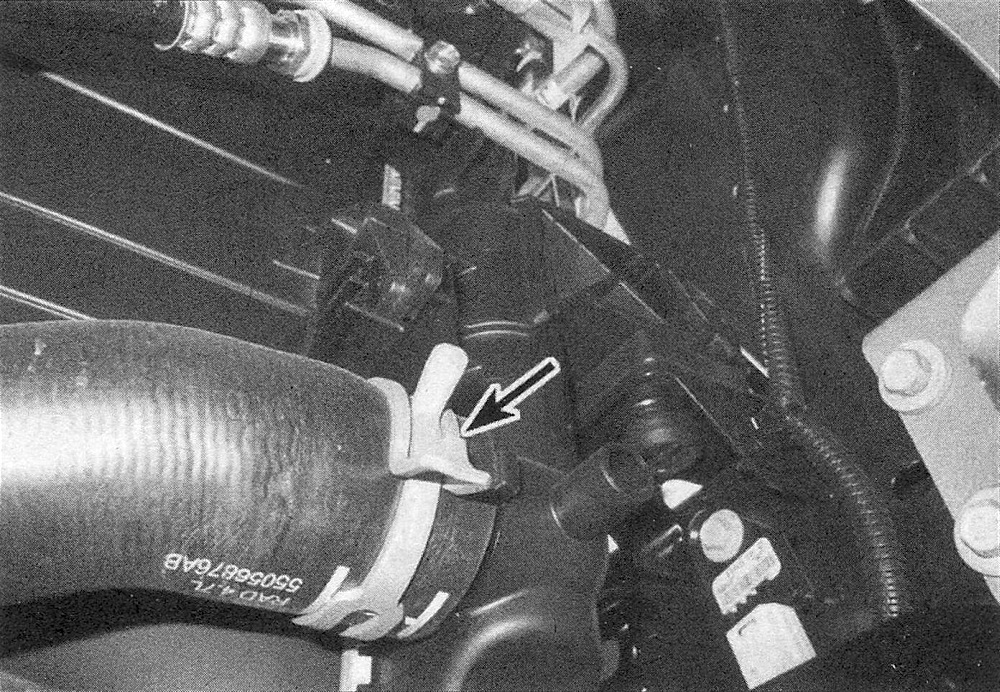
5. Remove the lower radiator hose (see illustration).
6.5 Use large pliers to remove the radiator hose clamps
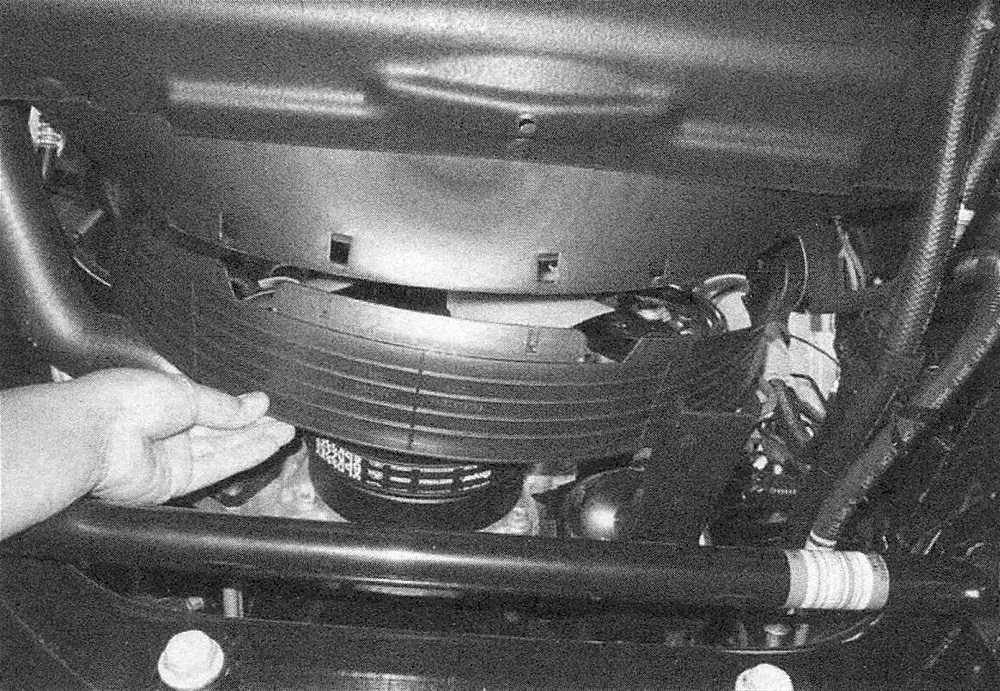
6. On 2012 and later models, remove the lower fan shroud (see illustration).
6.6 2012 models have a lower fan shroud that must be removed
7. Remove the lower electric fan wiring harness clip.
8. Lower the truck.
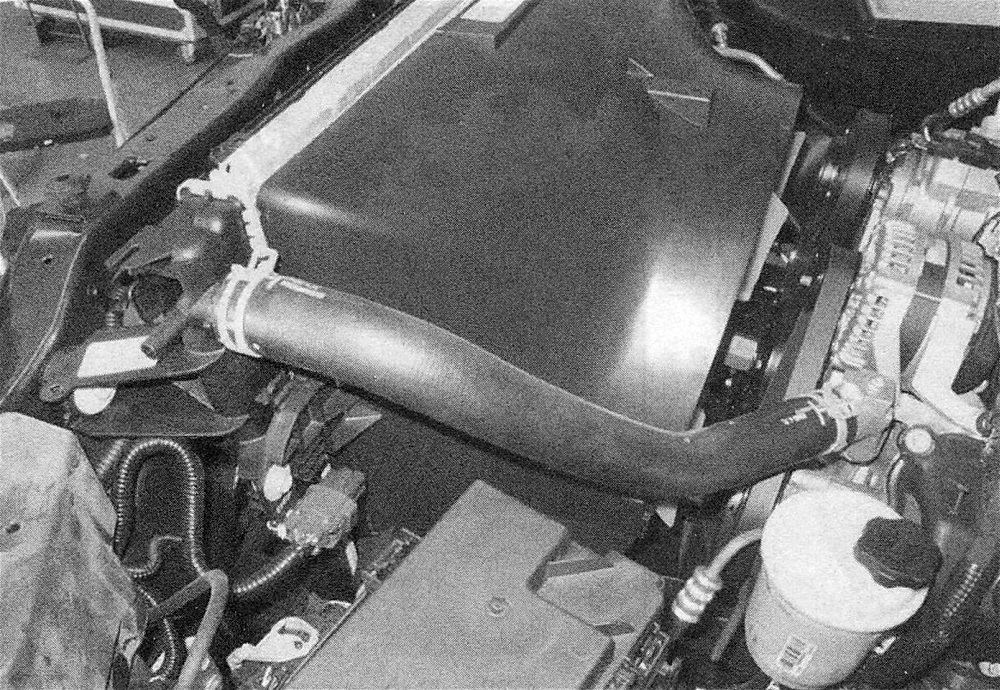
9. Remove the upper radiator hose (see illustration).
6.9 Typical 4.7L V8 upper radiator hose connections
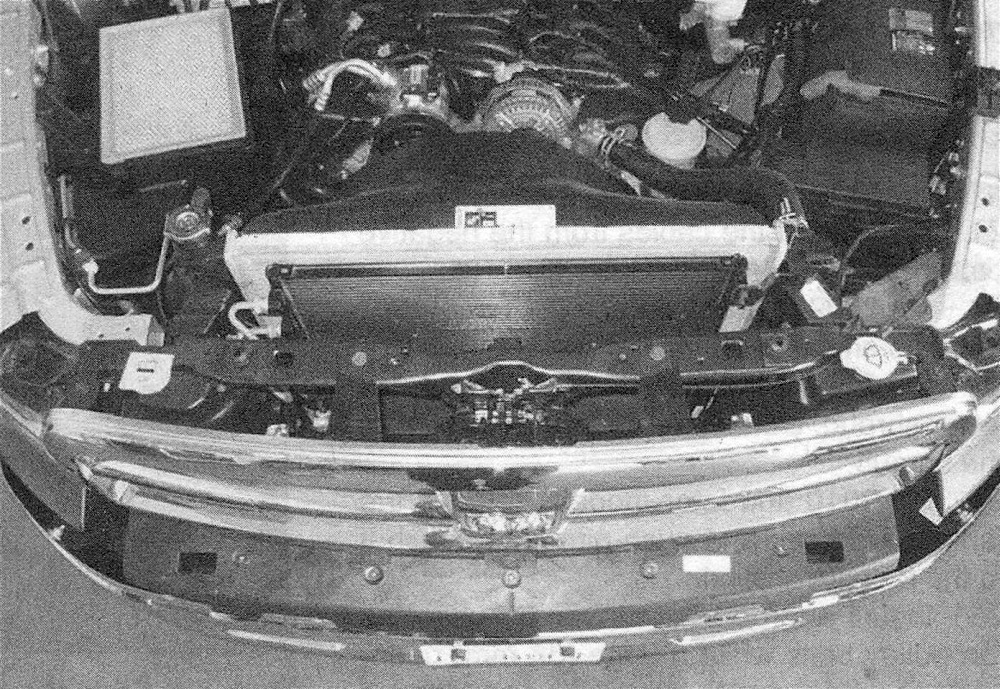
10. Remove the upper radiator cover (see illustration).
6.10 Remove the radiator upper cover for access to the radiator and air conditioning condenser
11. On 2009 through 2011 models, remove the engine-mounted viscous fan (Engine-mounted and radiator-mounted cooling fans – check and component replacement).
12. Remove the grille (see Body).
13. On automatic transmission-equipped vehicles, unbolt the transmission cooler lines from the radiator.
2009 through 2011 models
14. Remove the coolant reservoir (Coolant reservoir – removal and installation) and the windshield washer reservoir.
15. Remove the bolts from the front of the transmission cooler and air conditioning condenser.
16. Remove the top center clip that secures the electric fan to the radiator.
17. On automatic transmission-equipped vehicles, disconnect the transmission cooler lines from the cooler. Seal the openings to prevent contamination.
18. Detach the air conditioning compressor and transmission cooler from the radiator at the left side. Tie the cooler securely so it can’t fall.
19. Remove the fan shroud mounting bolts, detach it from the retainers at the bottom, then slide it to the rear as far as possible.
20. Release the fan clips from the radiator. Pull the viscous engine-mounted fan, the shroud and the electric fan out together.
2012 and later models
21. Unbolt the jumper line tapping block from the center right side of the radiator.
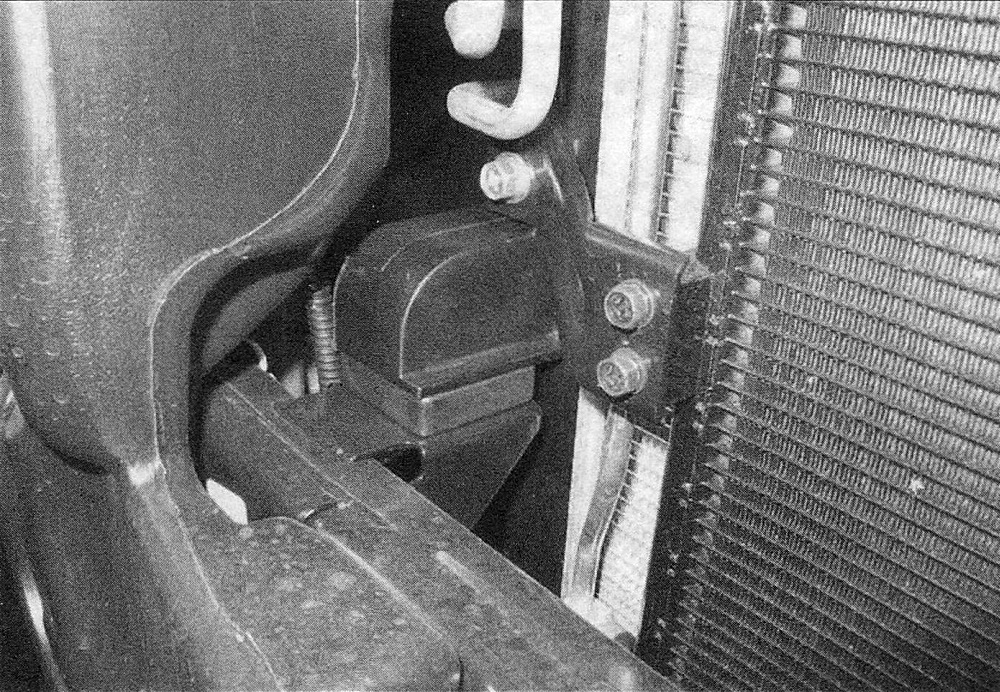
22. Detach the three brackets from the air conditioning condenser and transmission cooler (see illustration).
6.22 Typical condenser brackets to be removed from 2012 models
23. Without disconnecting the air conditioning lines, carefully release the cooler from the clip at the left end of the radiator.
24. Disconnect the wiring from the electric fan, then release the upper fan clips from the radiator.
25. Remove the fan shroud mounting bolts, detach it from the retainers at the bottom, then slide it to the rear as far as possible.
26. Remove the fan shroud and the electric fan together.
27. Disconnect the overflow hose from the filler neck of the radiator.
All models
28. Remove the upper radiator mounting bolts.
29. Lift the radiator from the engine compartment. Don’t spill coolant on the vehicle or scratch the paint. Also be careful not to damage the cooling fins of the transmission cooler or power steering cooler.
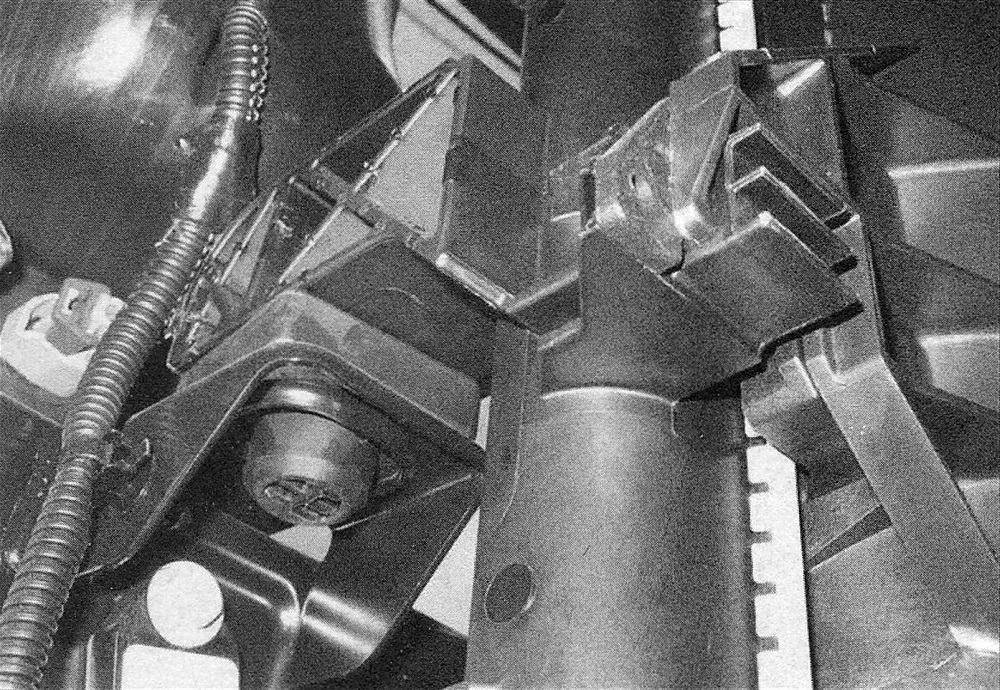
30. Whenever the radiator is removed from the vehicle, make note of the location of all rubber mounting cushions (see illustration). If they’re cracked, hardened or otherwise deteriorated, replace them.
6.30 Inspect the radiator mounts for damage
Diesel engine
31. Disconnect the cables from the negative battery terminals (see Engine electrical systems).
32. Drain the cooling system (see Tune-up and routine maintenance).
33. Disconnect the sensor wiring harnesses, then remove the air filter housing and intake tube (see Chapter Fuel and exhaust systems – gasoline engines ; Fuel and exhaust systems – diesel engine ).
34. Detach the coolant reservoir hose from the top of the radiator. On 2009 models, also detach the windshield washer reservoir hose and the battery cable, then remove the power steering cooler mounting bolts and move it aside.
35. On 2009 models, remove the fan shroud mounting nuts from the mounting brackets, then push it forward and clear of the brackets. Turn and push the shroud to the rear as far as possible for clearance.
36. On 2010 and later models, remove the engine-mounted viscous fan and the fan shroud (Engine-mounted and radiator-mounted cooling fans – check and component replacement).
37. Disconnect the transmission cooler lines from the cooler. Plug the openings to prevent contamination.
38. Unbolt the power steering cooler and move it aside.
39. Remove the radiator top mounting bolts.
40. Angle the radiator to the front, then lift it out.
Installation
41. With the radiator removed, it can be inspected for leaks and damage. If it needs repair, have a radiator shop or dealer service department perform the work as special techniques are required.
42. Bugs and dirt can be removed from the front of the radiator with a garden hose, followed by compressed air and a soft brush. Don’t bend the cooling fins as this is done. When blowing out the core, direct the hose or air line only from the engine side out.
43. Inspect the radiator mounts for deterioration and make sure there’s nothing in them when the radiator is installed.
44. Installation is the reverse of removal.
45. Fill the cooling system with the proper mixture of antifreeze and water (see Tune-up and routine maintenance).
46. Start the engine and check for leaks. Allow the engine to reach normal operating temperature, indicated by the inlet radiator hose becoming hot. Recheck the coolant level and add more if required.