Heater core – removal and installation
Warning: The models covered by this manual are equipped with a Supplemental Restraint System (SRS), more commonly known as airbags. Always disarm the airbag system before working in the vicinity of any airbag system component to avoid the possibility of accidental deployment of the airbag, which could cause personal injury (see Chassis electrical system). Do not use a memory saving device to preserve the PCM’s memory when working on or near airbag system components.
Warning: The air conditioning system is under high pressure. Do not loosen any hose fittings or remove any components until after the system has been discharged. Air conditioning refrigerant must be properly discharged into an EPA-approved recovery/recycling unit at a dealer service department or an automotive air conditioning repair facility. Always wear eye protection when disconnecting air conditioning system fittings.
Note: Heater core removal is a difficult task for the home mechanic. It can be done with slow, careful attention to detail, but many fasteners and wiring connectors are difficult to get at behind the instrument panel. The entire instrument panel must be removed to allow the heater/air conditioning unit to be removed from the vehicle.
Removal
1. Have the air conditioning system discharged (see Warning above).
2. Disconnect the cable (s) from the negative battery terminal(s) (see Engine electrical systems).
3. Drain the cooling system (see Tune-up and routine maintenance).
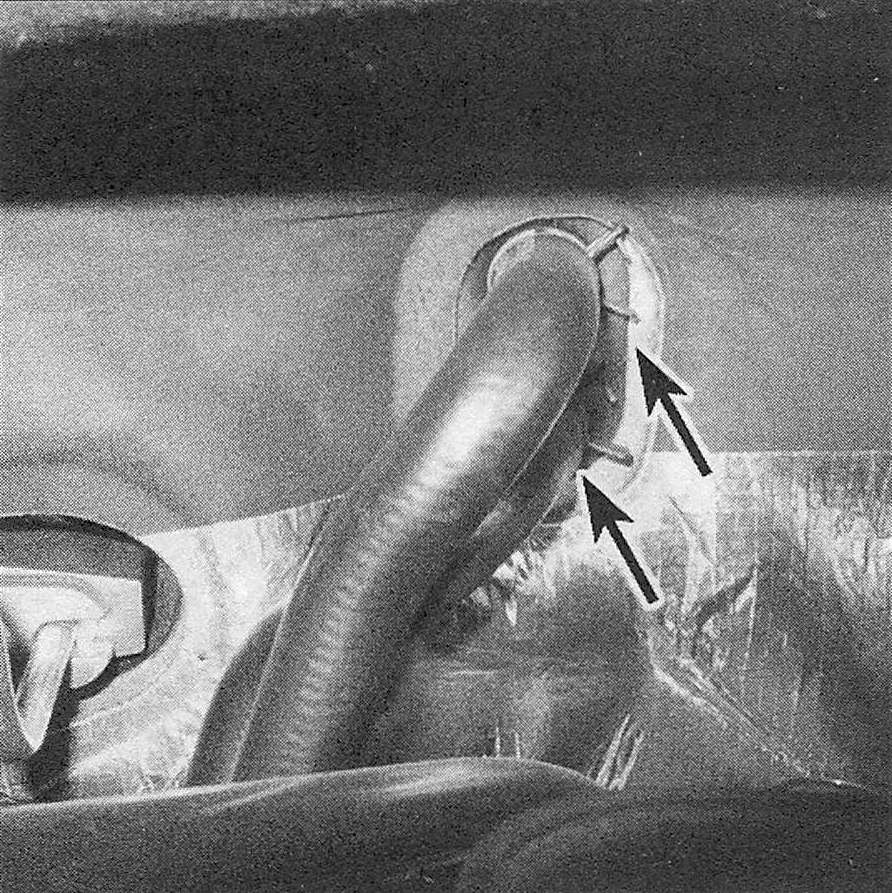
4. Disconnect the heater hoses at the heater core on the right side of the engine compartment at the firewall (see illustration). Tape or plug all openings.
12.4 Slide the clamps away and detach the hoses from the heater core at the engine compartment firewall
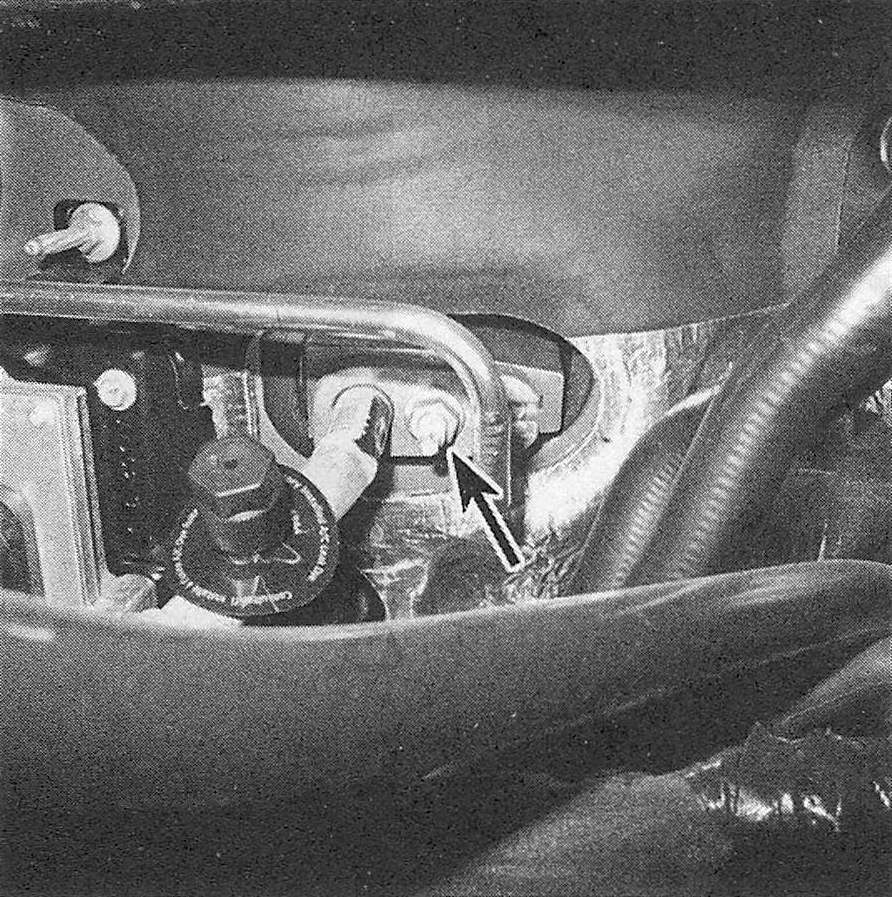
5. Disconnect both air conditioning lines from the firewall (see illustration).
12.5 Air conditioning line connection at the firewall
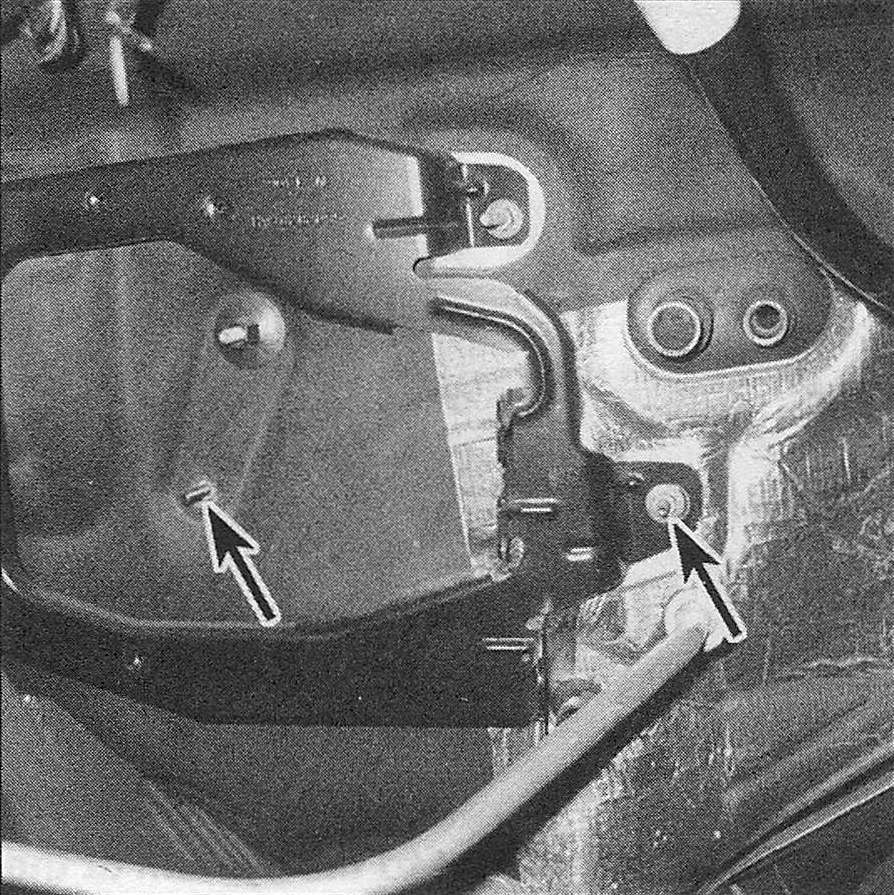
6. Remove the two nuts on the firewall in the engine compartment that retain the heater housing (see illustration). On some models it will be necessary to first remove the Powertrain Control Module (PCM) for access (see Emissions and engine control systems).
12.6 Remove the two heater/air conditioning unit nuts from the studs in the engine compartment (components removed for clarity)
7. Remove the instrument panel (see Body). On models with a center console, also remove the air duct that goes to the console.
8. Remove the rear floor air ducts, if equipped.
9. Remove the lower bolt and the two nuts that retain the heater housing, then remove the complete heater housing assembly from the vehicle.
10. Remove the foam insulator from the water pipe flange, then remove the two screws that attach the flange.
11. Release the tab and remove the flange.
12. Remove the heater core from the housing.
Installation
13. Before installing the heater core, make sure all foam seals are in place on the heater core and evaporator coil tubes.
14. Slide the heater core into the housing, engage the tab and install the screws.
15. Reinstall the remaining components in the reverse order of removal. Note: When installing the heater/air conditioning unit, avoid pinching any wiring harnesses between the body and the housing.
16. Refill the cooling system (see Tune-up and routine maintenance).
17. Start the engine and check for proper operation.
18. Have the air conditioning system evacuated, recharged and leak-tested by the shop that discharged it.