Engine-mounted and radiator-mounted cooling fans – check and component replacement
Check
Warning: Keep hands, tools and clothing away from the fan when the engine is running. To avoid injury or damage DO NOT operate the engine with a damaged fan. Do not attempt to repair fan blades – replace a damaged fan with a new one.
Engine -mounted cooling fan Warning: While checking the fan, make sure that the engine is NOT started. If it is, you could be severely injured.
Warning: Before the fan clutch operation can be checked in Step 5, the engine must be warmed up to its normal operating temperature and then turned off. Even though the engine won’t be running during this check, it’s HOT! Make sure that you don’t touch the engine itself during this check, or you could be burned.
Note: Diesel engines are equipped with an electronically controlled viscous fan that uses the PCM to control the operation of the fan during warm-up and driving conditions. If the engine is overheating because the fan isn’t coming on, have the electronically controlled viscous fan checked by a dealer service department or other qualified repair shop.
1. Symptoms of fan clutch failure are continuous noisy operation, looseness, vibration and/or silicone fluid leaking from the clutch.
Cold engine checks
2. Rock the fan back and forth by hand to check for excessive bearing play.
3. Turn the blades by hand. The fan should turn freely.
4. Visually inspect for substantial fluid leakage from the fan clutch assembly, a deformed bi-metal spring or grease leakage from the cooling fan bearing. If any of these conditions exist, replace the viscous fan clutch.
Hot engine check
5. Start the engine and allow it to warm up to its normal operating temperature. When the engine is fully warmed up, turn off the engine. Turn the fan by hand. Some resistance should be felt. If the fan turns easily, replace the fan clutch.
Radiator-mounted electric cooling fan
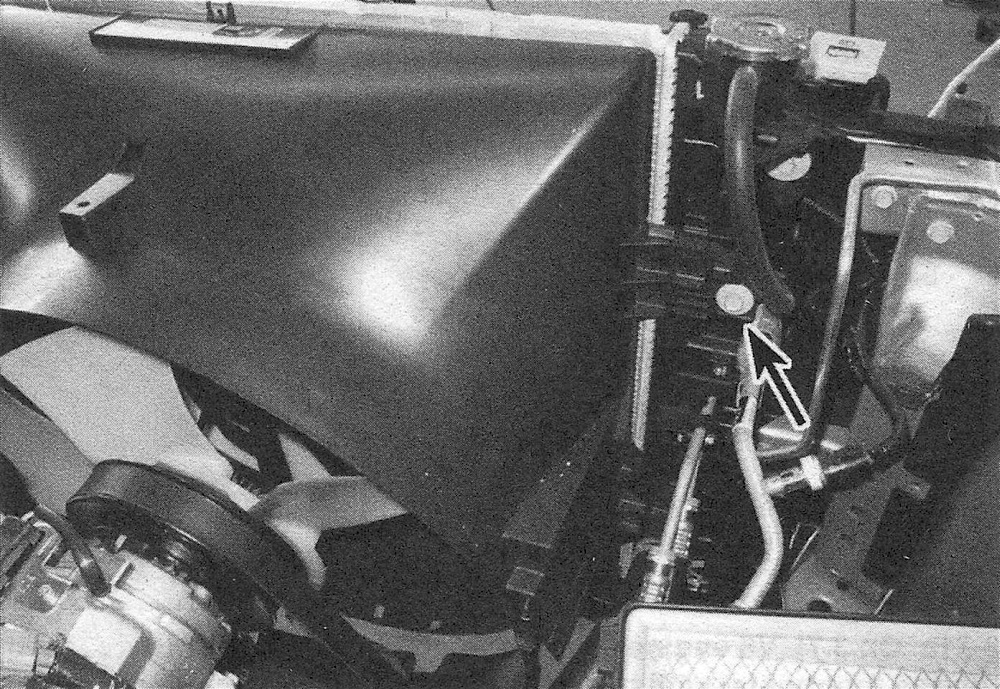
6. If the cooling fan is not coming on when the A/C is selected or the engine temperature rises to an excessive level, unplug the fan motor electrical connector, then connect one of the two terminals of the motor directly to the battery with a fused jumper wire (see illustration). Connect the other terminal to ground using another fused jumper wire. If the fan motor doesn’t come on, replace the motor. Caution: Do not apply battery power to the harness side of the connector. Test ONLY the cooling fan motor.
4.6 Location of the electric fan electrical connector (4.7L V8 engine)
7. If the fan motor is okay, but it isn’t coming on when the NC is selected or the engine gets hot, the fan relay might be defective. A relay is used to control a circuit by turning it on and off in response to a control decision by the Powertrain Control Module (PCM). These control circuits are fairly complex, and checking them should be left to a dealer service department or other qualified repair shop. Sometimes, the control system can be fixed by simply identifying and replacing a bad relay.
8. If the relay is okay, check all wiring and connections to the fan motor. Refer to the wiring diagrams at the end of Chapter Chassis electrical system.
Component replacement Gasoline engines
Note: The viscous (engine-mounted) and electric (radiator-mounted) cooling fans are removed together.
Note: Some models do not have an engine-mounted viscous fan.
9. Disconnect the cable from the negative battery terminal (see Engine electrical systems).
10. Remove the rivets and push-pin clips, then remove the radiator top cover.
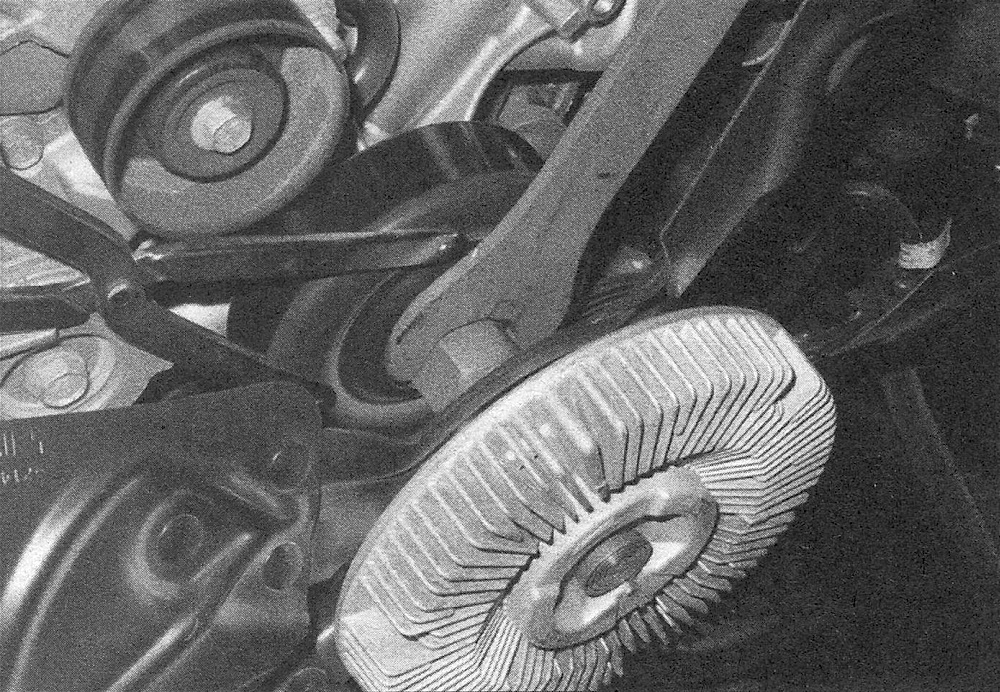
11. Hold the engine fan pulley. You can use a pin spanner or a strap wrench. If using a strap wrench, you’ll have to first remove the drivebelt (see Tune-up and routine maintenance).
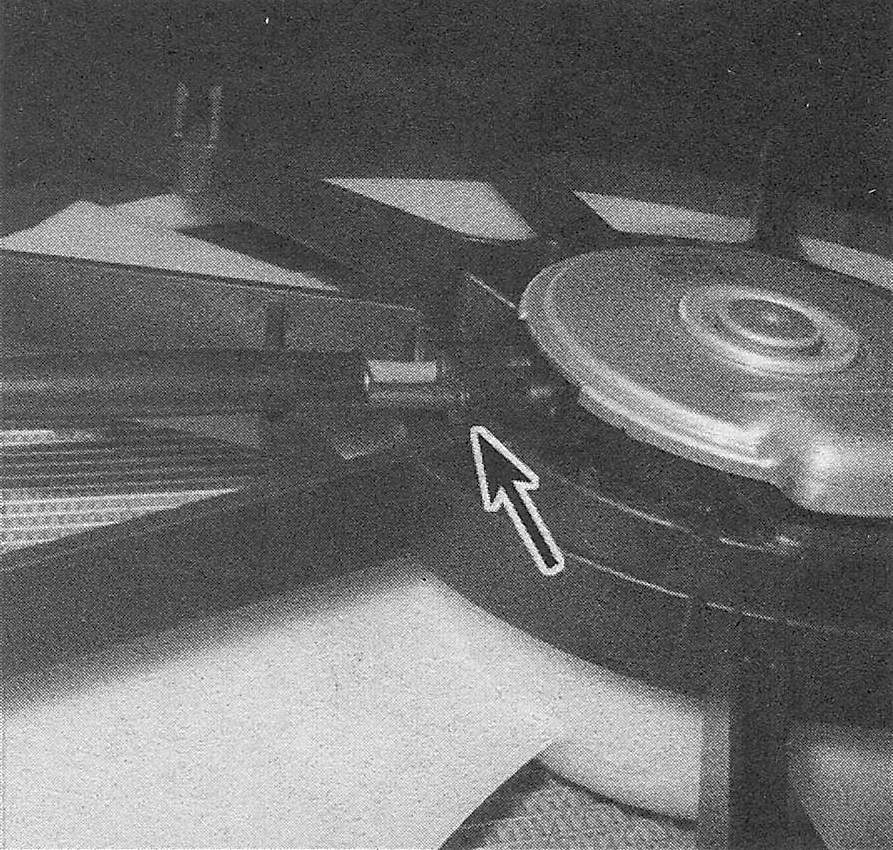
12. Unscrew the viscous fan mounting nut with a 36mm wrench or adjustable wrench (see illustration).
4.12 Use a pin spanner wrench or a strap wrench to prevent the water pump pulley from turning, then loosen the fan clutch nut
13. Remove the fan shroud bolts (see illustration).
4.13 Typical fan shroud mounting bolt
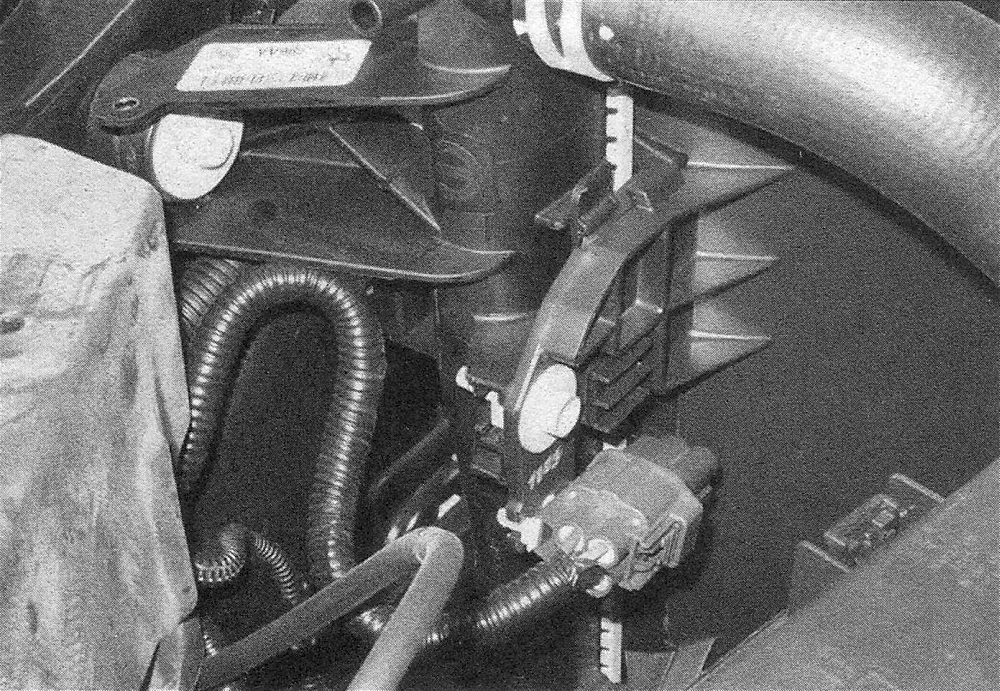
 14. Disconnect the wiring from the fans (see illustration).
4.14 Disconnect this plug when removing the electric fan assembly – a shroud mounting bolt is directly above it
15. Detach the clips at the lower section of the fan shroud.
16. Release the clips from the fan.
17. Lift the complete viscous fan, electric fan and shroud assembly up and out of the vehicle. Caution: Set the viscous fan in a vertical position. If it’s allowed to lie flat, it may leak fluid into the bearing and damage it.
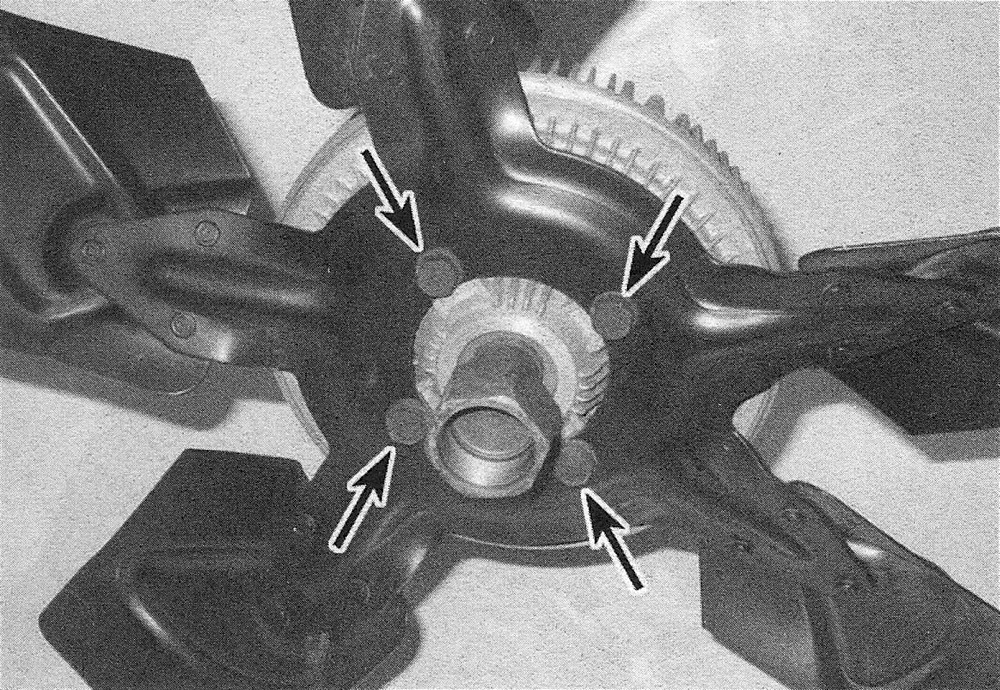
18. Working on the bench, remove the cooling fan mounting bolts from the viscous fan clutch (see illustration).
4.18 Remove the four bolts retaining the cooling fan to the fan clutch (Hemi engine shown, other models similar)
19. Installation is the reverse of removal. Tighten the fan clutch-to-cooling fan bolts to the torque Specifications listed in this Chapter. Tighten the fan clutch securely.
20. Remove the clip to detach the motor from the fan, then unbolt the fan from its frame (see illustrations). Warning: To avoid possible injury or damage, DO NOT operate the engine with a damaged fan. Do not attempt to repair fan blades – replace a damaged fan with a new one. Caution: Some models are equipped with REVERSE engine cooling fans. ONLY install cooling fans and fan clutches marked REVERSE, or the engine may be overheated and damaged.
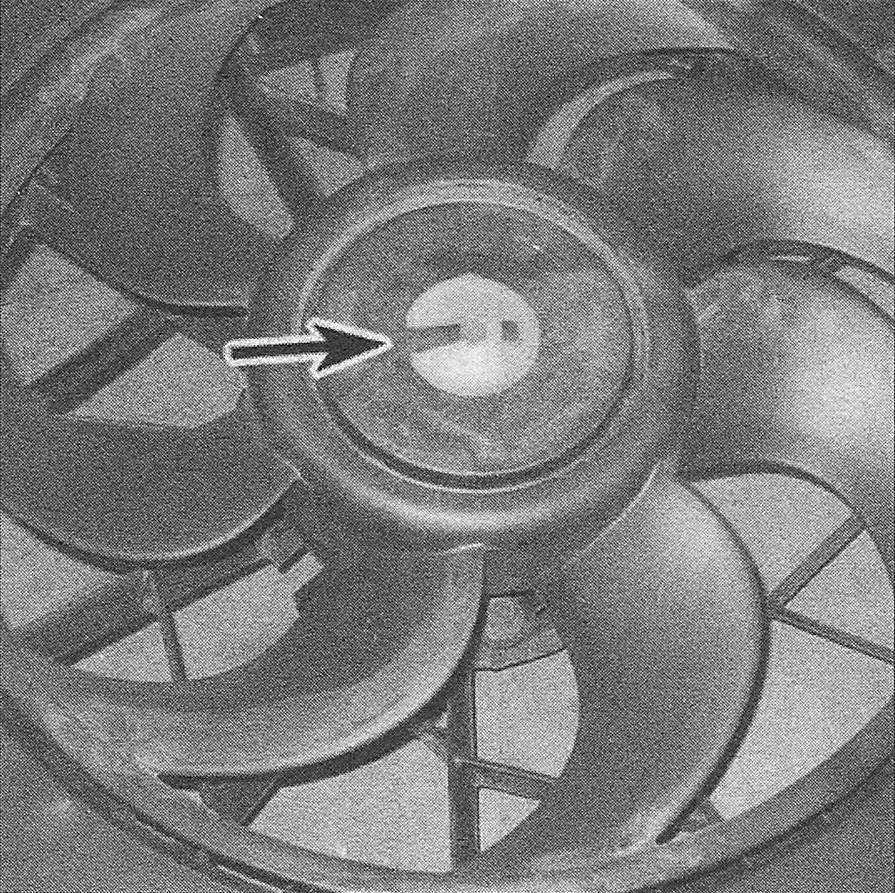
4.20a Slide the clip off the stud in the direction of the arrow and separate the cooling fan from the electric motor
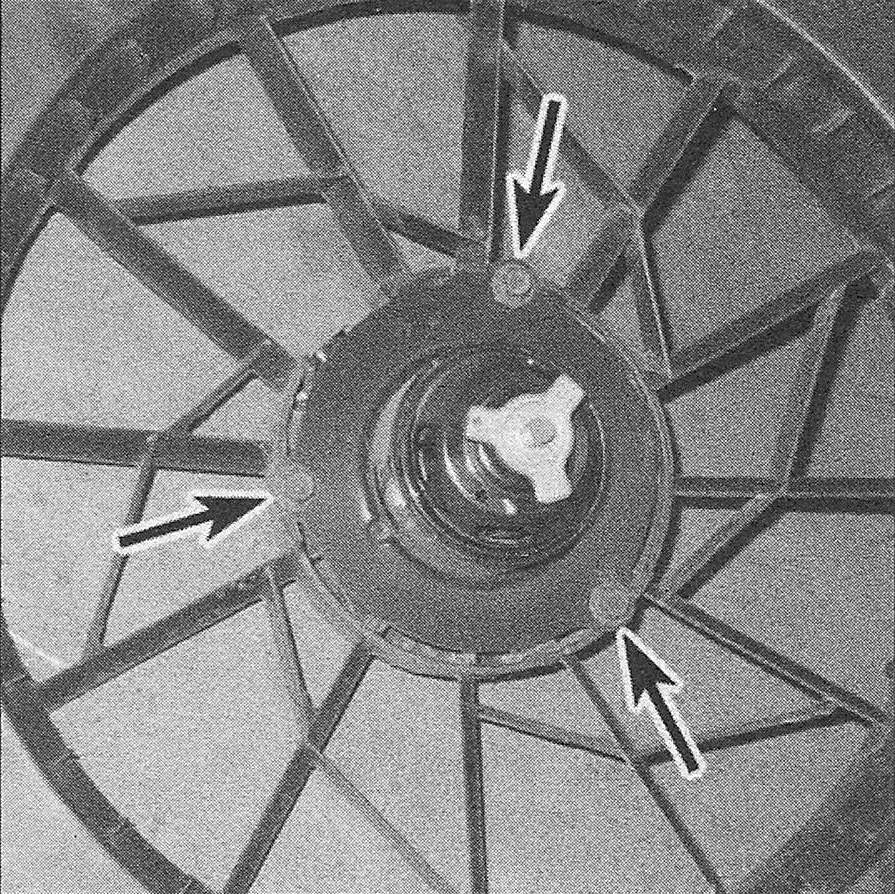
4.20b Remove the fan motor mounting bolts
Diesel engines
Engine-mounted viscous fan
21. Disconnect the cables from the negative battery terminals (see Engine electrical systems).
22. On 2009 models, detach the fan shroud from the engine by removing the nuts.
23. Disconnect the viscous fan wiring at the lower shroud. Detach the wiring harness from the shroud.
24. On 2010 and later models, remove the fan shroud bolts and push-pins that attach it to the radiator shroud.
25. Install a large screwdriver between the fan pulley bolts while a large (36 mm) open-end wrench is used to loosen the fan drive nut on the cooling fan. Turn the large nut counterclockwise. Caution: It’s a right-hand thread.
26. On 2010 and later models, release the lower fan shroud clips.
27. Collapse the fan shroud toward the radiator, then remove the shroud and fan assembly together. DO NOT damage the radiator fins while doing so. Caution: Do not remove any of the cooling fan pulley bolts. The pulley is under spring tension and could release.
28. On 2010 and later models, remove the wiring bracket from the fan shroud unit by detaching the clip and sliding it off.
29. Remove the fan blade mounting bolts.
30. Installation is the reverse of removal.
Radiator-mounted electric fan (2010 and later models)
31. Disconnect the cables from the negative battery terminals (see Engine electrical systems).
32. Remove the radiator top cover plate.
33. Detach the viscous fan from the pulley (see Steps 23 through 25).
34. Disconnect the wiring from the electric fan.
35. Unbolt the upper and lower fan shrouds from the radiator, unclip it at the bottom and slide it to the rear.
36. Release the electric fan clips from the radiator.
37. Pull the electric fan, viscous fan and shroud up and out of the vehicle as a complete assembly.
38. Installation is the reverse of removal.