Air conditioning condenser – removal and installation
Warning: The air conditioning system is under high pressure. Do not loosen any hose fittings or remove any components until after the system has been discharged. Air conditioning refrigerant must be properly discharged into an EPA-approved recovery/recycling unit at a dealer service department or an automotive air conditioning repair facility. Always wear eye protection when disconnecting air conditioning system fittings.
Note: The receiver-drier is an integral part of the condenser.
1. Have the air conditioning system discharged (see Warning above).
2. Disconnect the cable (s) from the negative battery terminal(s) (see Engine electrical systems).
Gasoline models
3. Drain the cooling system (see Tune-up and routine maintenance).
4. On automatic transmission models, disconnect the transmission cooler lines from the jumper lines near the right of the radiator. Seal the openings to prevent contamination.
5. On 2012 and later models, remove the radiator grille (see Body).
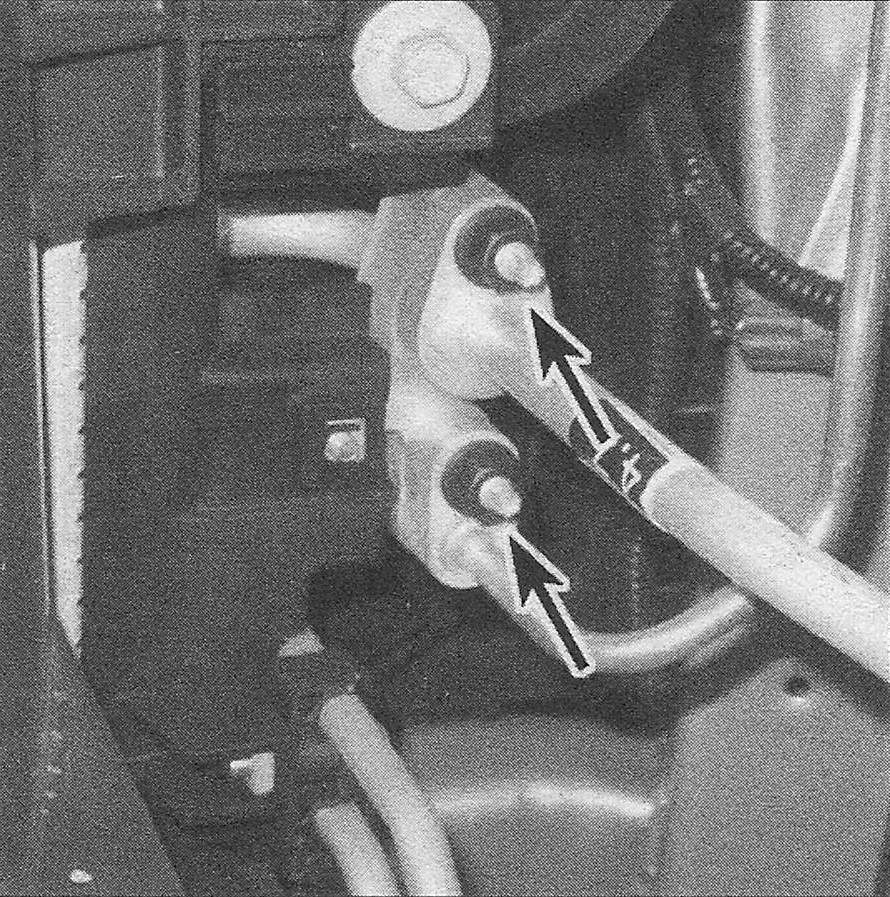
6. Disconnect the air conditioning lines from the condenser jumper line tapping block (see illustration). Seal the openings to prevent contamination.
15.6 Remove these nuts to detach the air conditioning lines from the short condenser jumper lines
7. On 2011 and earlier models, remove the
air conditioning condenser and the radiator as a single unit (Radiator – removal and installation). On 2012 and later models, remove the condenser-to-radiator line bracket bolts and condenser mounting bolts and separate the condenser from the radiator.
8. On 2011 and earlier models remove the jumper line (s) from the condenser (see illus trations). Seal the openings to prevent contamination.
15.8a The lower condenser jumper line is secured by a bolt …
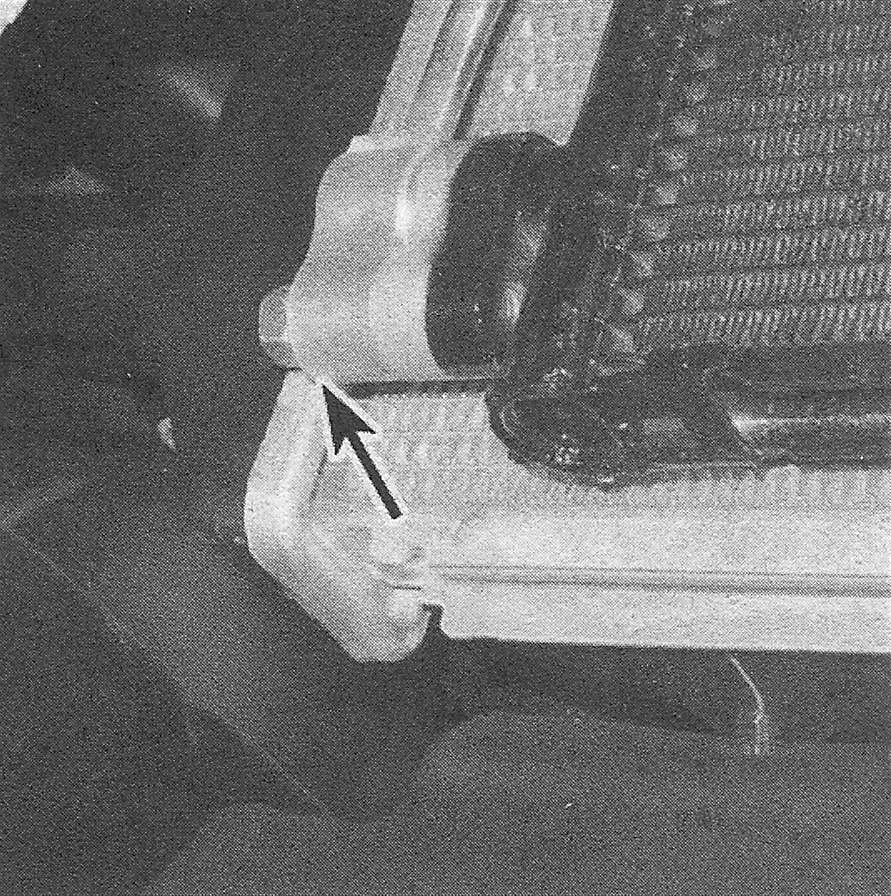
15.8b … the upper line is attached with a clip that’s under a plastic cover
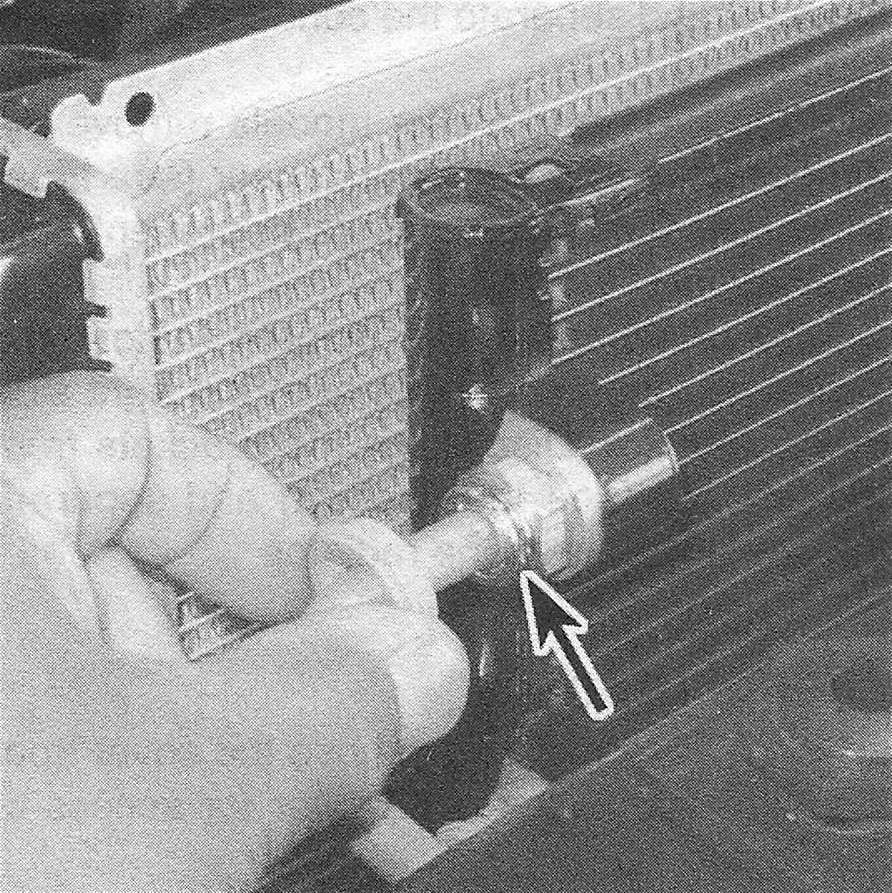
9. On 2011 and earlier models, remove the condenser mounting bolts from the right side of the radiator. Disengage the brackets from the left end (see illustration) and separate the condenser from the radiator.
15.9 The left side of the condenser can be separated from the radiator by sliding it out of this bracket

Diesel models
10. On 2009 models, remove the cover from the right end of the condenser for access to the fittings.
11. On 2010 and later models, remove the grille (see Body), then disconnect the automatic transmission cooler lines from the cooler (if installed). Seal the openings to prevent contamination.
12. Disconnect the refrigerant lines from the condenser. Seal the openings to prevent contamination.
13. Remove the mounting bolts, then remove the condenser.
All models
14. If the original condenser will be reinstalled, store it with the line fittings on top to prevent oil from draining out.
15. If a new condenser is being installed, pour 1 oz (30 ml) of refrigerant oil into it prior to installation (an oil designated as compatible with R-134a refrigerant). Note: New R-134a compatible 0-rings should be used in each fitting during reassembly.
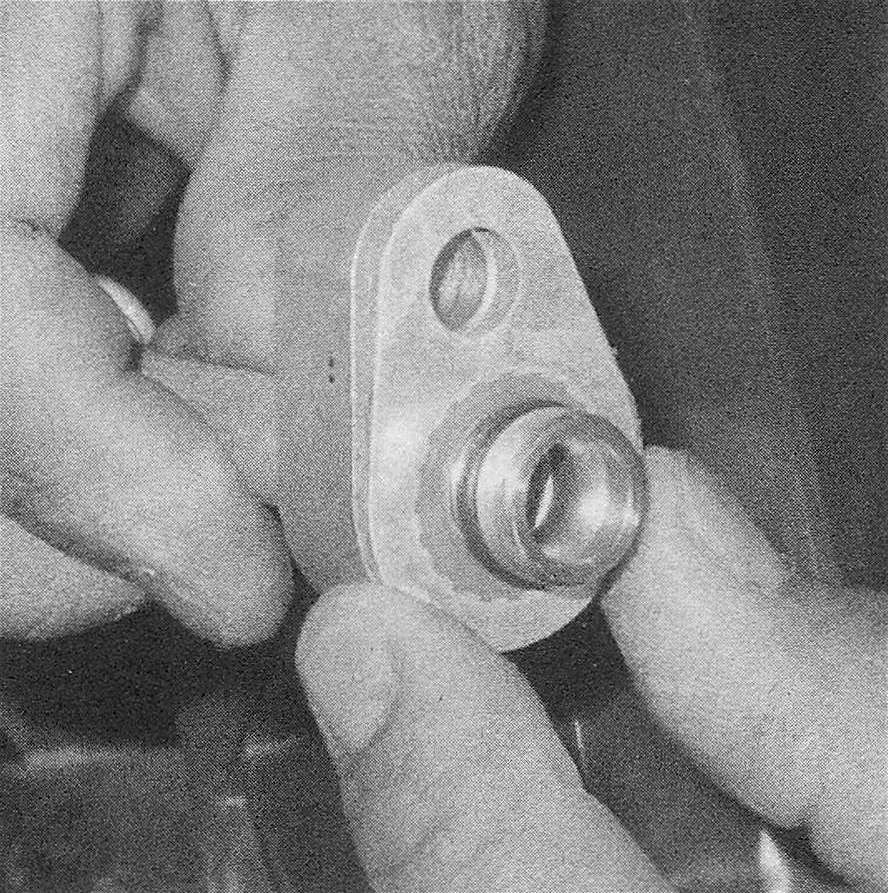
16. Install new 0-rings onto the refrigerant and transmission cooler lines (see illustration).
15.16 Install new 0-rings onto the refrigerant lines
17. Reinstall the components in the reverse order of removal.
18. Have the system evacuated, recharged and leak-tested by the shop that discharged it.