Rear axleshaft – removal and installation
Semi-floating axleshaft
Warning: The dust created by the brake system is harmful to your health. Never blow it out with compressed air and don’t inhale any of it. An approved filtering mask should be worn when working on the brakes. Do not, under any circumstances, use petroleum-based solvents to clean brake parts. Use brake system cleaner only!
1. The axleshaft is usually removed only when the bearing is worn or the seal is leaking. To check the bearing, raise the vehicle, support it securely on jackstands and remove the wheel and brake drum (see Brakes). Try to move the axle flange up and down. If the axleshaft moves up and down, bearing wear is excessive. Also check for differential lubricant leaking out from below the axleshaft – this indicates the seal is leaking.
2. Remove the cover from the differential carrier and allow the lubricant to drain into a suitable container.
3. Remove the lock bolt from the differential pinion mate shaft and remove the shaft (see illustrations).
17.3a Remove the pinion mate shaft lock bolt …
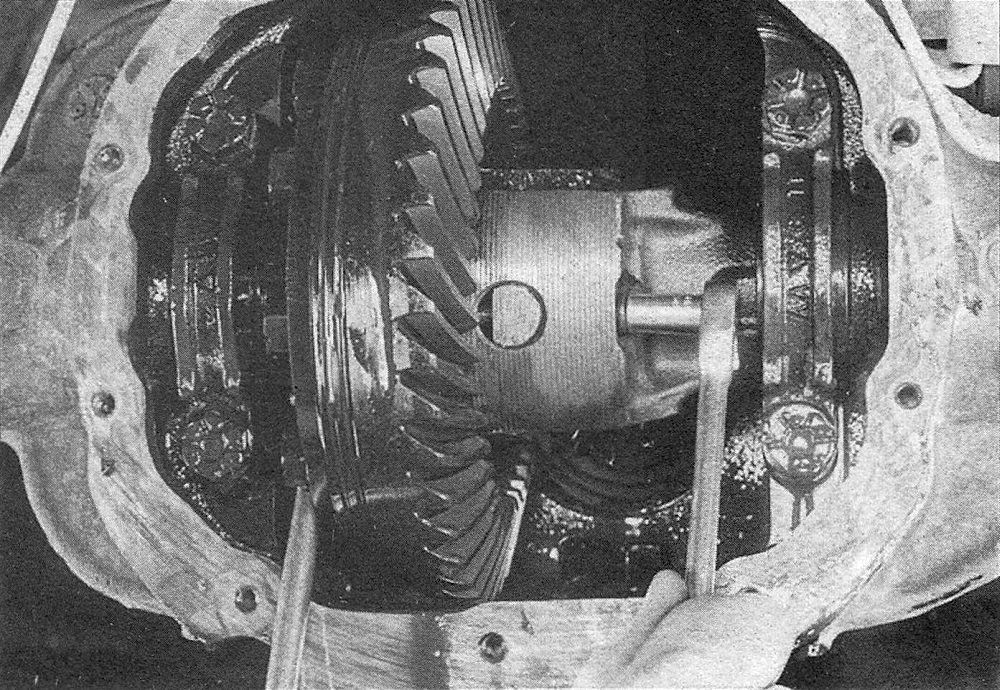
17.3b … then carefully remove the pinion mate shaft from the differential carrier (don’t turn the wheels or the carrier after the shaft has been removed, or the pinion gears may fall out)
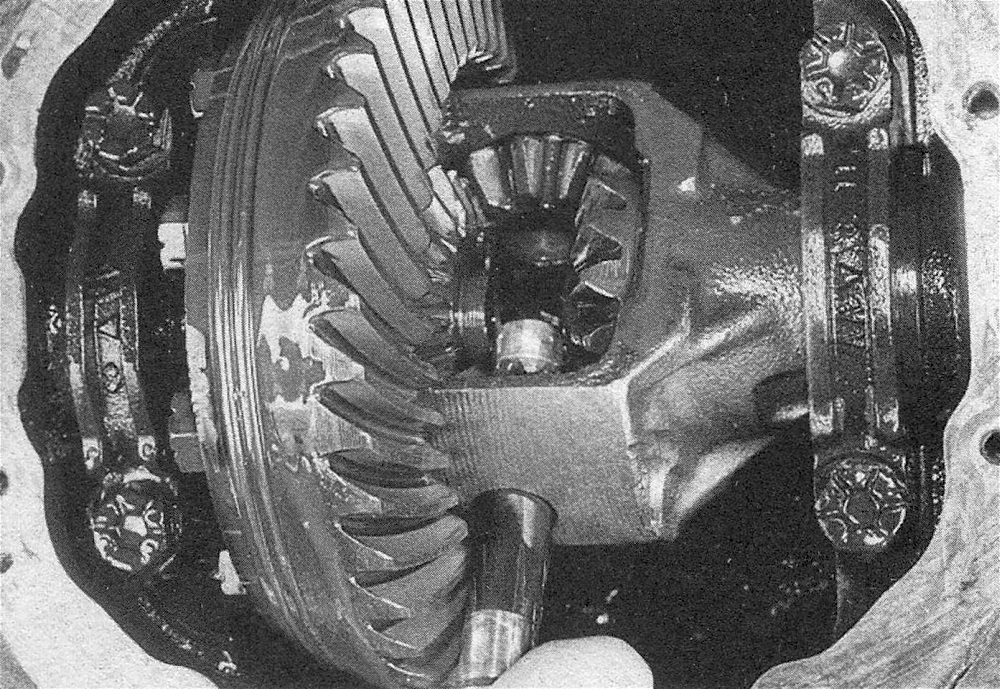
4. Push in the outer (flanged) end of the axleshaft and remove the C-lock from the inner end of the shaft (see illustration).
17.4 Push the axle flange in, then remove the C-lock from the inner end of the axleshaft

5. Withdraw the axleshaft, taking care not to damage the oil seal in the end of the axle housing as the splined end of the axleshaft passes through it.
6. Installation is the reverse of removal.
Apply thread-locking compound to the threads and tighten the pinion shaft lock bolt to the torque listed in this Chapter’s Specifications.
7. Always use a new cover gasket (or clean off the old RTV sealant and apply new sealant [see Tune-up and routine maintenance]) and tighten the cover bolts to the torque listed in the Tune-up and routine maintenance Specifications.
8. Refill the axle with the correct quantity and grade of lubricant (see Tune-up and routine maintenance).
Full-floating axleshaft
9. Loosen the rear wheel lug nuts, raise the rear of the vehicle and support it securely on jackstands. Remove the wheel. Note: If you’re just removing the axleshaft, it isn’t necessary to remove the wheel or raise the rear of the vehicle. If you are going to replace the hub seals and/or bearings, the rear of the vehicle must be supported on jackstands and the wheel will have to be removed.
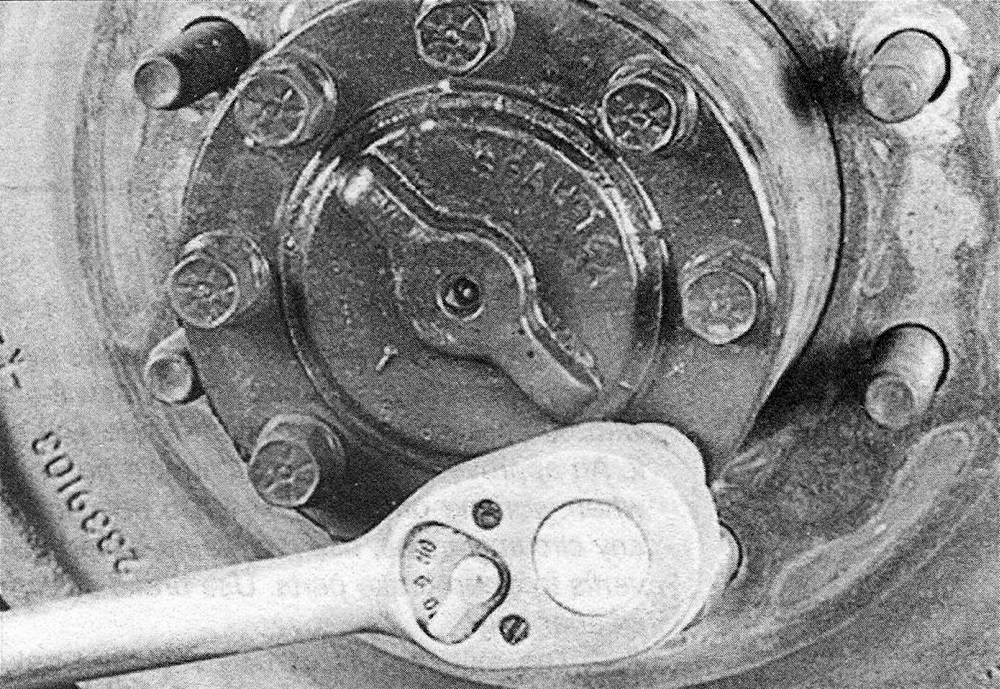
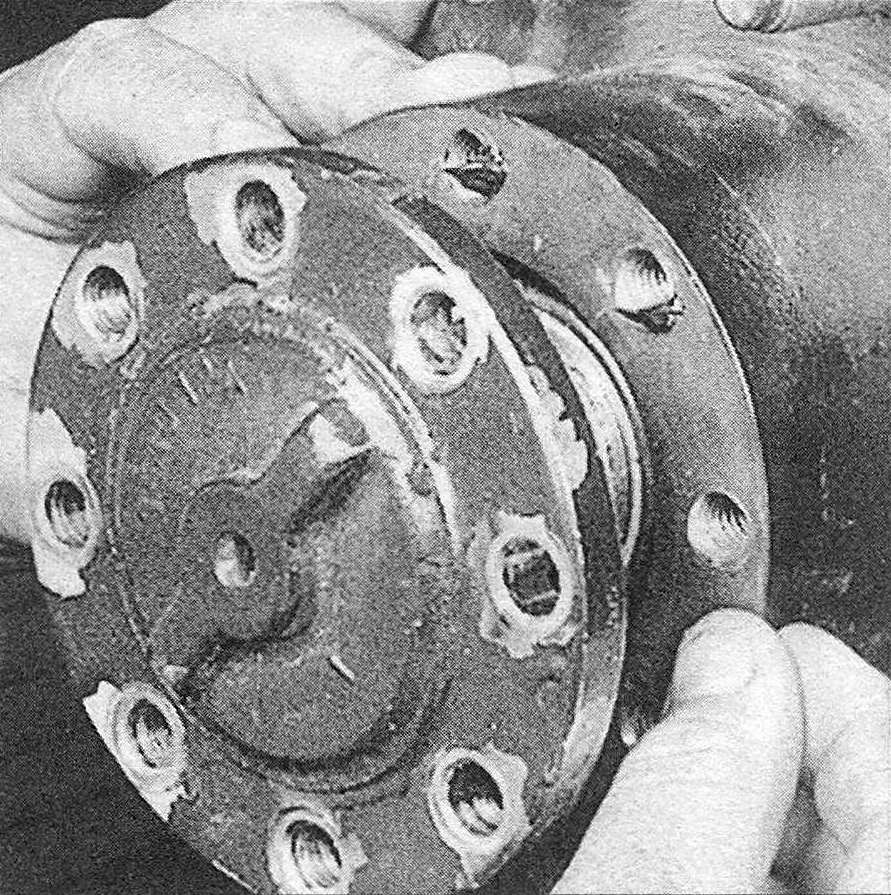
10. Remove the axleshaft flange bolts (see illustration).
17.10 Remove the axleshaft flange bolts …
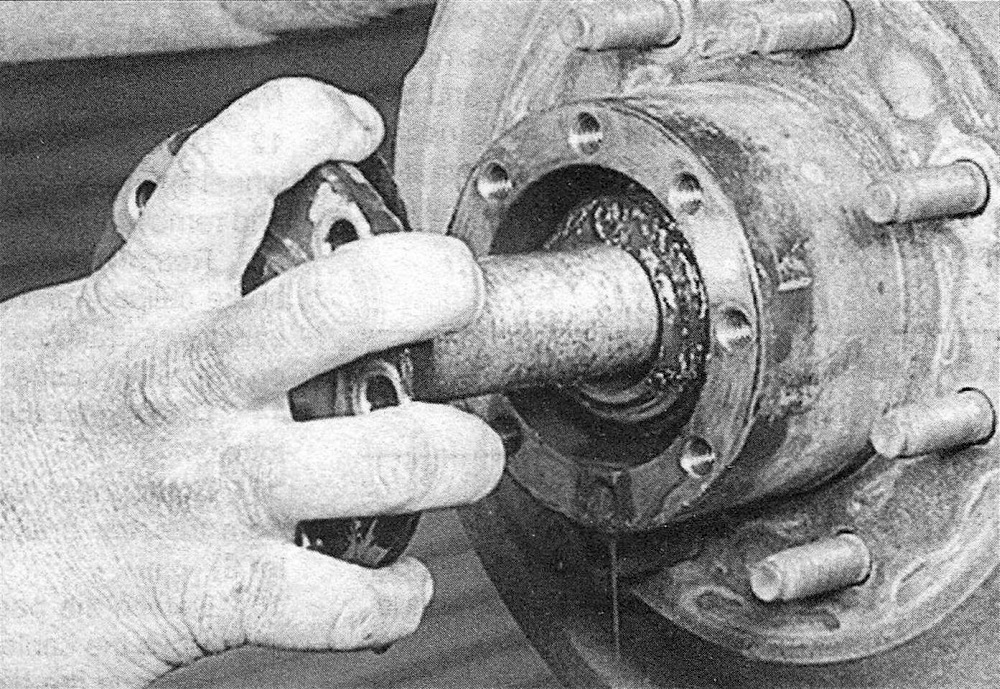
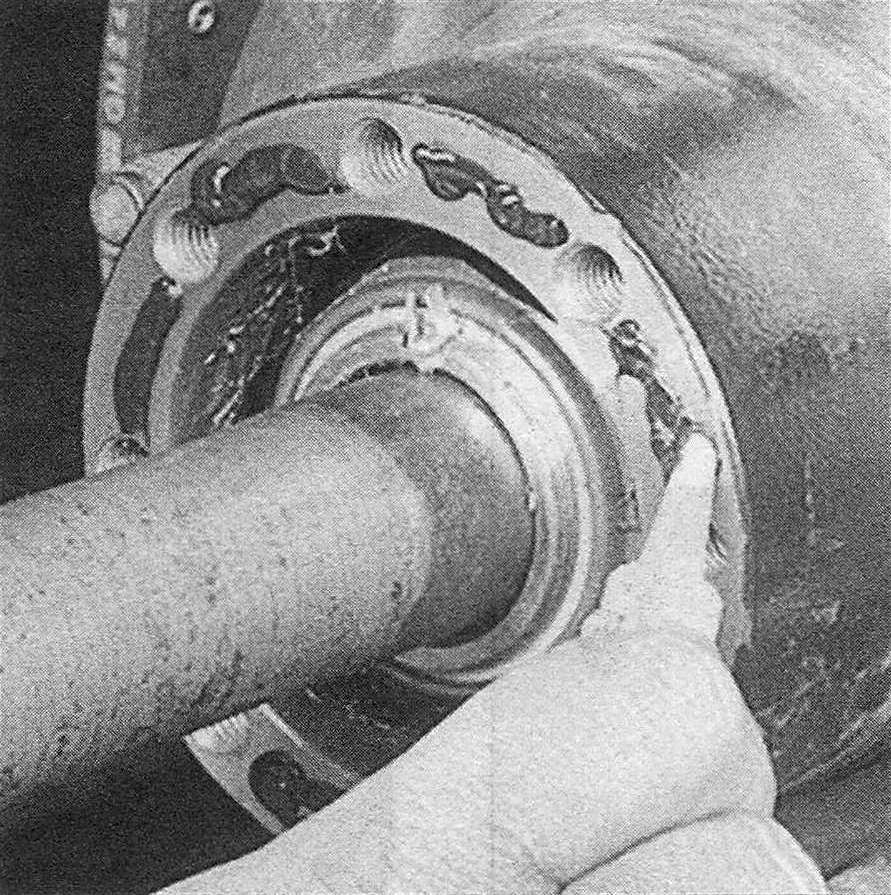
11. Pull out the axleshaft (see illustration).
If the same axleshaft is going to be installed, clean the flange mating surface.
17.11 … and pull out the axleshaft
12. Clean the flange mating surface on the hub. While the axleshaft is removed, inspect and, if necessary, replace the hub and bearing seals and bearings (Rear wheel hub bearing and grease seal (full-floating axle) – removal, installation and adjustment). This is also a good time to inspect the rear brake assembly (see Brakes).
13. Slip a new gasket over the end of the axleshaft and slide the axleshaft into the axle housing.
14. Before engaging the axleshaft splines with the differential, apply RTV sealant to the gasket mating surface of the hub and place the new gasket in position (see illustrations). Push the axleshaft into the axle housing until the axleshaft splines are fully engaged with the differential. If you have difficulty engaging the splines with the differential, have an assistant turn the other wheel slightly while you push on the axleshaft.
17.14a Apply a coat of RTV sealant to the mating surface of the hub …
17.14b … then place the new gasket in position on the hub
15. Install the flange bolts and tighten them to the torque listed in this Chapter’s Specifications. Caution: The manufacturer recommends using new bolts, but the old bolts can be used if the threads are cleaned and a thread locking compound is used when they are installed.
16. If the wheel was removed, install it and the lug nuts. Lower the vehicle and tighten the lug nuts to the torque listed in the Tune-up and routine maintenance Specifications.