Brake disc – inspection, removal and installation
Inspection
1. Loosen the wheel lug nuts, raise the vehicle and support it securely on jackstands. Apply the parking brake. Remove the wheels.
2. Visually inspect the disc surface for score marks and other damage (see illustration). Light scratches and shallow grooves are normal after use and won’t affect brake operation. Deep grooves require disc removal and refinishing by an automotive machine shop. Be sure to check both sides of the disc.
5.2 The brake pads on this vehicle were obviously neglected – they wore down completely and cut deep grooves into the disc (wear this severe means the disc must be replaced)

3. To check disc runout, place a dial indicator at a point about 1/2-inch from the outer edge of the disc (see illustration). If you’re checking a front disc, or rear disc on a vehicle with single rear wheels, install the lug nuts, with the flat sides facing in, and tighten them securely to hold the disc in place. Set the indicator to zero and turn the disc. The indicator reading should not exceed the runout limit listed in this Chapter’s Specifications. If it does, the disc should be refinished by an automotive machine shop. If you elect not to have the discs resurfaced, deglaze them with sandpaper or emery cloth.
5.3 Measure the brake disc runout with a dial indicator

4. The disc must not be machined to a thickness less than the specified minimum thickness, which is cast into the disc (see illustration). The disc thickness can be checked with a micrometer (see illustration).
5.4a The minimum (discard) thickness of the brake disc is cast into the disc
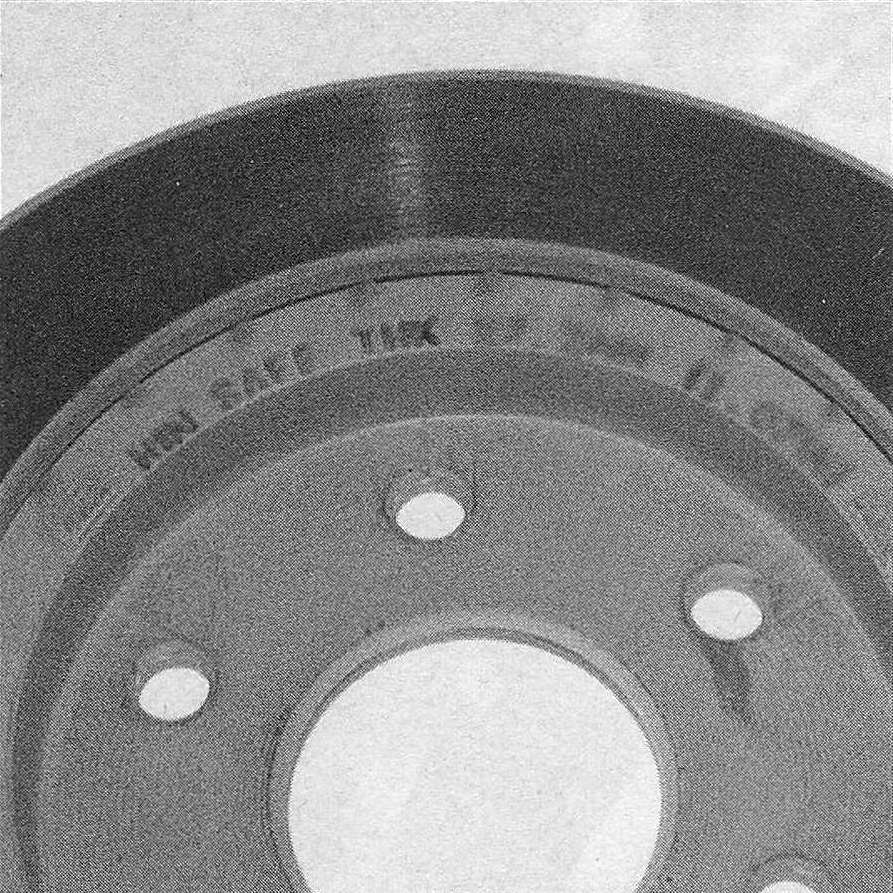
5.4b Measure the brake disc thickness at several points with a micrometer
Removal and installation
5. Remove the brake caliper (don’t disconnect the brake hose) and hang it out of the way (Disc brake caliper – removal and installation).
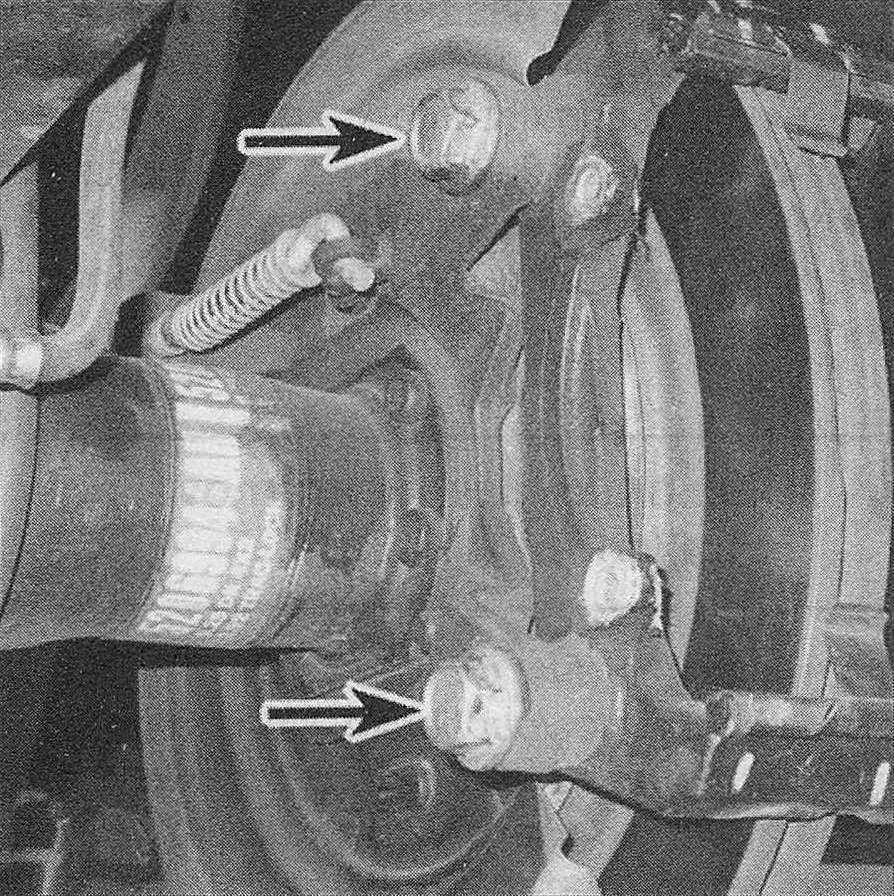
6. Remove the caliper mounting bracket (see illustration).
5.6 The caliper mounting bracket is retained by two bolts (rear shown, front similar)
7. If equipped, remove the hub extender from the hub.
8. Remove the lug nuts installed in Step 3 and pull the disc off the hub.
9. If you’re removing a rear disc on a model equipped with dual rear wheels, remove the rear axleshaft, remove the hub and bearing assembly (see Clutch and driveline), then unbolt the disc from the hub.
10. Installation is the reverse of removal. On models so equipped, tighten the disc-to-hub bolts securely.
11. Lower the vehicle and tighten the wheel lug nuts to the torque listed in the Tune-up and routine maintenance Specifications.