Seats – removal and installation
Warning: The models covered by this manual are equipped with Supplemental Restraint Systems (SRS), more commonly known as airbags. Always disable the airbag system before working in the vicinity of any airbag system component to avoid the possibility of accidental deployment of the airbags, which could cause personal injury (see Chassis electrical system).
Front seats
Driver’s seat
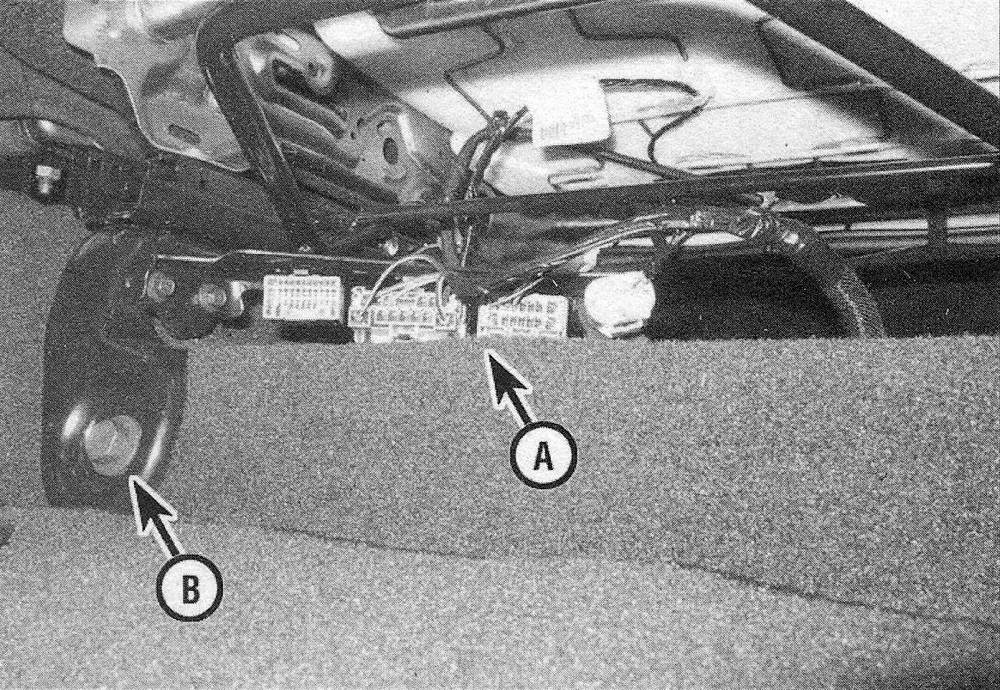
1. Detach the plastic bolt trim covers, then disconnect the wiring harnesses (see illustration).
27.1 Disconnect the wiring (A), then remove the seat mounting bolts (B)
2. Remove the front seat mounting bolts.
3. Remove the rear seat bolts and remove the seat.
4. Installation is the reverse of removal.
Install all of the mounting bolts finger tight until they’re all in place. Tighten the mounting bolts to the torque listed in this Chapter Specifications in the following sequence: front inner bolt, front outer bolt, rear inner bolt, rear outer bolt.
Passenger’s seat
5. Detach the front clip of the jack cover that’s at the base of the seat. Pull the front of the cover free.
6. Unhook the rear of the cover and remove it.
7. Disconnect any wiring harnesses.
8. Remove the forward seat mounting bolts.
9. if the vehicle has a center seat, remove its mounting bolts.
10. Remove the passenger’s seat rear mounting bolts.
11. Detach the under-seat air duct by moving the part that’s connected to the seat to the rear.
12. Remove the seat assembly from the vehicle.
13. Installation is the reverse of removal. Tighten the mounting bolts to the torque listed in this Chapter Specifications in the following sequence: front inner bolt, center seat front bolt, center seat left bolt, right outer bolt, center seat right bolt, right outer bolt.
Front center seat
Note: This seat is not installed on all models.
14. Remove the front passenger’s seat assembly (see Steps 5 through 12).
15. Remove the screws that secure the center seat and remove it.
16. Installation is the reverse of removal. Tighten the mounting bolts to the torque listed in this Chapter Specifications in the correct sequence (see Step 13).
Rear seat
17. Disconnect any wiring harnesses attached to the seat.
18. Remove the bolt from the retractor-end of the center shoulder belt, then move the belt out of the way.
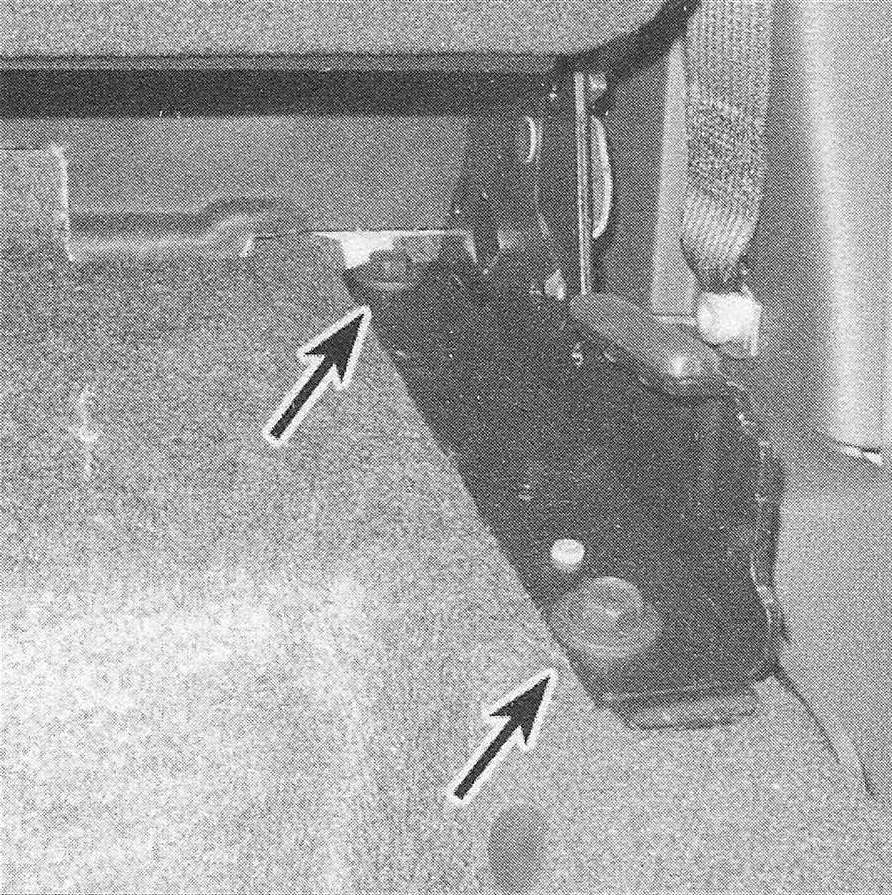
19. Remove the bolts from the seat mounts (see illustration).
27.19 Rear seat mounting bolts
20. Lift the seat assembly so that the tabs on the top of the seat back disengage from the body.
21. Remove the seat.
22. Installation is the reverse of removal. Tighten the mounting bolts to the torque listed in this Chapter Specifications.

