Instrument panel – removal and installation
Warning: The models covered by this manual are equipped with Supplemental Restraint Systems (SRS), more commonly known as airbags. Always disable the airbag system before working in the vicinity of any airbag system component to avoid the possibility of accidental deployment of the airbags, which could cause personal injury (see Chassis electrical system).
Note: This is a difficult and time-consuming procedure. If you decide to attempt it, make notes or take pictures as you go to keep track of the locations of all components. Lay all parts out in order as you remove them and label any complex assemblies so they can be installed correctly.
1. Disconnect the cable (s) from the negative battery terminal(s) (see Engine electrical systems). Turn the front wheels to the straight-ahead position and lock the steering column.
2. Remove the front seat (s) (Seats – removal and installation)
3. Remove both door threshold/kick panel trim panels by pulling them upward.
4. Remove the lower steering column cover (Steering column covers – removal and installation).
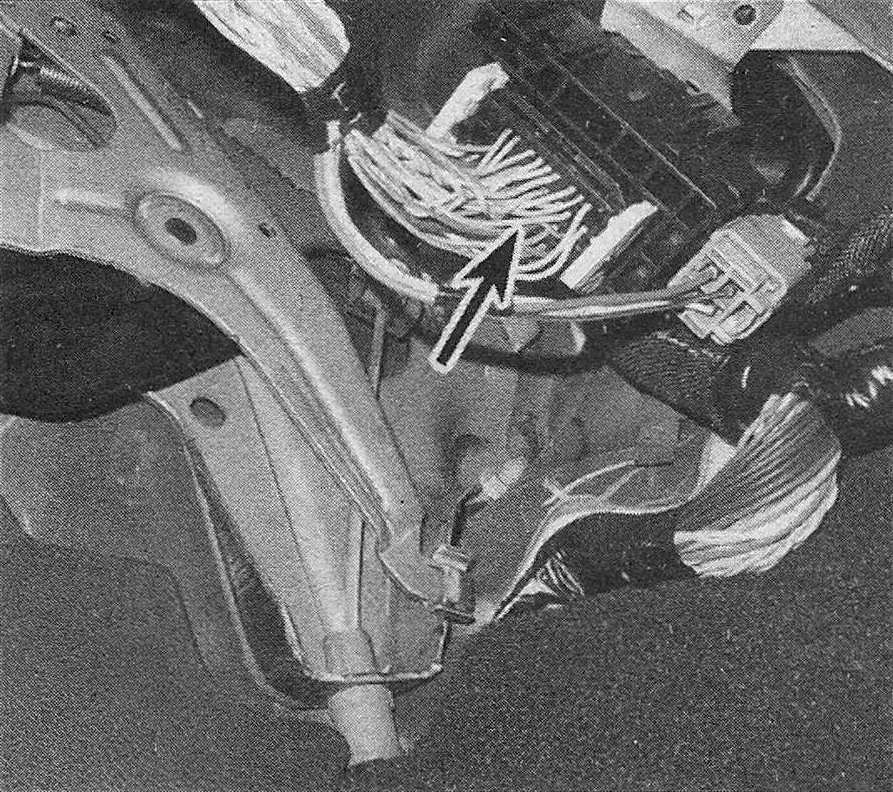
5. Working under the instrument panel near the brake pedal, disconnect the wiring harness from the firewall connector (see illustration).
25.5 Wiring harness connector in the left footwell
6. Remove the steering column (see Suspension and steering systems). Remove the parking brake release handle and the hood release handle.
7. Remove both windshield pillar trim panels and the glove box (Dashboard trim panels – removal and installation).
8. Use a plastic trim tool or a screwdriver wrapped with tape to pry both end caps from the instrument panel (see illustration 23.12).
Note: There’s a notch at the bottom to insert the tool.
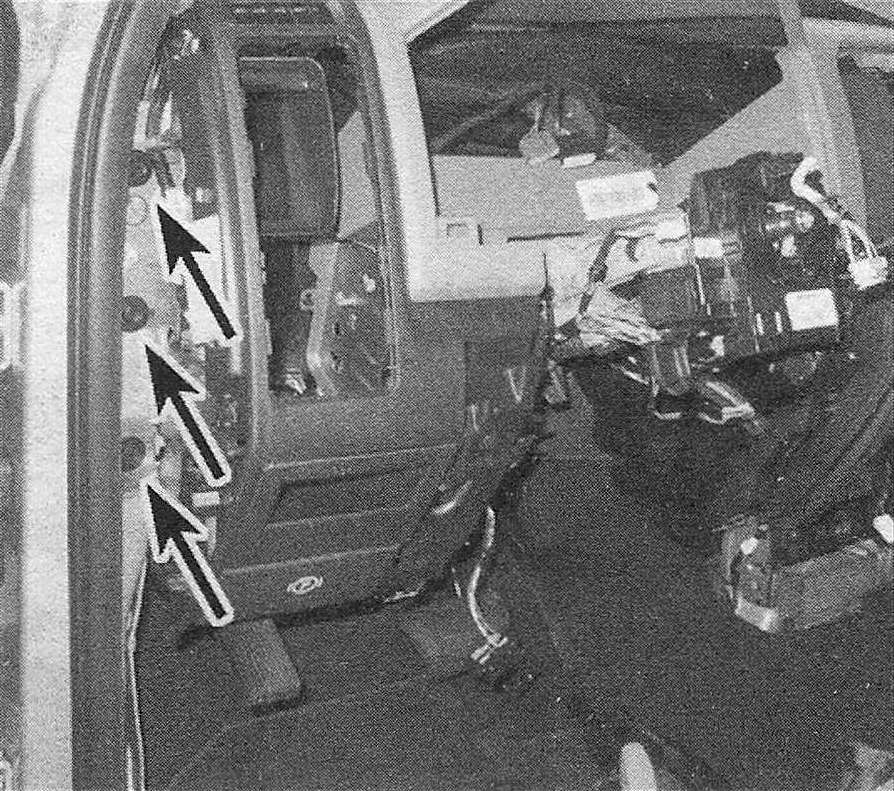
9. Remove the three bolts from the left end of the instrument panel (see illustration).
25.9 Instrument panel left-side mounting bolts
10. Remove the console (Console – removal and installation). Remove the brake sled mounting bolts.
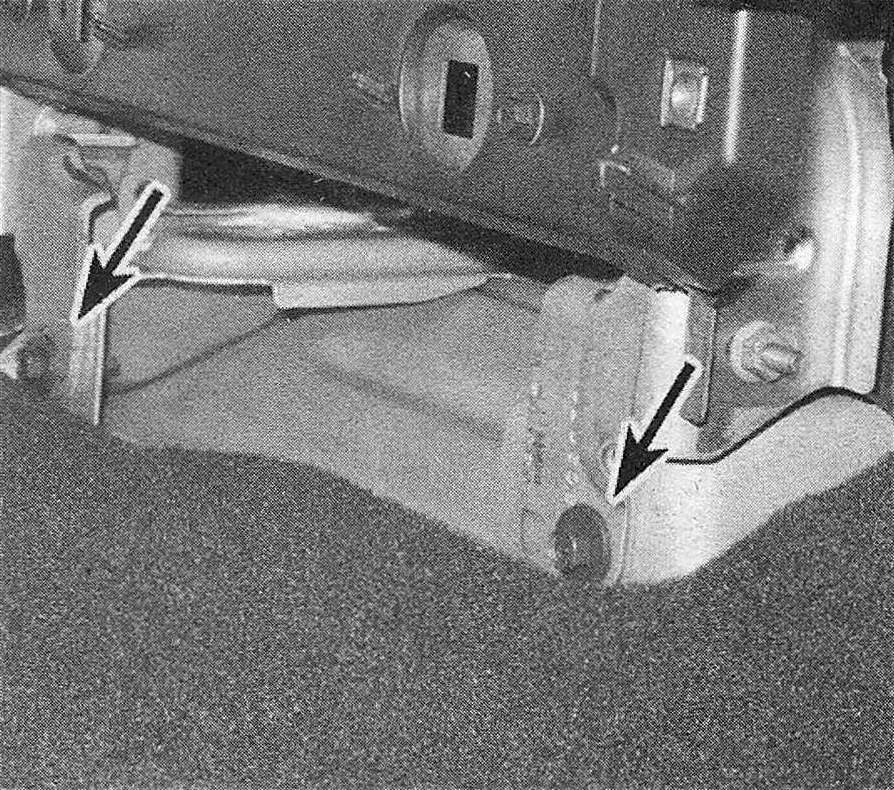
11. Remove the two instrument panel mounting bolts from the bottom center near the front of the console (see illustration).
25.11 Instrument panel center mounting bolts
12. Working under the right windshield pillar trim panel, disconnect the wiring harness.
13. Remove the instrument panel mounting screw in the back of the glove box opening.
14. Disconnect the five wiring harnesses and the antenna cable at the right kick panel area.
15. Remove the three bolts from the bracket at the right end of the instrument panel.
16. Remove the screw covers along the windshield, then remove the screws under them (see illustration 23.47).
17. Slide the carpet to the rear enough to reach the chassis ground screw of the two electronic modules. Disconnect the wire and remove the wiring harness.
18. On models so equipped, remove the two bolts securing the instrument panel to the floor pan.
19. Have an assistant help you to raise the instrument panel off of its mounts, then remove it from the vehicle.
20. Installation is the reverse of removal.