Shift cable – check, adjustment and replacement
Note: On 8HP45/845RE 8-speed models, no shift cable is used. The transmission uses an electronic shifter (E-shifter) which is an electronic switch/module mounted to the instrument panel, using electronic messaging to communicate the transmission gear changes.
Check
1. Firmly apply the parking brake and try to momentarily operate the starter in each shift lever position. The starter should only operate when the shift lever is in the PARK or NEUTRAL positions. If the starter operates in any position other than PARK or NEUTRAL, adjust the shift cable (see below). If, after adjustment, the starter still operates in positions other than PARK or NEUTRAL, the Transmission Range (TR) sensor is defective (see Emissions and engine control systems).
Adjustment
2. Place the shift lever in the PARK position.
3. Raise the vehicle and support it securely on jackstands. Note: The rear of the vehicle must also be raised, so the driveshaft can be turned in Step 6 (to verify that the transmission is completely engaged in PARK).
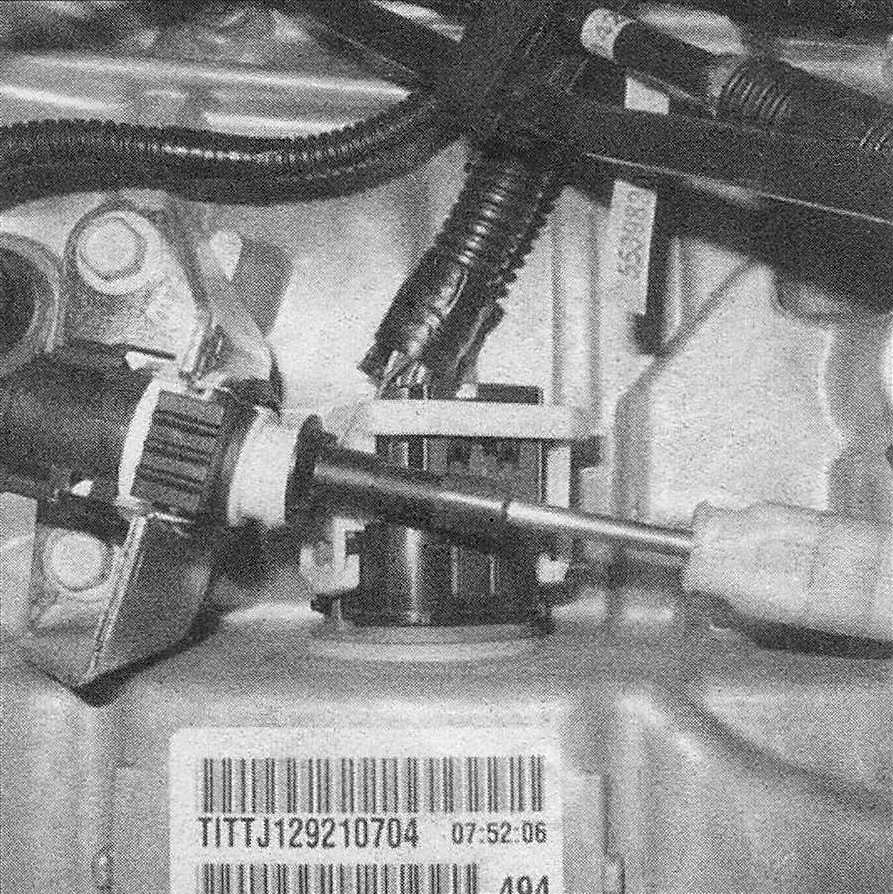
4. Working at the transmission end of the cable, pry the cable end off the manual shift lever (see illustration).
3.4 Use a screwdriver to pry the shift cable off the shift lever at the transmission
5. Verify that the manual shift lever on the transmission is all the way to the rear, in the last detent. This is the PARK position.
6. Verify that the park lock pawl inside the transmission is engaged by trying to rotate the driveshaft. The driveshaft will not rotate if the transmission is correctly engaged in PARK.
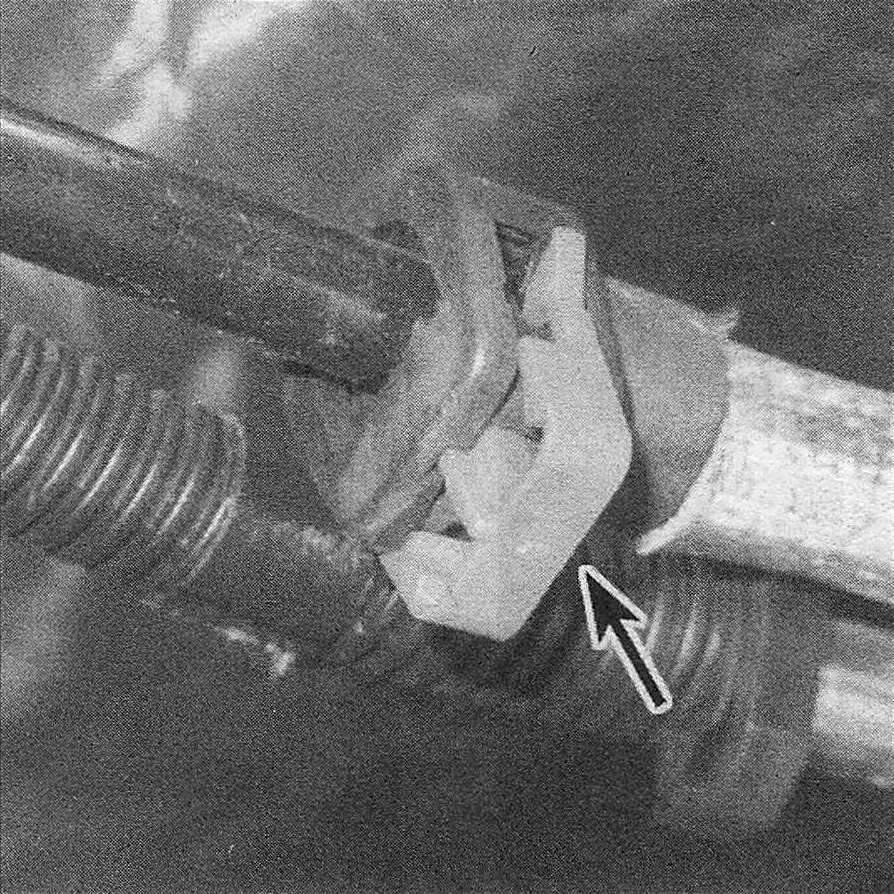
7. Disengage the locking clip on the cable end by pushing it up from the rear side (see illustration). Note: This adjustment mechanism is at the transmission end of the cable on most models. On some diesel models, it’s at the opposite end of the cable, so instrument panel trim will have to be removed for access (see Body).
3.7 Slide this clip loose to adjust the length of the transmission shift cable
8. Move the end of the cable in or out as required so that it snaps over the stud on the shift lever.
9. Snap the locking clip into place by pushing it down firmly.
10. Lower the vehicle and replace any trim panels removed. With the parking brake firmly applied, make sure the engine starts (don’t move the shift lever from PARK yet).
11. If the linkage appears to be adjusted correctly, but the starter still operates in any other position (s) besides PARK and NEUTRAL, replace the Transmission Range (TR) sensor (see Emissions and engine control systems).
Replacement
12. Make sure the shift lever is in the PARK position.
13. Raise the vehicle and place it securely on jackstands.
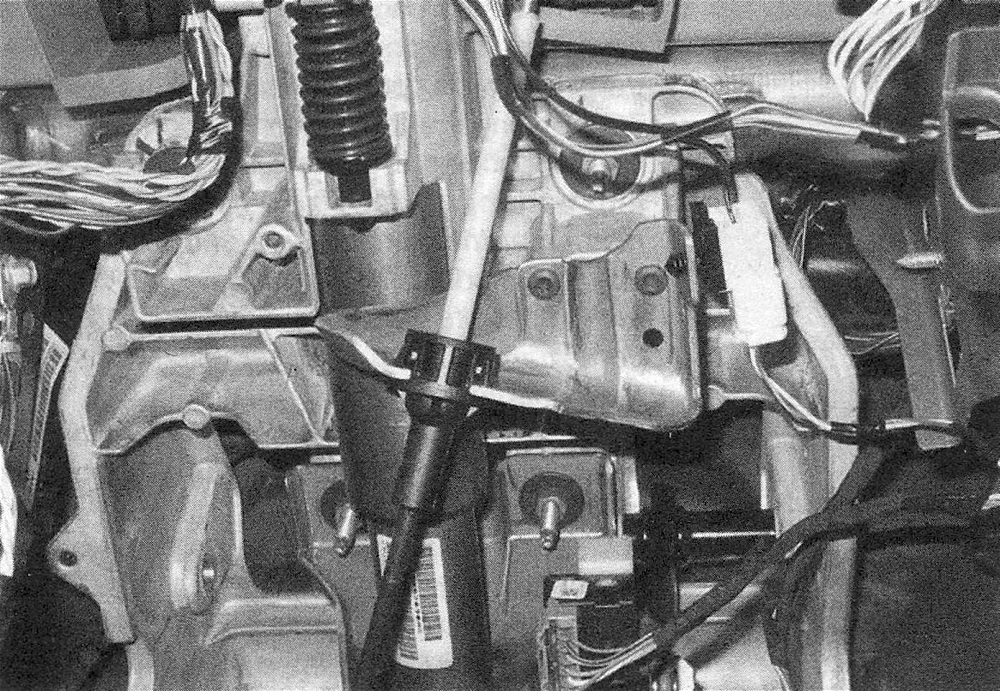
14. Working at the transmission end of the cable, remove the cable end from the shift lever, then pull it out of its mounting bracket.
15. Lower the vehicle.
16. Remove the instrument panel trim panels necessary to reach the upper end of the shift cable.
17. Remove the shift cable grommet from the firewall after pulling back the insulation.
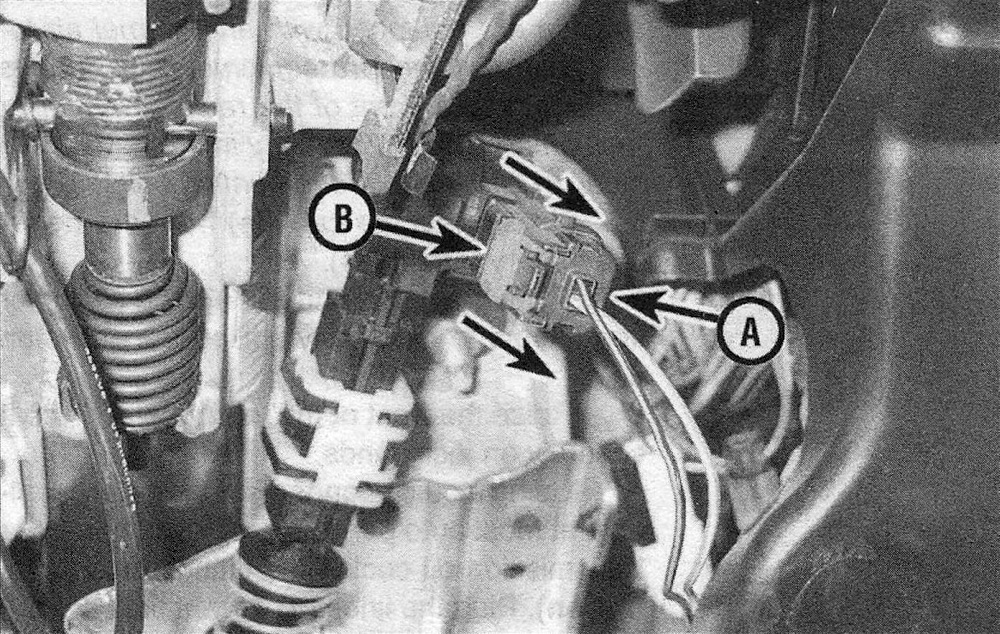
18. Disconnect the electrical connector from the Brake Transmission Shift Interlock (BTSI) solenoid (see illustration)
3.18 To disconnect the electrical connector (A) from the Brake Transmission Shift Interlock (BTSI) solenoid, slide the sliding lock toward you, then depress the button (B) on the slide lock and pull off the connector
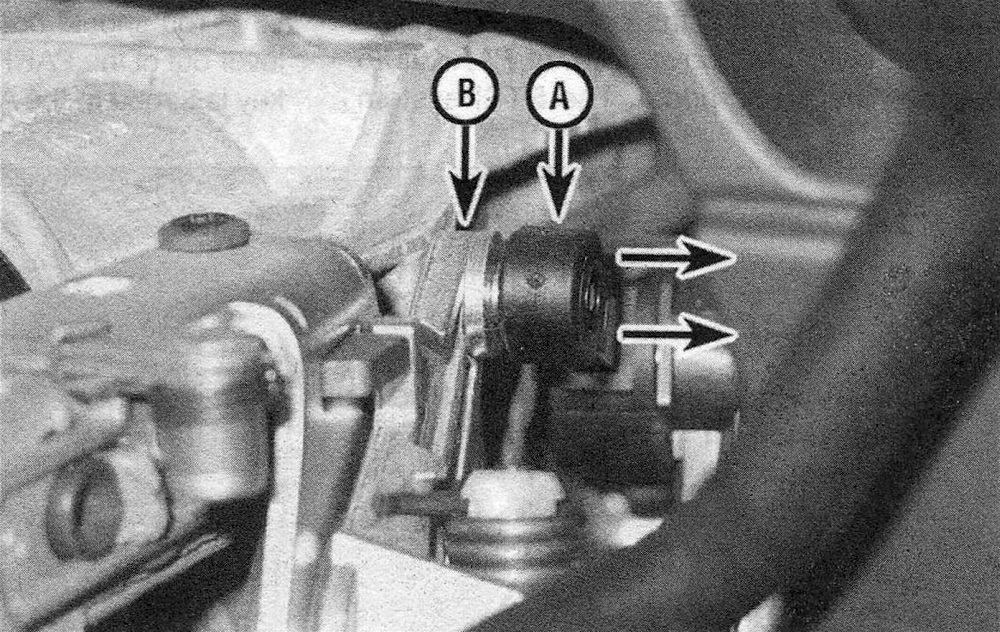
19. Pry the cable end off the lever on the steering column (see illustration)
3.19 Insert a small screwdriver between the shift cable (A) and the shift lever pin (B) to disconnect them
20. To disengage the cable assembly from the steering column bracket, squeeze the two tangs on the cable housing together, then pull the cable assembly straight down (see illus tration).
3.20 To disengage the shift cable assembly from its mounting bracket, squeeze the tangs on the cable housing together, then pull the cable assembly straight down. To remove the cable assembly, disengage the grommet from the cable hole in the firewall, then pull the cable through the hole into the cab
21. Installation is the reverse of removal. Adjust the cable (see Steps 2 through 11).
