Automatic transmission – removal and installation
Removal
Caution: The transmission and torque converter must be removed as a single assembly. If you try to leave the torque converter attached to the driveplate, the converter driveplate, pump bushing and oil seal will be damaged. The driveplate is not designed to support the load, so none of the weight of the transmission should be allowed to rest on the plate during removal.
1. Disconnect the cable (s) from the negative battery terminal(s) (see Engine electrical systems).
2. Raise the vehicle and support it securely on jackstands.
3. Remove the skid plate, if equipped.
4. Remove all exhaust components that interfere with transmission removal (see Fuel and exhaust systems – gasoline engines Fuel and exhaust systems – diesel engine ). This includes the particulate filter on diesel engines.
5. If the transmission is being removed for overhaul, drain the transmission fluid (see Tune-up and routine maintenance).
6. On gasoline engines, remove the starter motor (see Engine electrical systems).
7. Mark the yokes and remove the driveshaft (see Clutch and driveline). On 4WD models, remove both driveshafts.
8. On 3.7L V6 and 4.7L V8 models, remove the engine-to-transmission brace (see illus tration)
7.8 To remove the transmission brace on a vehicle with 45RFE or 545RFE transmission, remove these bolts (Hemi engine shown, others similar)
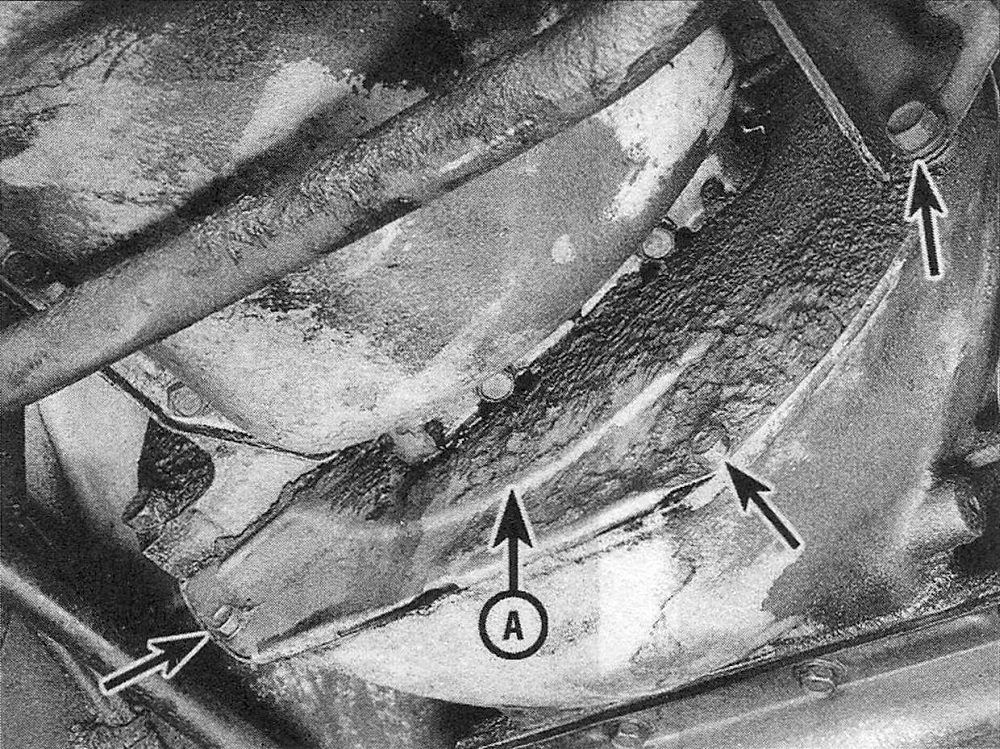
9. Remove the torque converter access cover, if equipped (see illustration). On Hemi engines, this is a structural component.
7.9 To remove the torque converter access cover (A), remove all the retaining bolts and pull it off. The number and location of the cover bolts varies with the engine-transmission combination
10. On Hemi engines, remove the transmission-to-differential bracket and the exhaust support.
11. On diesel engines, remove the bracket from the rear of the transmission, if so equipped.
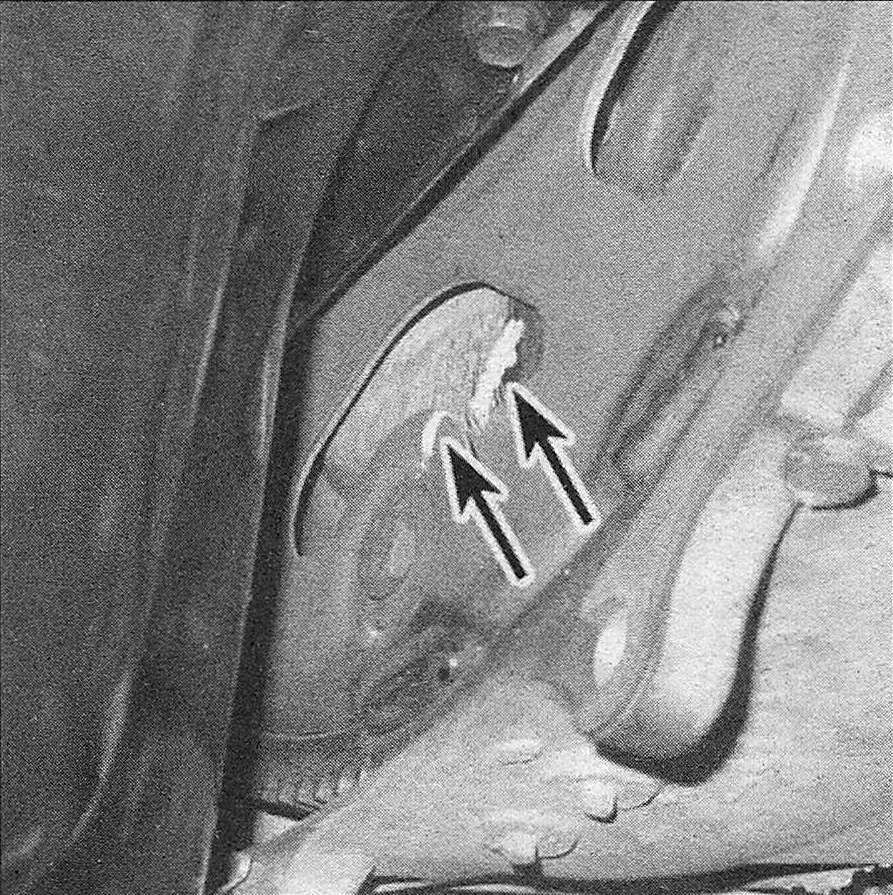
12. Mark the relationship of the torque converter to the driveplate (see illustration) to ensure that their dynamic balance is maintained when the converter is reattached to the driveplate.
7.12 If you’re going to re-use the old torque converter, mark the relationship of the torque converter to the driveplate to ensure that their dynamic balance is preserved when the torque converter is reattached
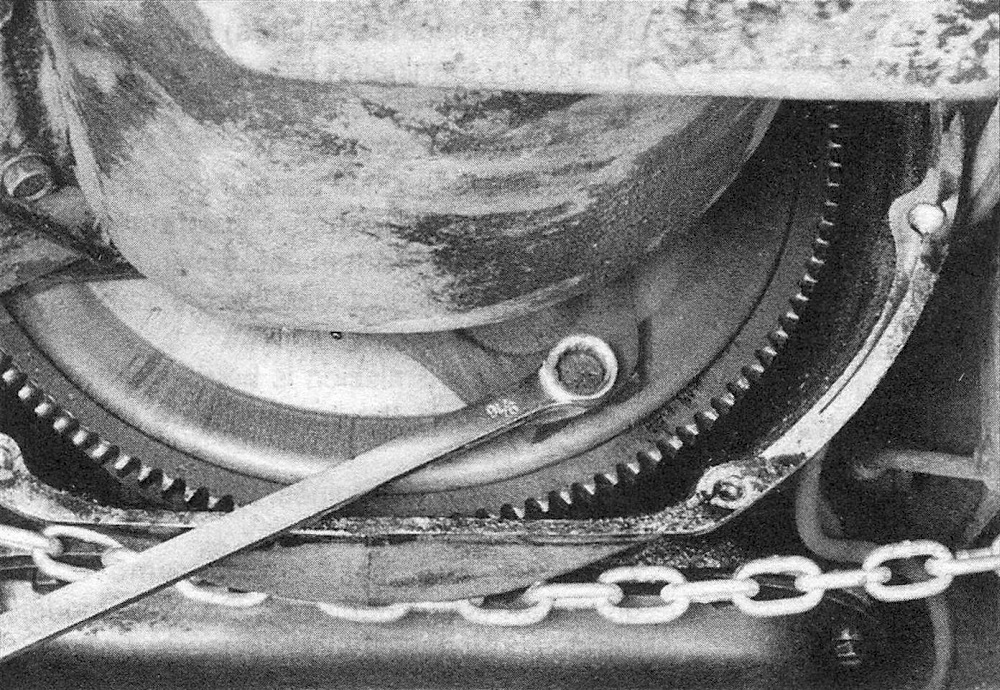
13. Remove the torque converter-to-driveplate bolts (see illustration). Turn the crankshaft for access to each bolt.
7.13 To remove the torque converter-to-driveplate bolts, turn the crankshaft to access each bolt
14. Disconnect all electrical connectors from the transmission. The connectors to various electrical and/or electronic devices on the transmission are different in shape, color and the number of terminals, so there’s little danger of accidentally reconnecting a connector to the wrong device. The wiring harness is also designed so that each connector will only reach the device to which it’s supposed to be connected. However, if any of the connectors look identical or look like they could be accidentally reconnected to the wrong device, be sure to mark them to prevent mix-ups.
15. Disconnect the shift cable from the transmission (Shift cable – check, adjustment and replacement).
16. Support the rear end of the transmission with a floor jack, then raise the transmission slightly to take the weight off the crossmember.
17. Unbolt the transmission mounting bracket from the transmission and from the crossmember and remove the bracket.
18. Unbolt and remove the transmission crossmember.
19. On 4WD models, remove the transfer case (see Transfer case). Note: If you are not planning to replace the transmission, but are removing it in order to gain access to other components such as the torque converter, it isn’t really necessary to remove the transfer case. However, the two components are awkward and heavy when removed and installed as a single assembly. They’re much easier to maneuver off and on as separate units. If you decide to leave the transfer case attached, disconnect the shift rod from the transfer case shift lever, or remove the shift lever from the transfer case and tie the rod and lever to the chassis (see Chapter Transfer case ). Warning: If you decide to remove the transfer case and transmission as a single assembly, use safety chains to help stabilize them and to prevent them from falling off the jack head, which could cause serious damage to the transmission and/or transfer case and serious bodily injury to you.
20. Disconnect the transmission cooler lines from the transmission (see illustration). Plug the ends of the lines to prevent fluid from leaking out after you disconnect them. Caution: The lines on some models are equipped with quick-connect fittings. Use the proper tool to separate these fittings to avoid damage.
7.20 To prevent damage to the lines, use a back-up wrench on the stationary fittings when unscrewing the transmission cooler line fittings

21. Remove the oil filler tube bracket bolts and withdraw the tube from the transmission. Don’t lose the filler tube seal (unless it’s damaged, in which case you should replace it). On 4WD models, remove the bolt that attaches the transfer case vent tube to the converter housing (unless you already did so when removing the transfer case).
22. Support the transmission with a transmission jack (available at most equipment rental facilities) and secure the transmission to the jack with safety chains. Support the engine with a jack. Use a block of wood under the oil pan to spread the load.
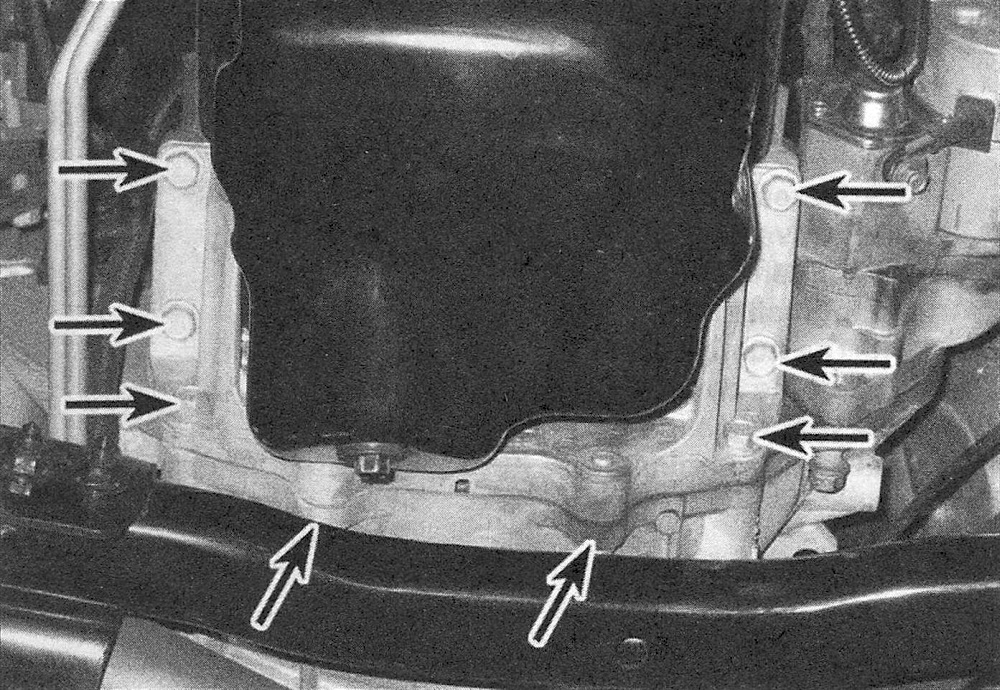
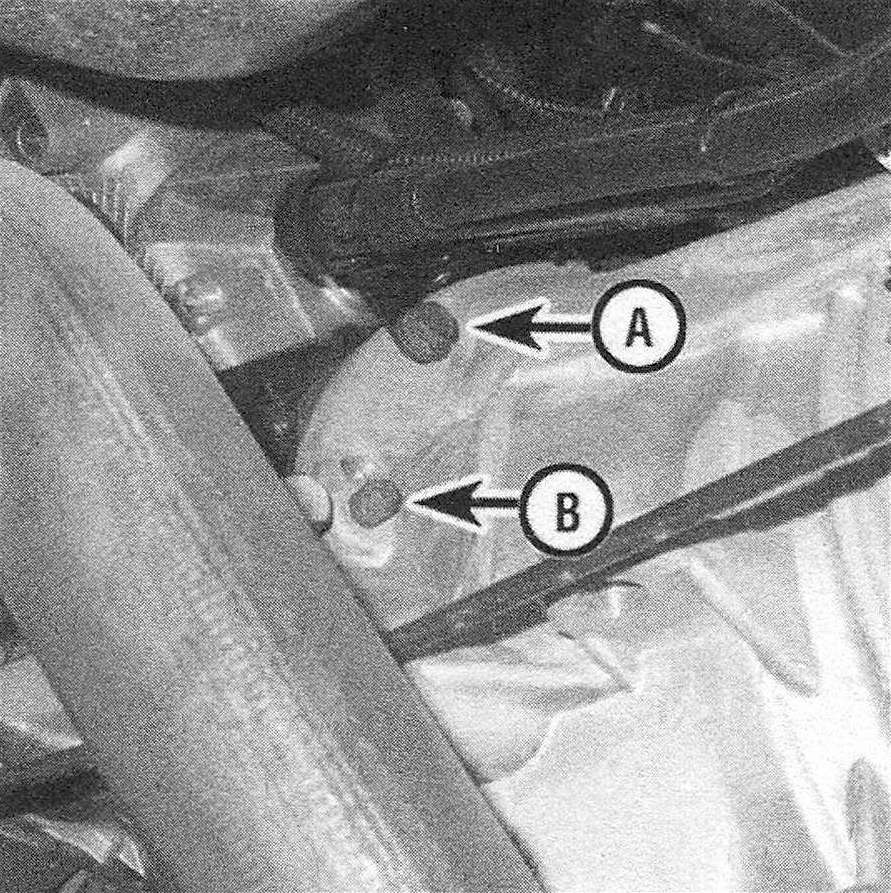
23. Remove the bolts securing the transmission to the engine (see illustration). A long extension and a U-joint socket will greatly simplify this step. Note: The upper bolts are easier to remove after the transmission has been lowered (see the next Step). Also, on some models, you might have to remove the oil filter (see Tune-up and routine maintenance) before you can remove the lower right (passenger’s side) bolt.
7.23 To detach the transmission from the engine, remove all transmission- to-engine bolts (A) and engine-to- transmission bolts (B) (left side shown, right side similar; not all bolts visible in this photo)
24. Lower the engine and transmission slightly and clamp a pair of locking pliers onto the lower portion of the transmission case, just in front of the torque converter. The pliers will prevent the torque converter from falling out while you’re removing the transmission.
25. Move the transmission to the rear to disengage it from the engine block dowel pins and make sure the torque converter is detached from the driveplate. Lower the transmission with the jack.
Installation
26. Prior to installation, make sure the torque converter is securely engaged in the pump. If you’ve removed the converter, spread transmission fluid on the torque converter rear hub, where the transmission front seal rides. With the front of the transmission facing up, rotate the converter back and forth. It should drop down into the transmission front pump in stages. To make sure the converter is fully engaged, lay a straightedge across the transmission-to-engine mating surface and make sure the converter lugs are at least 1/2-inch below the straightedge. Reinstall the locking pliers to hold the converter in this position.
27. With the transmission secured to the jack, raise it into position. Connect the transmission fluid cooler lines.
28. Turn the torque converter to line up the holes with the holes in the driveplate. The marks on the torque converter and driveplate made during removal must line up.
29. Move the transmission forward carefully until the dowel pins and the transmission are engaged. Make sure the transmission mates with the engine with no gap. If there’s a gap, make sure there are no wires or other objects pinched between the engine and transmission and also make sure the torque converter is completely engaged in the transmission front pump. Try to rotate the converter – if it doesn’t rotate easily, it’s probably not fully engaged in the pump. If necessary, lower the transmission and install the converter fully.
30. Install the transmission-to-engine bolts and tighten them to the torque listed in this Chapter’s Specifications. As you’re tightening the bolts, make sure that the engine and transmission mate completely at all points. If not, find out why. Never try to force the engine and transmission together with the transmission-to-engine bolts or you’ll break the transmission case!
31. Install the torque converter-to-driveplate bolts. Tighten them to the torque listed in this Chapter’s Specifications. Caution: Using the correct length bolts for bolting the converter to the driveplate is critical. A number of different converters are used on the vehicles covered by this manual. If the bolts are too long, they will damage the converter. If you’re planning to use new bolts, make sure you obtain original equipment replacement bolts of the same length. Note: Install all of the bolts before tightening any of them.
32. The remainder of installation is the reverse of removal.
33. Refill the transmission with the specified fluid (see Tune-up and routine maintenance), run the engine and check for fluid leaks.