Oil pan – removal and installation
Removal
1. Disconnect the cable from the negative terminal of the battery (see Engine electrical systems).
2. Apply the parking brake and block the rear wheels. Raise the front of the vehicle and place it securely on jackstands.
3. Drain the engine oil (see Tune-up and routine maintenance).
4. If equipped, remove the skidplate.
5. Remove the transmission oil cooler lines.
6. Remove the front crossmember.
7. Attach an engine hoist or an engine support fixture to the lifting eyes on the engine, raise the engine just enough to take the weight of the engine off the engine mounts, then remove the engine mount through-bolts (Engine mounts – check and replacement).
8. Raise the engine until the engine fan is almost in contact with the fan shroud. Caution: Don’t allow the fan to contact the fan shroud.
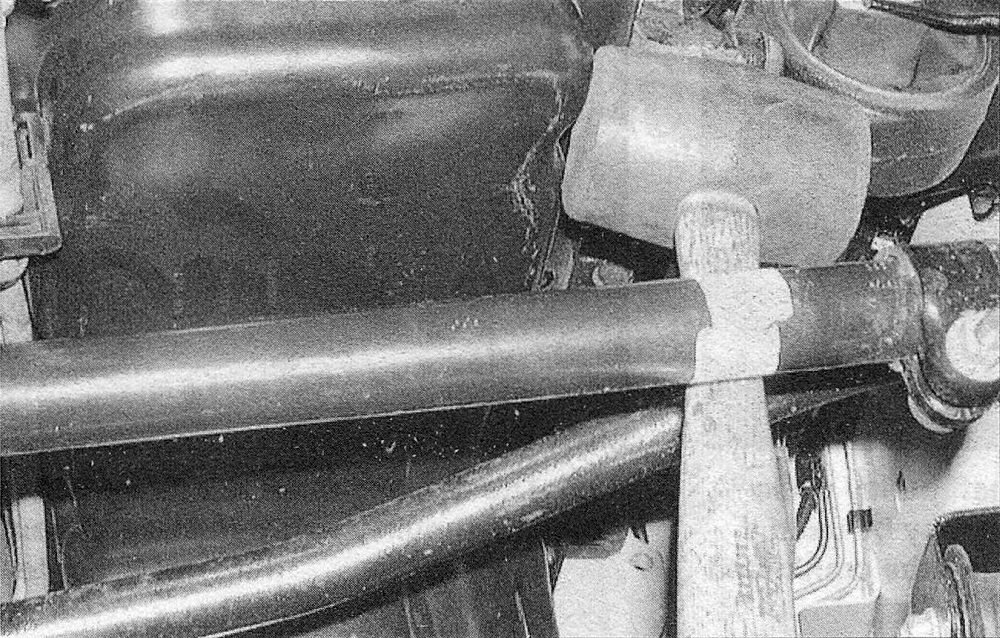
9. Remove the bolts and nuts, noting the stud locations, then carefully separate the oil pan from the block. Don’t pry between the block and the pan or damage to the sealing surfaces and gasket could occur and oil leaks may develop. Instead, tap on the side of the oil pan with a rubber mallet if necessary to break the gasket seal (see illustration).
14.9 If the oil pan is stuck to the gasket, gently tap on the side of the oil pan to break the gasket seal
10. Remove the two nuts and one bolt that secures the oil pump pick-up tube and windage tray. Drop the pick-up tube into the oil pan, then remove the pick-up tube, windage tray and oil pan as a unit.
Installation
11. Clean the oil pan with solvent and remove any gasket material from the block and the pan mating surfaces. Clean the mating surfaces with lacquer thinner or acetone and make sure the bolt holes in the block are clear. Check the oil pan flange for distortion, particularly around the bolt holes.
12. Inspect the oil pan gasket for cuts and tears, replacing it if necessary. If the gasket is in good condition, it can be reused. Note: The oil pan gasket and the windage tray are a one piece design, therefore must be replaced together.
13. Place the pick-up tube and oil pan gasket/windage tray in the oil pan and position the oil pan on the engine. Note: Always use a new 0-ring on the pick-up tube and tighten the pick-up tube-to-oil pump bolt first. Tighten the oil pump pick-up tube bolt to the torque listed in this Chapter’s Specifications.
14. After the oil pan bolts are started, them in several steps in a criss-cross pattern starting from the center and working out to the ends. Tighten them to the torque listed in this Chapter’s Specifications.
15. The remainder of installation is the reverse of removal.
16. Refill the engine with oil (see Tune-up and routine maintenance) and replace the oil filter. Run the engine until normal operating temperature is reached and check for leaks.
