Engine mounts – check and replacement
1. There are three powertrain mounts on the vehicles covered by this manual; left and right engine mounts attached to the engine block and to the frame and a rear mount attached to the transmission and the frame. The rear transmission mount is covered in Chapters Manual transmission ; Automatic transmission ; Transfer case . Engine mounts seldom require attention, but broken or deteriorated mounts should be replaced immediately or the added strain placed on the driveline components may cause damage or wear.
Check
2. During the check, the engine must be raised slightly to remove the weight from the mounts.
3. Raise the vehicle and support it securely on jackstands, then position a jack under the engine oil pan. Place a large wood block between the jack head and the oil pan, then carefully raise the engine just enough to take the weight off the mounts. Warning: DO NOT place any part of your body under the engine when it’s supported only by a jack!
4. Check for relative movement between the inner and outer portions of the mount (use a large screwdriver or prybar to attempt to move the mounts). If movement is noted, lower the engine and tighten the mount fasteners.
5. Check the mounts to see if the rubber is cracked, hardened or separated from the metal casing which would indicate a need for replacement.
Replacement
6. Disconnect the cable from the negative terminal of the battery (see Engine electrical systems).
7. Remove the engine cooling fan and shroud (see Cooling, heating and air conditioning systems). Caution: Raising the engine with the cooling fan in place may damage the viscous clutch.
8. Raise the front of the vehicle and support it securely on jackstands.
9. Support the engine with a lifting device from above. Caution: Do not connect the lifting device to the intake manifold. Raise the engine just enough to take the weight off the engine mounts. If you’re removing the driver’s side engine mount, removal of the oil filter will be necessary.
2WD models
10. Remove the engine mount-to-frame support bracket through-bolt.
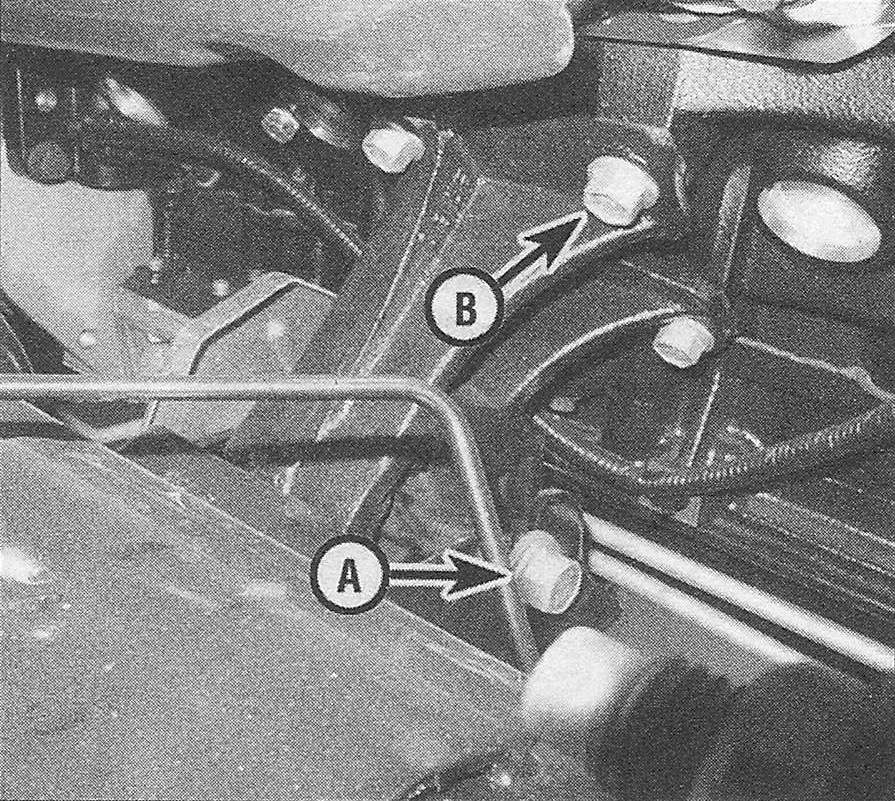
11. Remove the mount-to-engine block bolts, then remove the mount and the heat shield, if equipped (see illustration).
18.11 Each engine mount is secured by the through-bolt (A) and the mount-to-engine block bolts (B)
12. Place the heat shield and the new mount in position, install the mount-to-engine block bolts and tighten all the bolts securely.
4WD models
13. Use a floor jack and jackstands to support the front axle. The front axle will be partially lowered to make additional clearance for the engine mount removal.
14. Remove the engine skidplate.
15. Remove the front crossmember (see Suspension and steering systems).
16. Remove the bolts that support the engine mount to the front axle.
17. Remove the bolts that attach the front axle to the engine.
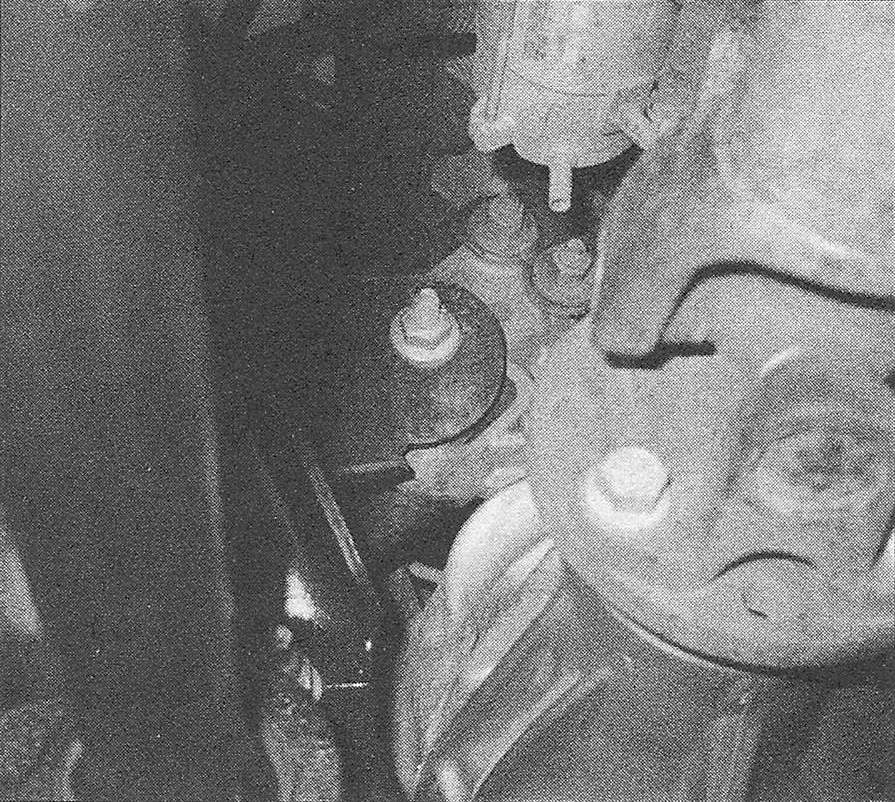
18. Remove the engine mount-to-frame support bracket through-bolt (see illustration).
18.18 Location of the engine mount through-bolt on a 4WD model
19. Remove the engine mount-to-engine support bracket bolt and nuts.
20. Install the engine mount onto the engine support bracket and tighten the bolts securely.
All models
21. After the engine mounts have been installed onto the engine, lower the engine while guiding the engine mount and through-bolt into the frame support bracket. Install the through-bolt nut and tighten it securely.
22. The remainder of installation is the reverse of removal. Remove the engine hoist and the jackstands and lower the vehicle.